Enhancements:
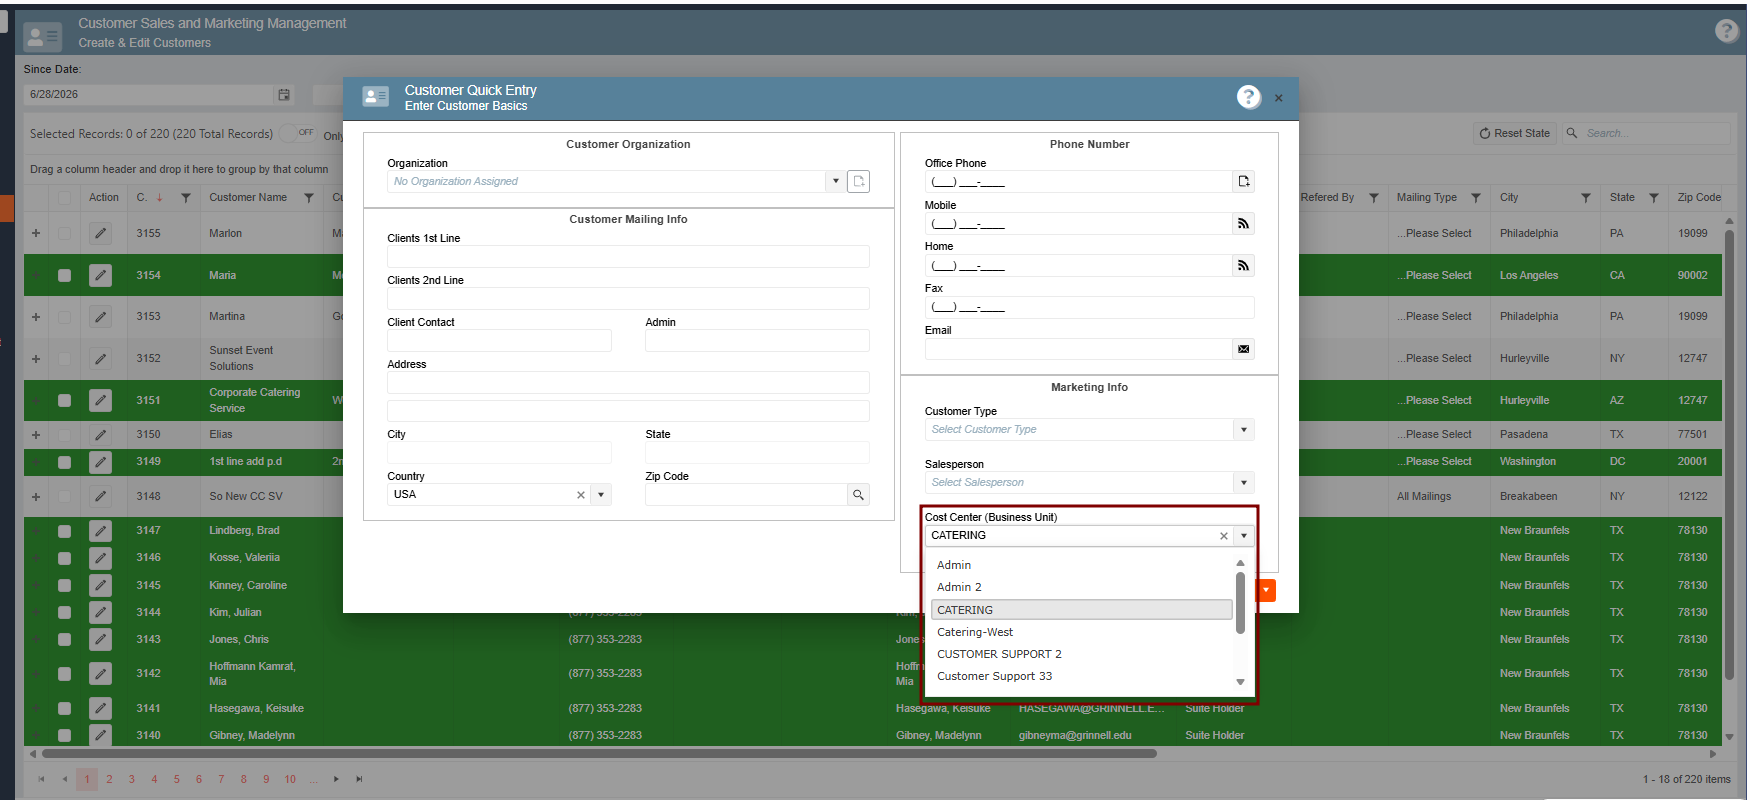
1. Wanting to setup the Cost Center from Customer and Marketing window instead of Legacy Settings:
The Cost Center field can now be updated directly from Customer Sales and Marketing Management, with changes being saved successfully without requiring users to access Legacy settings.
This enhancement streamlines customer maintenance and ensures Cost Center updates are managed consistently within the current application. Special attention has been given to customers created through the Quick Entry process to ensure Cost Center information is saved and maintained correctly.
1. On the left side panel, go to Sales & Marketing
2. Click on Customer (CRM)
3. Select Customer Marketing
4. Choose Customer Sales and Marketing Management
5. From the New Entry bottom, click on Quick Add
2. Deciding whether Recipe Prep Units of Measure should be converted, so that I can keep item units according to my preference:
A new ConvertMeasunitPrepItems setting has been added to give organizations control over how Recipe Prep Item quantities are scaled. When automatic conversion is disabled, the system preserves the original unit of measure and updates only the quantity, even when predefined conversion thresholds are exceeded.
This behavior is applied consistently across Guest Count Scaling, Event Scaling, Master Data Scaling, and manual quantity adjustments, ensuring data integrity, operational consistency, and preventing unexpected unit conversions.
How to check the Appsetting:
1. At the top of the screen, on the right side click on the Gear Icon
2. Select Appsettings
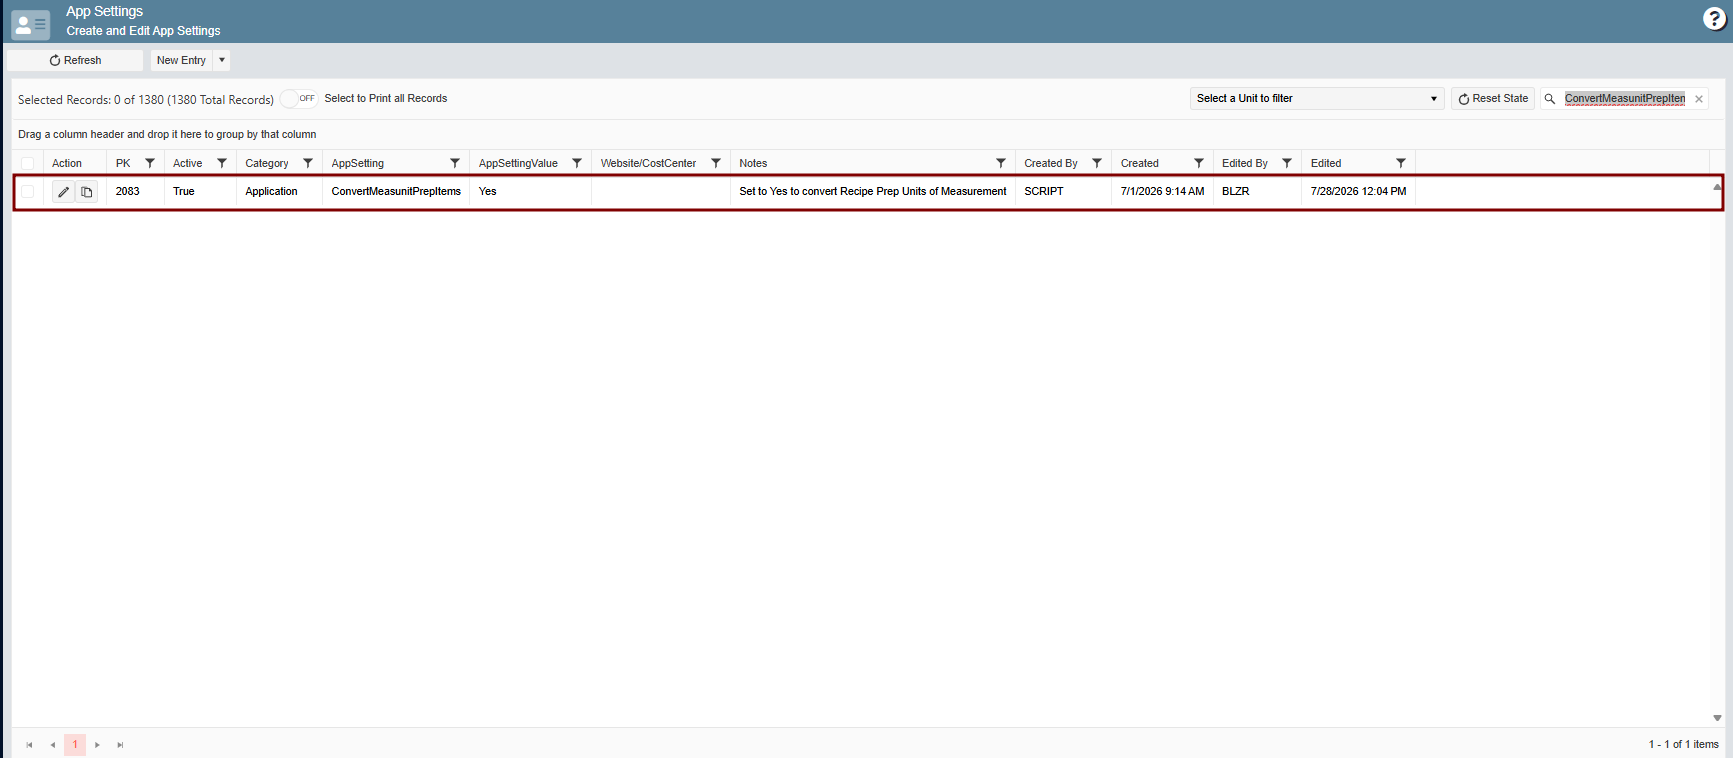
3. Search for ConvertMeasunitPrepItems, confirm the value is Yes:
Next
4. On the left side panel, go to Production
5. Click on Kitchen Management
6. Select Main Kitchen View
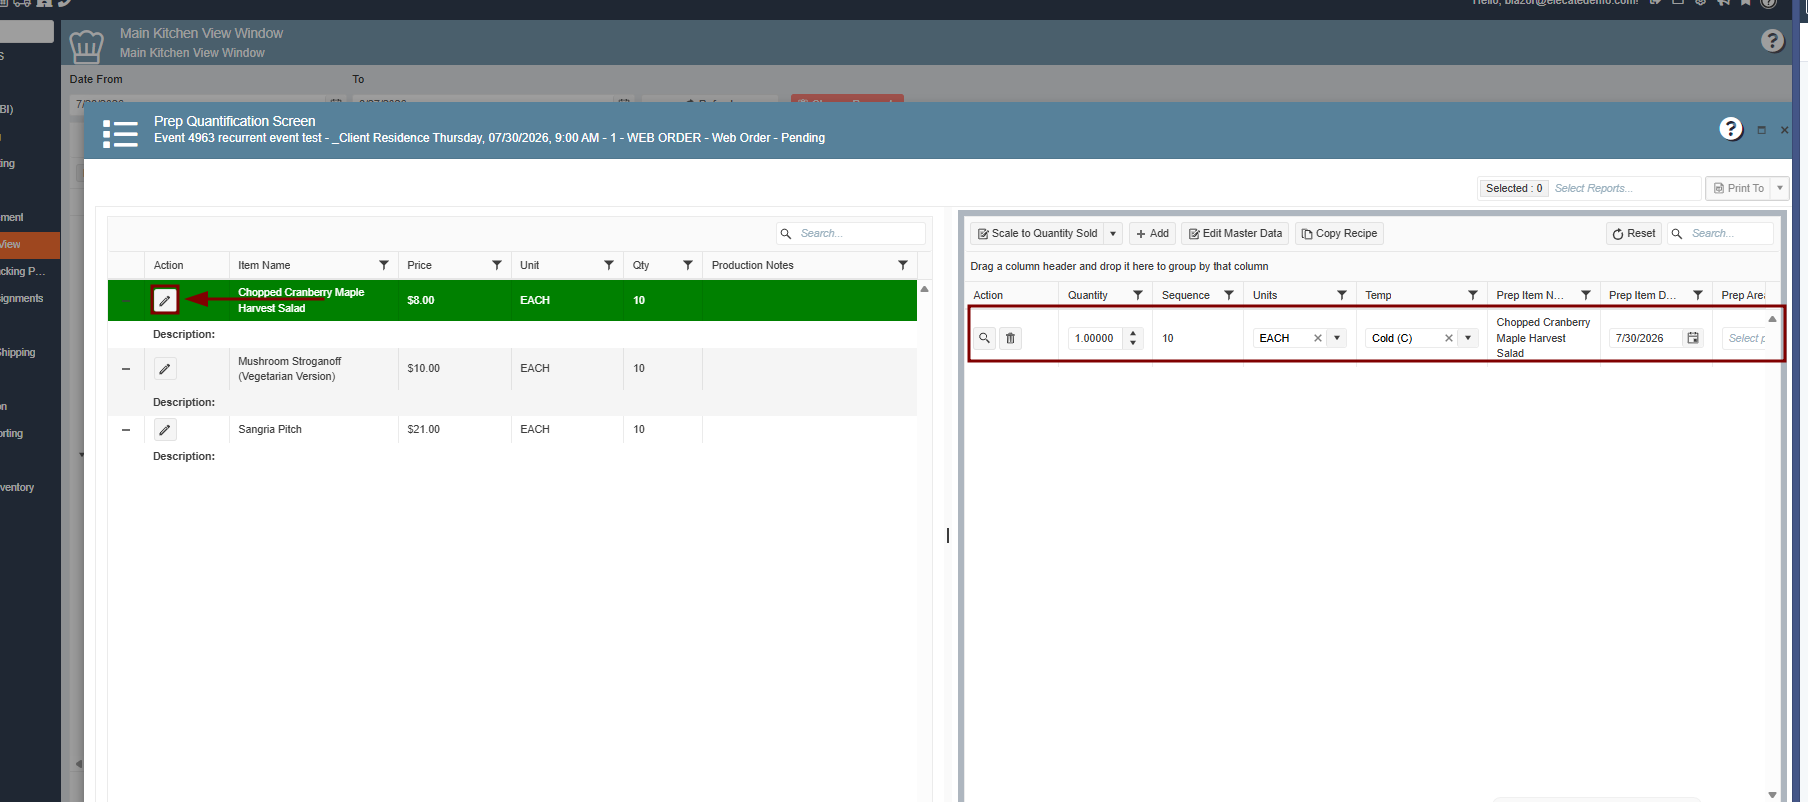
7. Search for your event, open it by clicking on the pen icon
6. Open a recipe by clicking on the Pen Icon, on the right box you´ll see the Prep Quantification information
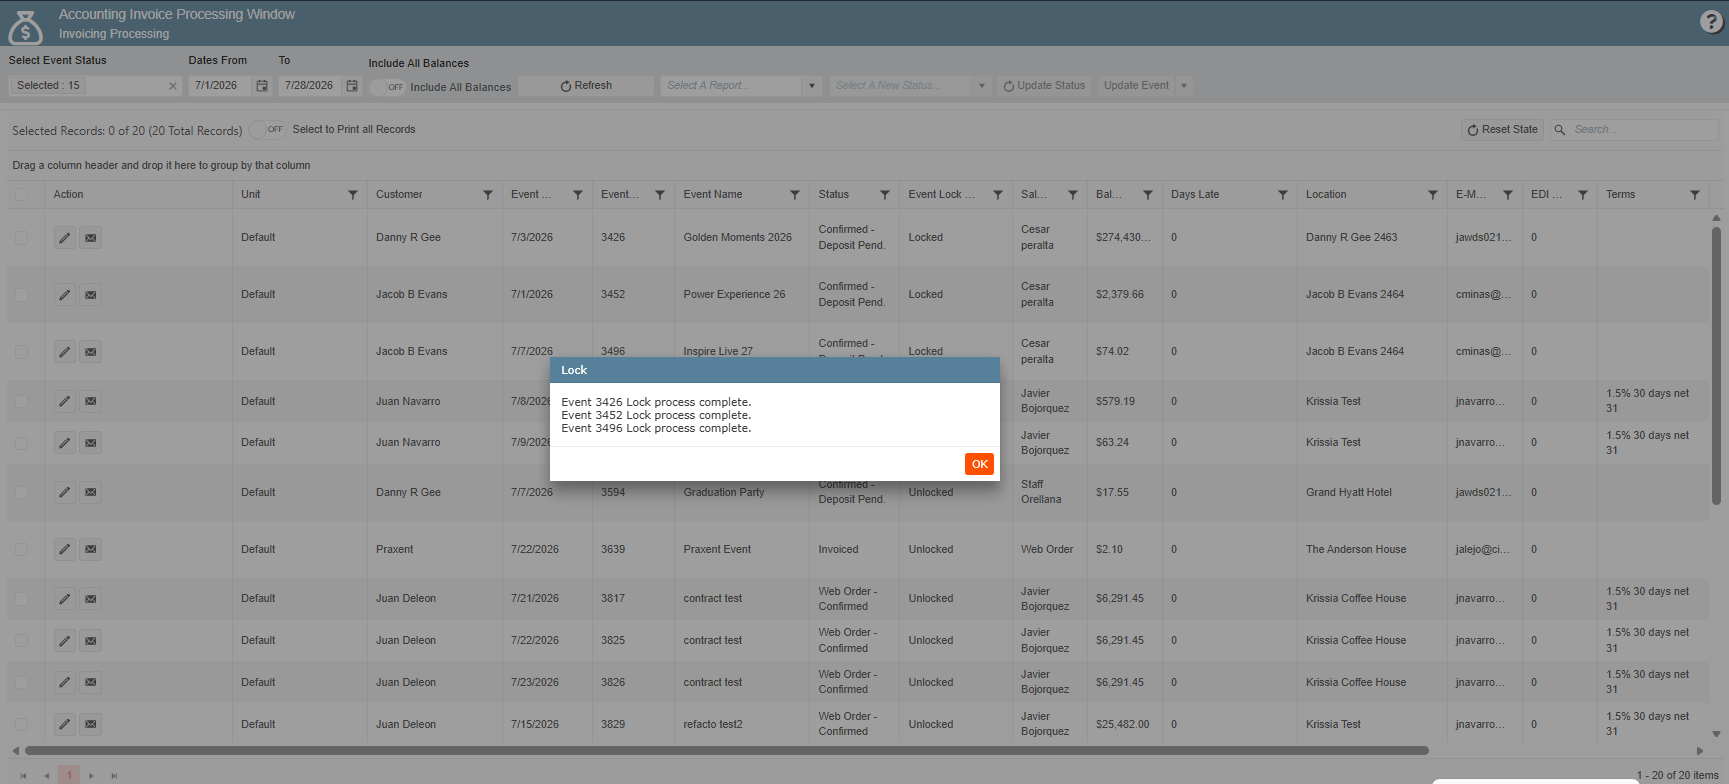
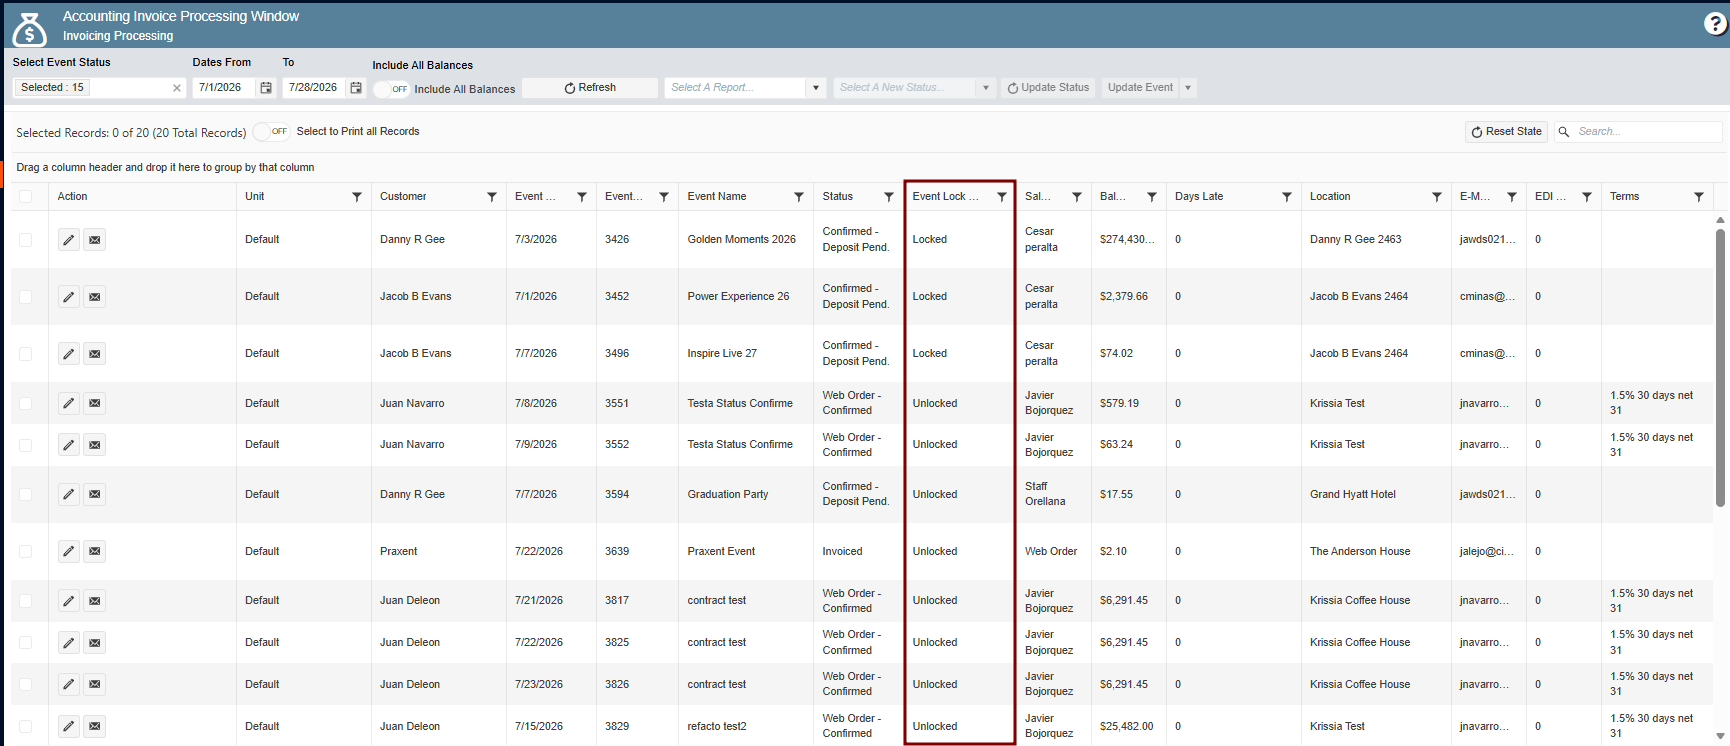
3. Wanting the "Accounting Lock" to be applied only to confirmed events and be able to Lock/Unlock events in batch:
The Accounting Invoice Processing window has been enhanced to improve control and efficiency when managing event locks.
- Event locking is now restricted to Confirmed events only, preventing Pending events from being locked and ensuring alignment with the intended accounting workflow.
- A new Lock Status column has been added to the grid, allowing users to easily identify whether an event is currently locked or unlocked.
- New Lock Event Files and Unlock Event Files actions support batch processing, enabling users to lock or unlock multiple selected events at once.
These improvements strengthen process controls, improve visibility, and streamline the management of event file locks.
1. On the left side panel, go to Finance & Accounting
2. Click on Accounting Tools
3. Select Accounting Invoice Processing Window
4. Adding the Web Column in the Data Items Groups Grids:
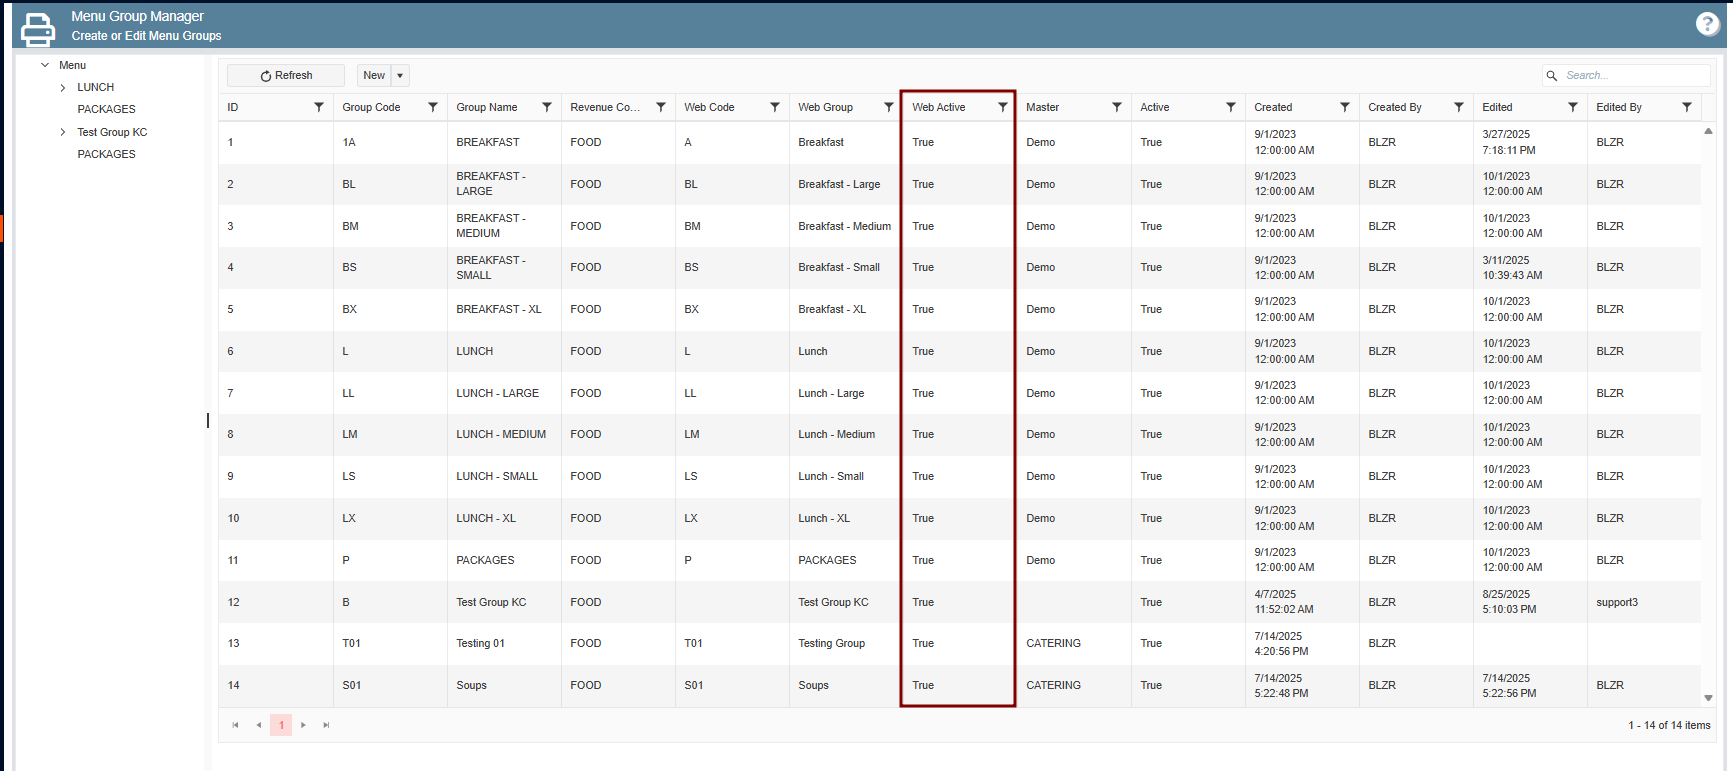
A new Web column has been added to the grids within Recipe Groups, Beverage Groups, Menu Groups, and Equipment Groups.
This enhancement improves visibility by allowing users to quickly identify and manage web-related settings directly from the grid, reducing the need to open individual records for review.
1. On the left side panel, Data Items
2. Click on Food Management
3. Select Menu Group Management
Bugs:
1. Credit Card Charge fails with "amount must be greater than tax" error:
An issue that incorrectly prevented users from processing valid credit card payments has been resolved. The payment validation logic has been corrected, eliminating the "Amount must be greater than tax" error and ensuring eligible credit card transactions can be processed successfully.
1. On the left side panel, click on Sales & Marketing
2. Select Event & Order Management
3. Choose Event Management - All Status Included
4. Open an existing event, go to Financial, under the Payment Schedule section try to process a payment by clicking on Process Credit Card, add the card details and process a payment:

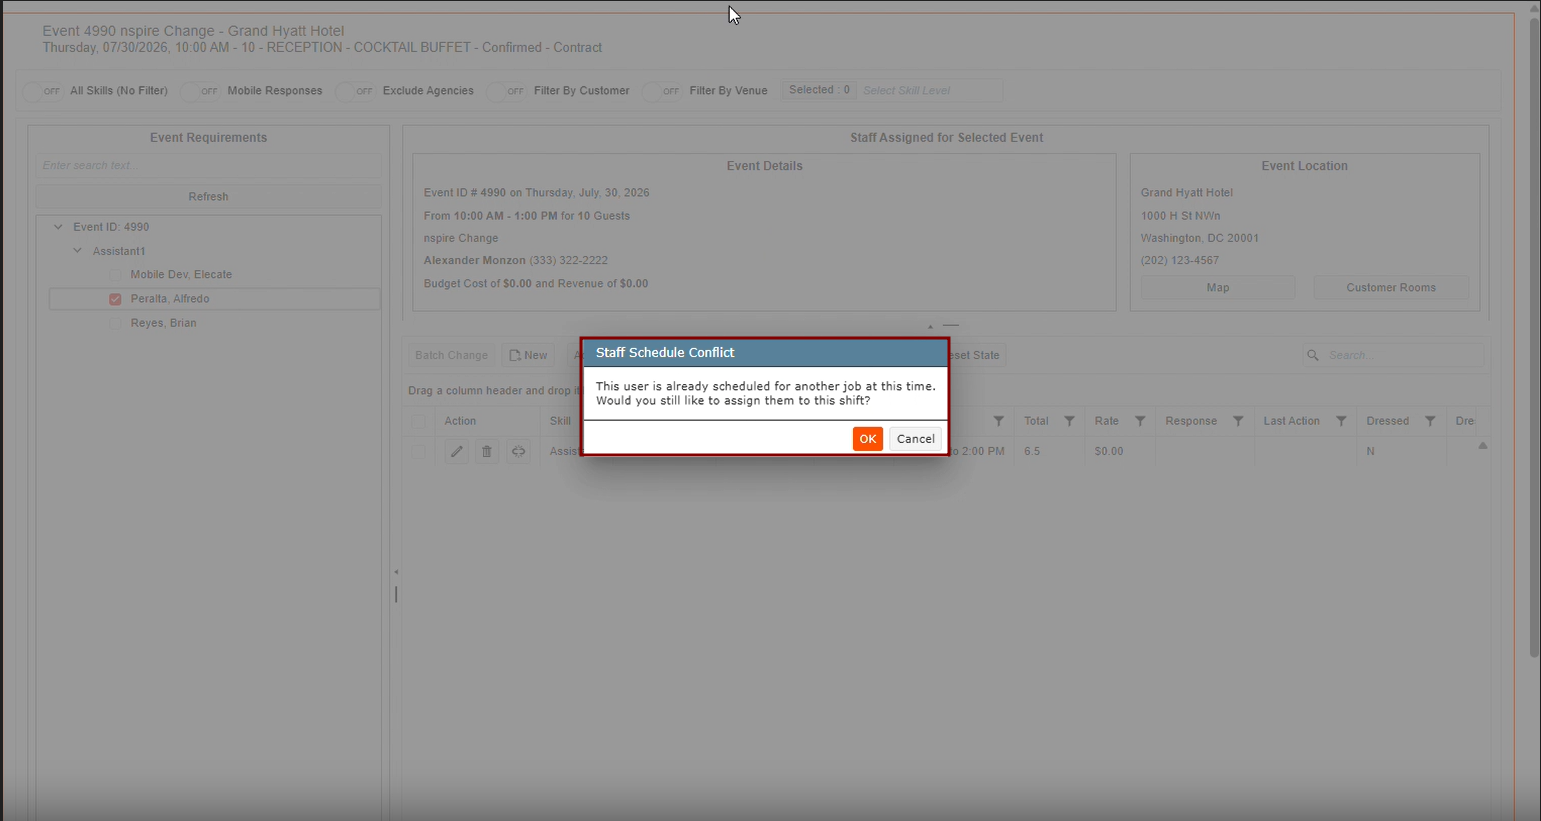
2. There's a typo on the Staff Schedule Overlap prompt:
A typographical error identified in the application has been corrected. This update ensures the affected text now displays the correct wording, improving accuracy and providing a more polished user experience.
1- Set up an event and a skill type for a specific time frame
2- Add a staff member on that event and shift
3- Save & close
4- Then go back to the Staff Scheduling window
5- Select a new event that will overlap the scheduling with the previous event
6- Try to add the same staff member to that shift
7- Check the grammar on the message