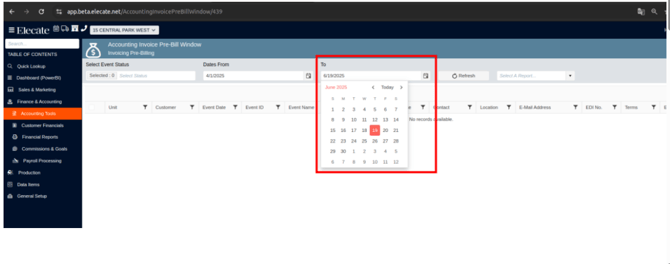
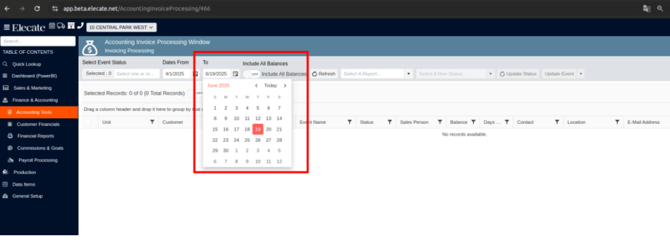
Release Notes 26.1.0: Minor Updates

1. Adding timeout limits to regular expressions to prevent potential DoS attacks:

  • Add appropriate timeout limits to the Regex in Utils.cs:
  1. Implement RegexOptions.None with explicit timeout 
  2. Maintain existing functionality for ClearEmailSubject. 
  • Add appropriate timeout limits to the Regex in KeycloakPasswordPolicies.cs, line 85,107,129,150:
  1. Implement RegexOptions.None with explicit timeout 
  2. Maintain existing functionality for password validation 
  • Add appropriate timeout limits to the Regex in AccountingExportsWindow.razor.cs:
  1. Implement RegexOptions.NoneBacktracking with explicit timeout 
  2. Maintain existing functionality for phone format number validation 
  • Add appropriate timeout limits to the Regex in ChangeOrdersByChangeDateTimeReportingWindow.razor.cs:
  1. Implement RegexOptions.NoneBacktracking with explicit timeout 
  2. Maintain existing functionality for phone format number validation 
  • Add appropriate timeout limits to the Regex in EventManagementComponent.razor.cs:
  1. Implement RegexOptions.NoneBacktracking with explicit timeout 
  2. Maintain existing functionality for phone format number validation 
  • Add appropriate timeout limits to the Regex in OrganizationManagementWindow.razor.cs:
  1. Implement RegexOptions.NoneBacktracking with explicit timeout 
  2. Maintain existing functionality for phone format number validation 
  • Add appropriate timeout limits to the Regex in PayrollManagementProcessedWindow.razor.cs:
  1. Implement RegexOptions.NoneBacktracking with explicit timeout 
  2. Maintain existing functionality for phone format number validation 
  • Add appropriate timeout limits to the Regex in SmsService.cs:
  1. Implement RegexOptions.NoneBacktracking with explicit timeout 
  2. Maintain existing functionality for phone format number validation 
  • Add appropriate timeout limits to the Regex in SynergyCustomValidators.cs:
  1. Implement RegexOptions.None with explicit timeout 
  2. Maintain existing functionality for phone format number validation 

2. Allowing the "To" control to extend far further than the current date:

  • The "To" date control in the "Accounting Tools" windows needs to have the same date range the "Date From" control. Not the current date. 

1. From the left side panel, go to Finance & Accounting

2. Click on Accounting Tools

3. Select Accounting Invoice Pre-Bill Window or Accounting Invoice Processing Window
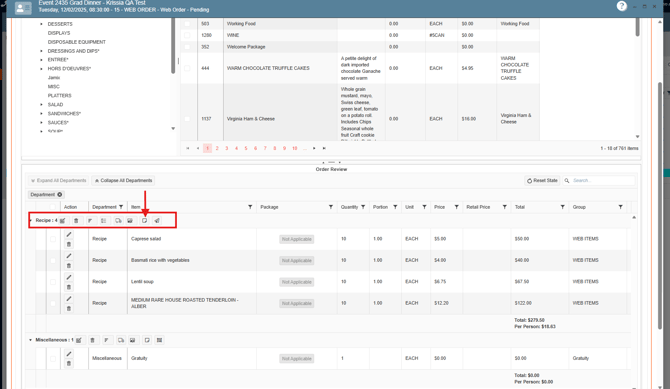
3. Applying the customer ID to NetSuite sales & cash receipt:

Customer ID appliance:
  • Apply the customer ID to the new exports. 
    • Rename those files to NetSuite export file
      • Allow testing on those files
  • Development Requirement
  • Need to modify the Accounting Export Window to work with the NetSuite Export.

4. Update Accounting Exports Window to Support NetSuite Exports:

  • New NetSuite export options appear in the Accounting Exports window (Customers, Sales, Cash Receipts).
  • Refresh and Export to CSV buttons in the Accounting Exports window work correctly for each NetSuite option.
  •  Customers and Sales exports include the cusid column.
  •  Existing QuickBooks exports are verified to work correctly (Blazor fix applied if necessary).
  •  NetSuite stored procedures listed above are used. Any missing SPs have been created in coordination with the DB team.

5. Being able to use Shift+Enter to add multiple lines on Notes fields:

  • Multiple lines pressing the Shift+Enter combination feature
    • The user can enter a new line by pressing Shift + Enter in the multiple-line text field without triggering the save functionality.
    • This feature has been applied to the following components:
    • Recipes:
      • Description
      • Alternate or Proposal Name 
      • Production Notes 
      • Contract or Proposal Notes 
    • Beverages
      • Description
      • Production Notes
      • Contract Notes
    • Equipment
      • Description
      • Production Notes
      • Contract Notes
      • Assembly
    • Staffing
      • Description
      • Production Notes
      • Contract Notes

1. On the left side panel, go to Sales & Marketing

2. Click on Event & Order Management

3. Select Event Management - All Status Types Included

4. Open an existing event or create a new

5. Go to the Order Details Tab, add items to the event

6. Click on the Options section and add notes to the item
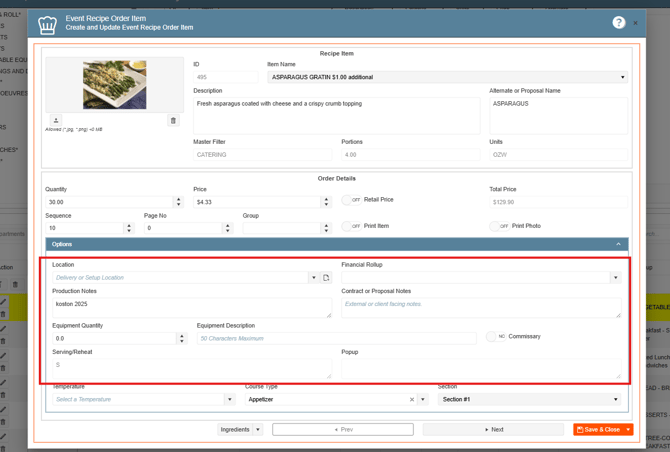
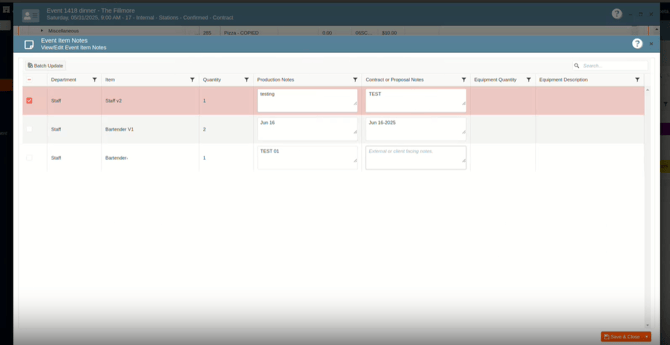
6. Having a partial save on the Event Item Notes to speed up the process:

  • Partial or QuickSave implemented
    • Users would like to have a partial or quick save on this module in order to speed up the save process
    • If a user has made a save, then we need to register those changes in the change section

1. On the left side panel, go to Sales & Marketing

2. Click on Event & Order Management

3. Select Event Management - All Status Types Included

4. Open an existing event or create a new

5. Go to the Order Details Tab, from the Grid select Event Notes