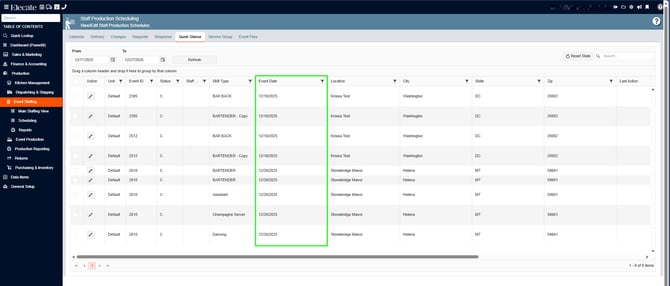
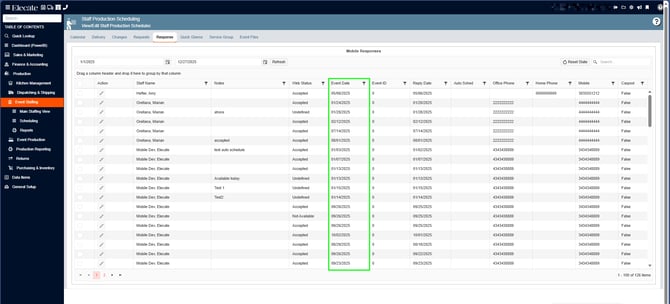
- Windows is showing consistency between them, in the event date column.
- The American format is used.
1. On the left side pane, go to Production
2. Click on Event Staffing
3. Select Staff Production Scheduling
4. Choose Response or Quick Glance
2. Wanting staff members to receive a notification after Publishing Event so that top staff are aware of incoming events (Operations Manager):
Description:
Staff Window Parity:
1. Add the Auto Scheduling Level dropdown (right now this is only the level)
2. Dropdown should have values from 0 to 9 increasing by one
3. This Value must be stored in the Auto_Sched column of the dbo.staff table record.
Publish Event at the Staff Production Scheduling Event Window parity:
1. In the Staff Production Scheduling Window, there is the Action selector button:
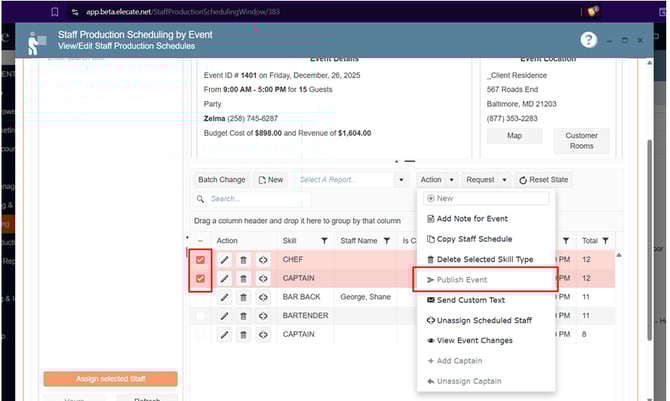
1.1. Must be enabled when no staff records are selected from the grid
1.2. Must be disabled when one or multiple records are selected
2. Open a new pop-up window:
2.1. Display a dropdown to select the Event Level (vales from 0 to 9)
2.2. If confirmed and clicked save: Store the value saved in the Auto_Sche column in the events table record
2.3. Insert a record in the EventStaffPublishSchedule table every time the Event Level is changed
3 - Mobile App Notification:
Notify through the Staffing Mobile Apps:
1. Read the content of the email template `StaffPublish`
2. When a record in the `EventStaffPublishHistory` is created, call the API endpoint to
trigger a notification for staff that matches the following criteria:
2.1. Read the Top 1 value of the `Levels` column from the `EventStaffPublishHistory` table
2.2. Match Staff's `Auto_Sched` and Event's `Auto_Sched` so they have the same value
2.3. Staff's have the same skill required for the event `evntstff`
1. StaffPublish Email: The message has been activated and set up correctly:
1. At the top of the screen, on the right side, click on the Gear Icon
2. Look for Email Management
3. In the search bar, type in StaffPublish 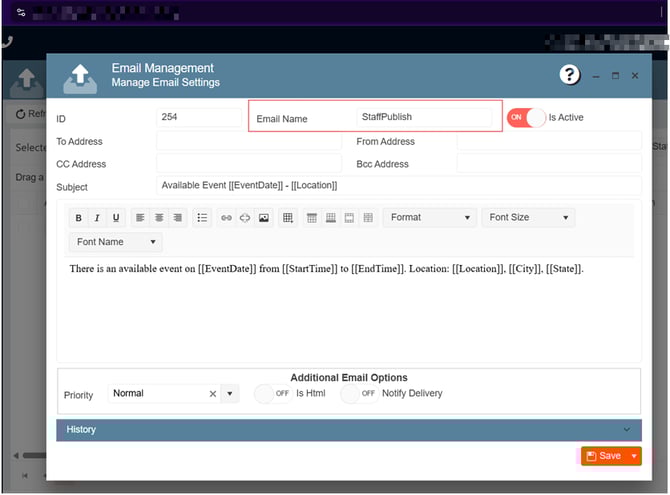
2. StaffPublishEmailPk AppSetting: Active and properly configured:
1. At the top of the screen, on the right side, click on the Gear Icon
2. Look for Appsettings
3. In the search bar, type in StaffPublishEmailPk, make sure to enter the value 254 and the Is Active toggle ON:

3. Staff Person Management: The Auto Scheduling Level field has been added:
1. On the left side panel, go to Data Items
2. Click on HR Management
3. Select HR Management (Active Only)
4.Open an existing record and go to the Mobile/Web Tab 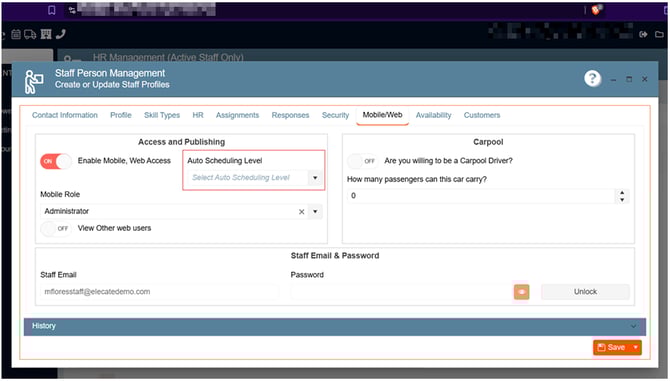
In order to validate the US, a value of 4 was set: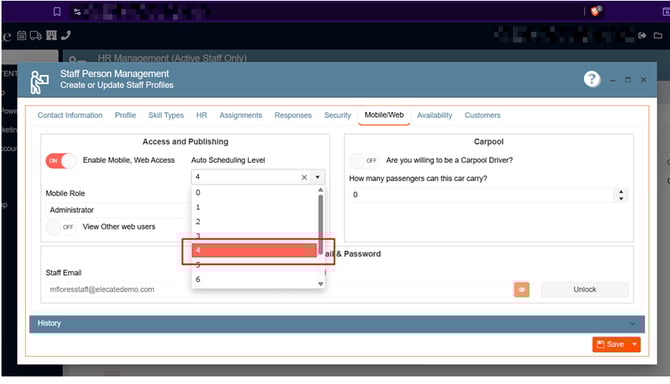
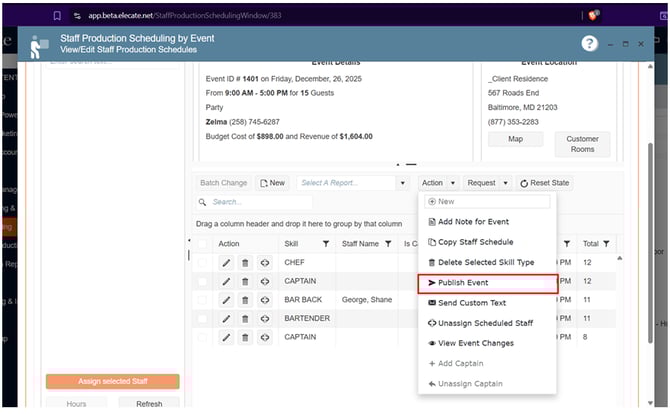
4. Staff Production Scheduling: The Publish Event action is working properly:
1. Go to Production
2. Click on Event Staffing
3. Select Staff Production Scheduling
4. Pick an event from the Calendar and open it
5. From the Action drop-donw menu, select Publish Event
In order to validate the US, when publishing an Event, a value of 4 was set in the Select
Desired Event Level field: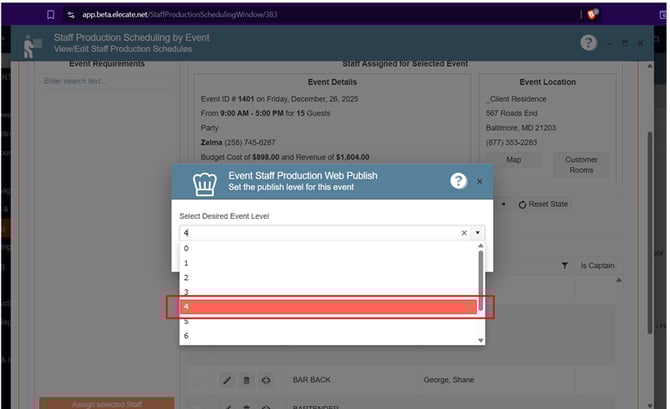

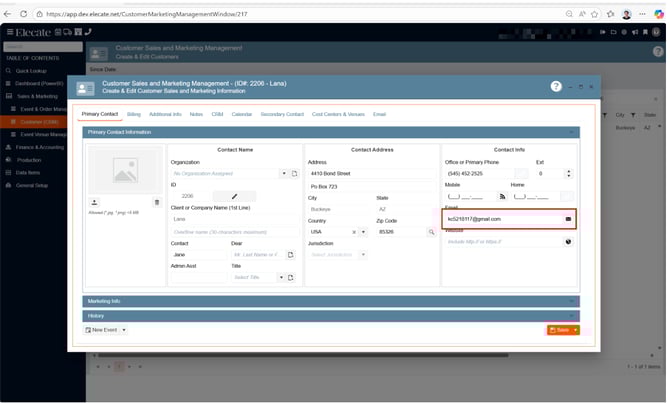
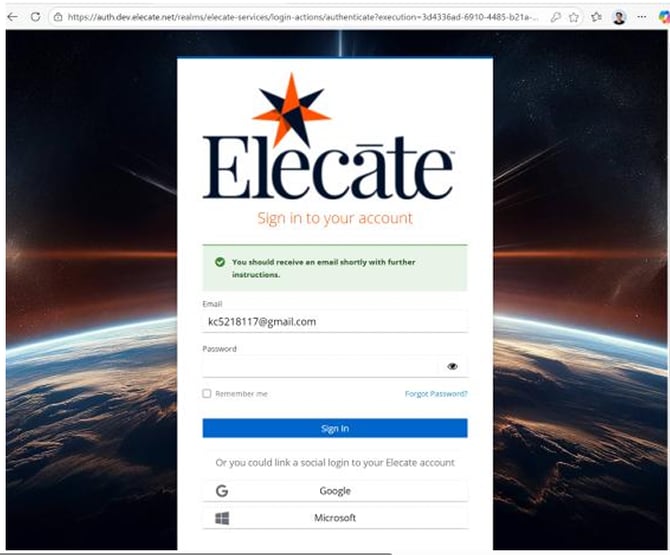
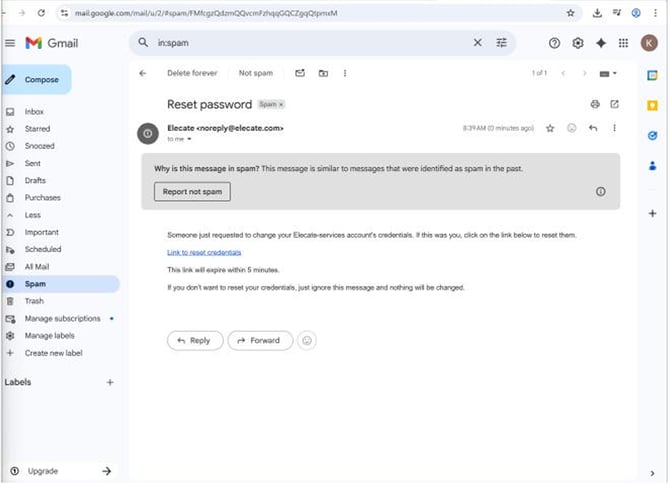
3. Being able to update a customer email without losing access to the shopping cart or the ability to process payments:
As a Salesperson, I want to be able to update a customer email without losing access to the shopping cart or the ability to process payments.
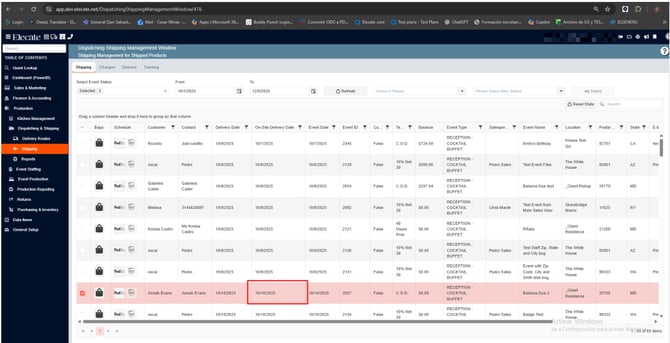
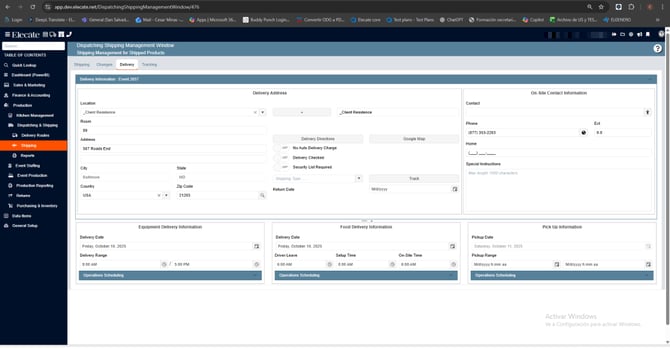
4. Wanting the On-Site Delivery Date Column in the Shipping and Pickup grids:
When they want to consult the Shipping or Pickup grids then they will find the On-Site Delivery Date column that can be updated from the Event card's Delivery section, on the On-Site Delivery info, following a format `MM/DD/YYYY.
1. On the left side panel, go to Production
2. Click on Dispatching & Shipping
3. Select Dispatching Shipping Management Window
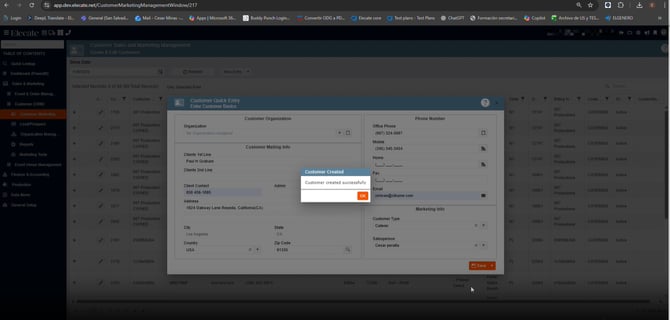
5. Needing the Addition of a Confirmation message for the Creation of customers with the Quick Add function:
-
After clicking Save in the Quick Add modal:
- Display a clear success message (e.g., “Customer created successfully”) or an error message if the creation fails.
1. On the left side panel, go to Sales & Marketing
2. Click on Customer Sales & Marketing Management
3. Select Customer Sales and Marketing Management
4. From the New Entry drop-down click on Quick Add
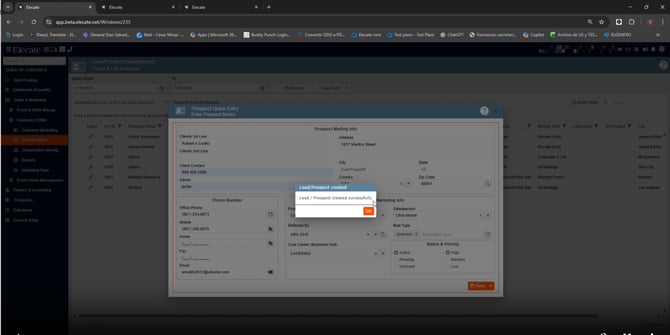
6. Needing the Addition of a Confirmation to Prevent Duplicate Creation of Lead/Prospect with the Quick Add Modal:
After clicking Save in the Lead/Prospect Quick Add modal:- Display a success message (e.g., “Lead/Prospect created successfully”) or an error message if the creation fails.
- Need to prevent the Lead records from being duplicated.
1. On the left side panel, go to Sales & Marketing
2. Click on Customer Lead/Prospect
3.Choose Lead/Prospect Management
3. From the New Entry drop-down click on Quick Add
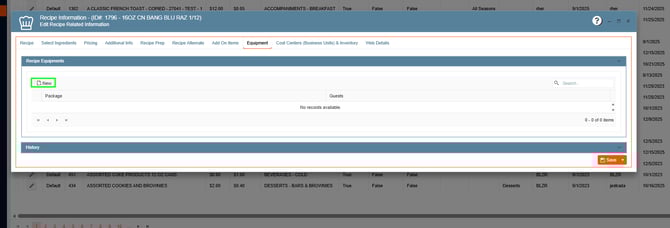
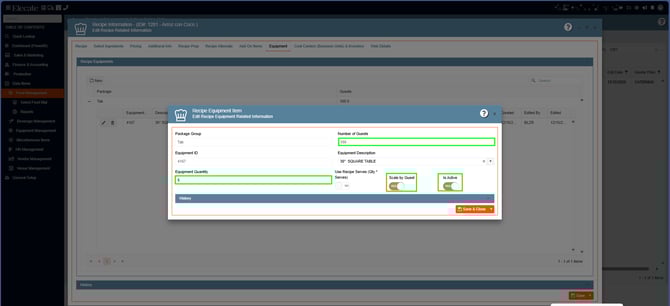
7. Having a scaling flag for recipe equipment that works with the package guest count:
- The scaling will be activated if the "Scaling" flag is on, on the recipe.
- The scaling will only work based on the package guest count determine when adding the equipment item.
- Meaning that if you set a package guest count for 100 guest and then you added a quantity of 5 for a given item, then the item won't surpass the quantity of 5 unless you enter the next threshold (101-200 so on and so forth)
- Add a pencil icon to the left of the trash icon that will open the prompt to edit the recipe equipment.
1. On the left side panel, go to Data Items
2. Click on Food Management
3. Select Recipe Management (Active Items Only)
4. You can either select an existing item or create a new record by selecting New Entry
5. If you selected an existing item, go to the Equipment Tab
6. Select the New add bottom
1. Go to Sales & Marketing
2. Click on Event & Order Management
3. Select on Event Management - All Status Types Included
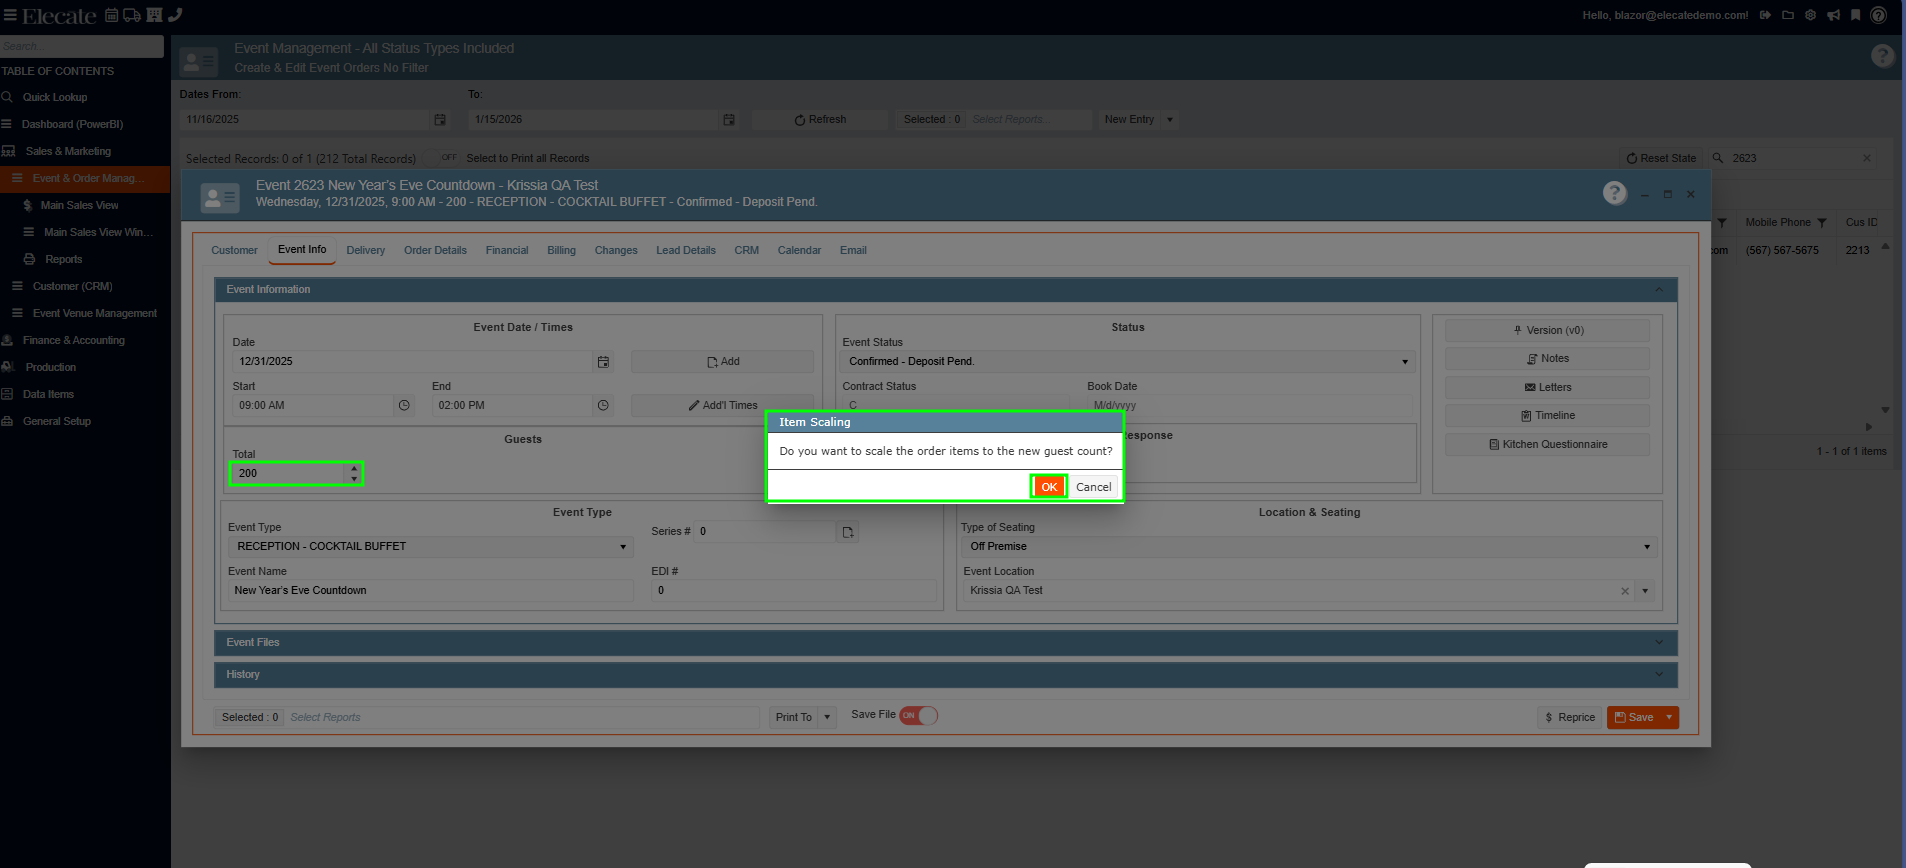
4. Open an existing event or create a new one by clicking on New Entry
5. Go to the Event Info Tab, enter the number of guests, click on OK in the pop-up: Do you want to scale the order items to the new guest count?
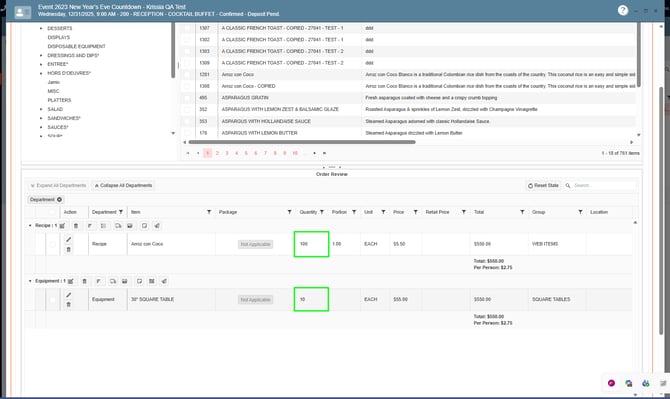
6. Go to the Order Details, look for the Recipe item that you previously modified with the Equipment and add the item to the event, under Order Review you will be able to check, if the recipe and the equipment item were added to the event and the quantity for each item:
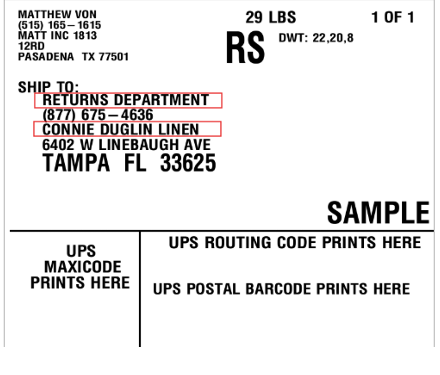
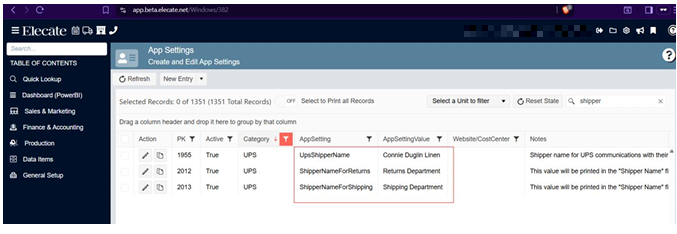
8. Setting up the Company Name and Department using an AppSetting, so that they can be printed in the package labels:
When they process packages to send through UPS then the shipping or the pickup label will include the content of the `UpsShipperName.
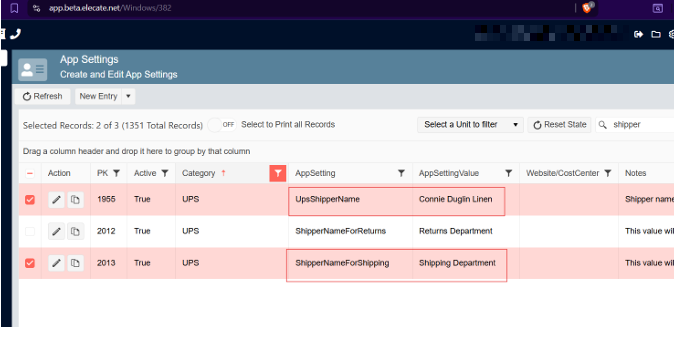
1. At the top of the screen, on the right side click on the Gear Icon
2. Select App Settings
3. Make sure the following apps have the correct values: Connie Duglin Linen, Returns Department and Shipping Department
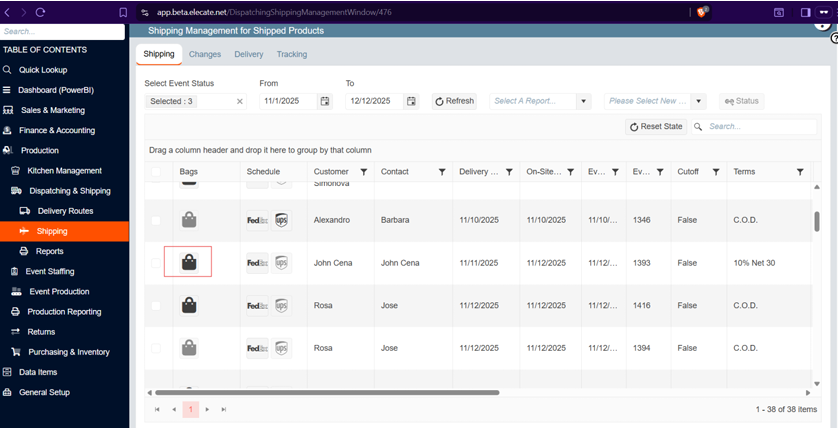
1. On the left side panel, go to Production
2. Click on Shipping
3. Choose Dispatching Shipping Management Window
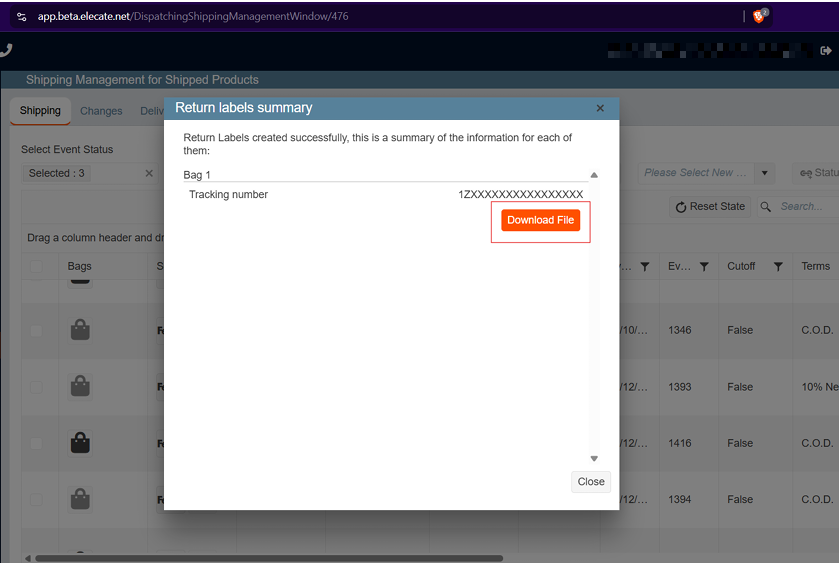
4. Pick an event, click on the bag icon, enter the bag´s number, choose Save and Continue, click on Next and Confirm, the Return Label Summary window will appear with the information related to the bags, finally select Continue