Release Notes 12
Release date: 4/12/2024
1. New Functionality for Menu Packages.
The Equipment and Beverage Package CRUD Editor now includes a multi-select substitution dropdown, allowing users to replace multiple items simultaneously. Additionally, the Equipment and Beverage CRUD Editor allows substituting items in existing orders.
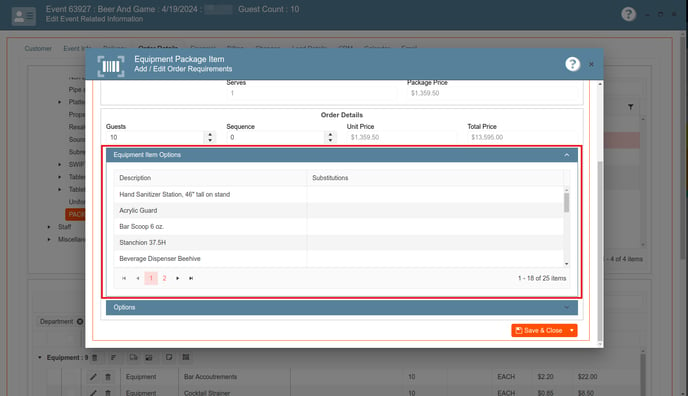
2. Connect Hubspot to Elecate.com
We have developed a landing page integrated with the Elecate.com domain, hosted on HubSpot. This landing page will capture prospect information through an attached form, efficiently collecting and storing data for future use.
1. Access to Sales and Marketing on the side panel
2. Click on Customer (CRM)
3. Select Lead/Prospect Management
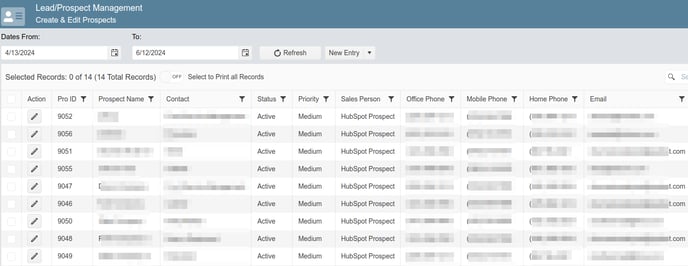
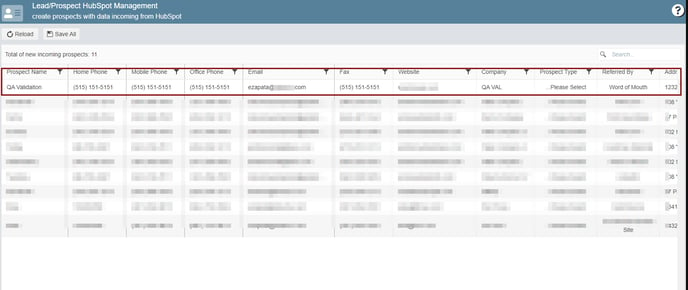
4. To create prospects with data incoming from Hubspot
Access to Lead/Prospect Hubspot Management

Click on the reload button

The data should look like below
3. Admins approval for price adjustment.
In the future, any changes to prices for an event will need to be approved by an administrator.
1. Select the event you would like to apply the discount to.
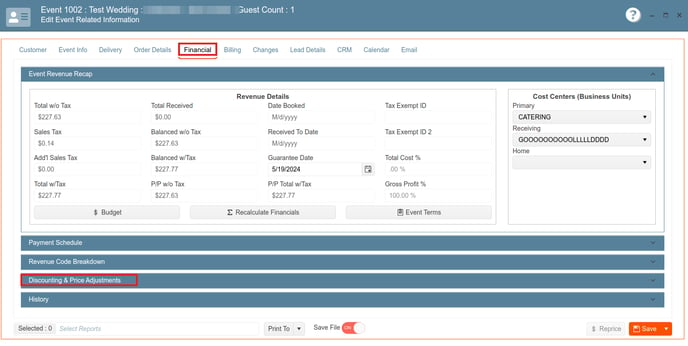
2. Click on Discount & Price Adjustments then click on "Save Price Adjustments"

3. The following pop-up will appear
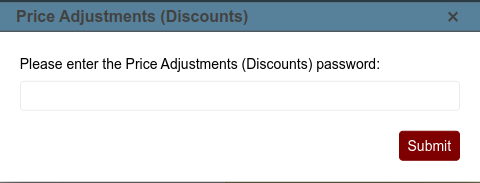
4. Enter the password and click on Submit
5. The discount will be successfully applied.

4. Introducing Tasting Events.
Users can now create Tasting Events from an existing "Parent" Event record. This selection will be based on the proposal and linked to the Parent event, streamlining event management processes.
1. On the side panel click on Sales and Marketing
2. Access to Event and Order Management
3. Click on Event Management -All Status Included
4. Select an event
5. Click on the arrow next to the New Entry button
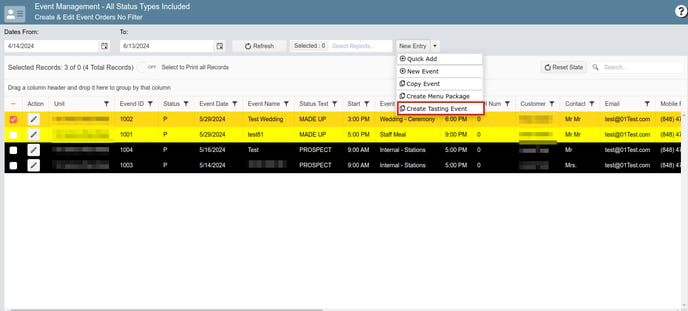
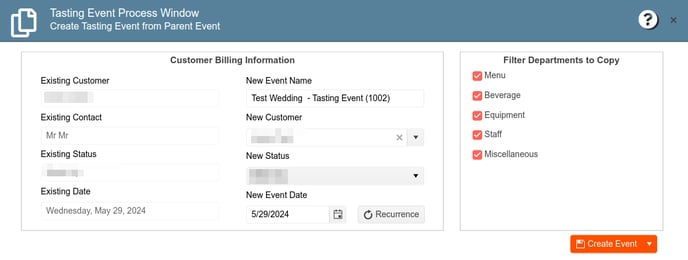
6. A Pop-Up will appear
Important: Adjust the event's date and time, and make sure to deselect any departments that will not be utilized before clicking on the "Create Event" button.
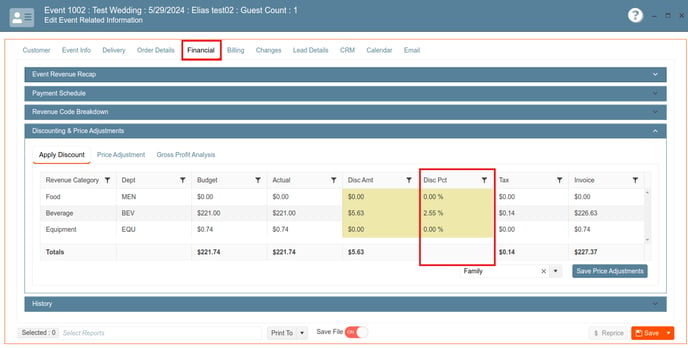
5. Display commission amounts using a percentage sign instead of a dollar sign for easier understanding and clarity.
6. New Cancellation Pop-Up
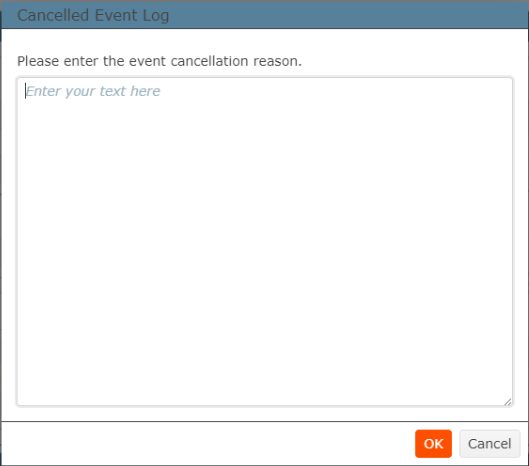
A new cancellation pop-up has been implemented to prompt users to provide a detailed reason for canceling an event, ensuring clear communication and record-keeping.
How to cancel an event:
1. Click on Sales and Marketing
2. Access to Event and Order Management
3. Click on Event Management -All Status Types Included
4. Select the event you need to cancel
5. Within the Event Info Tab, you will find the Event Status dropdown where you can select the reason for cancellation, such as high cost, competition, or weather-related issues.
The following Pop-Up will appear.
6. Click on OK
7. New Legacy Settings
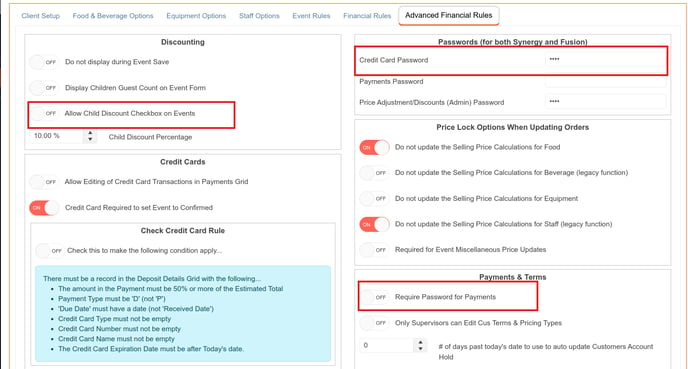
In the legacy settings or setup client, within the financial section of each component, you will come across a section that requires you to set a password for:
- Credit Card Password
- Payment Password
- Price Adjustments
1. Navigate to the gear icon located at the top corner of the page.

2. Click on Legacy Settings
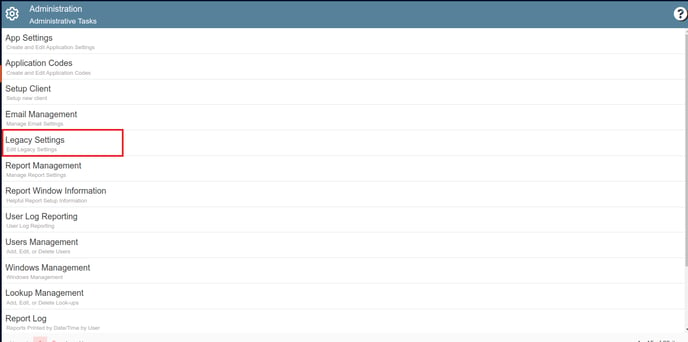
3. Turn on the switches you need and click on Save
8. New "Group By" for Events.
This new function allows you to group two or more events according to the date, location, salesperson, etc. Improving visibility and coordination for event management.
- Access to Sales & Marketing
- Click on Event & Order Management
- Access to Event Management - All Status Types Included
- Drag a column header and drop in the bar (e.g. Event Date)

- The group should look like the following picture.

9. Password Admin Approval Changes.
If the "Price Adjustments (Discounts) Password" field is empty, the system should not prompt for a password.

10. New Retry and Cancel.
In case of any errors, you will have the option to Retry or Cancel. Choosing Retry will refresh the page, while selecting Cancel will redirect you to the main home page.

