1. Missing feature from WPF on the Event Managment Grids via + sign to open OrderDetails for quick viewing:
- Add a non-movable plus icon as the first cell in each event row across:
- Event Management (for any event status that is visible)
- Event Calendar grid
- Event Delivery Calendar grid
- Clicking the plus icon opens an inline preview panel (row detail) showing event items grouped by department: Recipe, Bev, Equipment, Misc, Staffing.
- Each department is collapsible (accordion-style).
- Columns shown per department:
- A. Department
- B. Item
- C. Package (if belongs to a package)
- D. Quantity
- E. Portion
- F. Unit
- G. Price
- H. Total
- I. Group
- Grid persistence enabled for Event Calendar and Event Delivery grids (column order, visibility, widths, sorts, filters), but the plus icon column must never move/hide/resize.
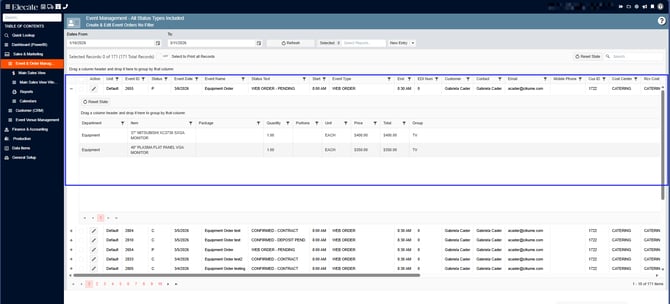
1. On the left side panel, go to Sales & Marketing
2. Click on Event & Order Management
3. Select Event Management - All Status Types Include, select an event and click on the + icon the expand the information related to the event:
Or
4. At the top of the screen, on the left side click on the Event Calendar Icon
5. Select an event from the calendar and click on + icon to expand the information related to the items added in the event:

Then
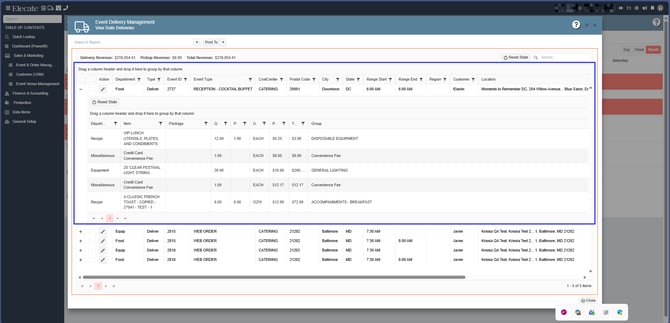
6. At the top of the screen, on the left side click on the Delivery Calendar Icon
7. Select an event from the calendar and click on + icon to expand the information related to the items added in the event:
2. Assigning Drivers from the Delivery Routes windows so that Drivers can see their schedule Deliveries from the mobile App (Mobile Apps | Sync | As an Admin):
Once the schedule is set, the Drivers will be able to view these assigned deliveries directly from the Delivery Driver App.
1 - Route Assignment/Delivery Info
- Select a date
- Click on the refresh button
- Select an Event
- Click on the Delivery Info button

2 - Route Assignment Scheduling Driver & Truck
- Select a Date
- Select a Route (can be assigned in the Event Card or the Route Assignment window)
- Click on Refresh
- Users can update the Truck, Driver and On-Site hour, after clicking on the Save button

3 - Dispatching Status Update - Get by Event
- Select a date where there are a Driver and Route assigned (to confirm)
- Click on Refresh
- You can either select one or multiple records and update individually or batch

4 - Dispatching Status Update - Get by Location
- Select a date where there are a Driver and Route assigned (to confirm)
- Click on Refresh
- You can either select one or multiple records and update individually or batch

5 - Update Dispatching Date/Times
- Select a Date
- Click on the Refresh button
- You can individually edit dispatch dates

Users can technically track the UPS ticket today, but the option is not intuitive. To improve usability, we should add a Track button directly on the grid and display the appropriate UPS or FedEx icon depending on the carrier.
Additionally, please remove the existing Track option located near the default Save & Close area, as it will no longer be necessary once the grid button is implemented.
Ideally, the same tracking logic should also support FedEx links, since those URLs are already stored in the Shipping tables.
1. On the left side panel, go to Sales & Marketing
2. Click on Event & Order Management
3. Select Event Management - All Status Types Included
4. Open an existing event, go to the Delivery Tab, click on the Track button

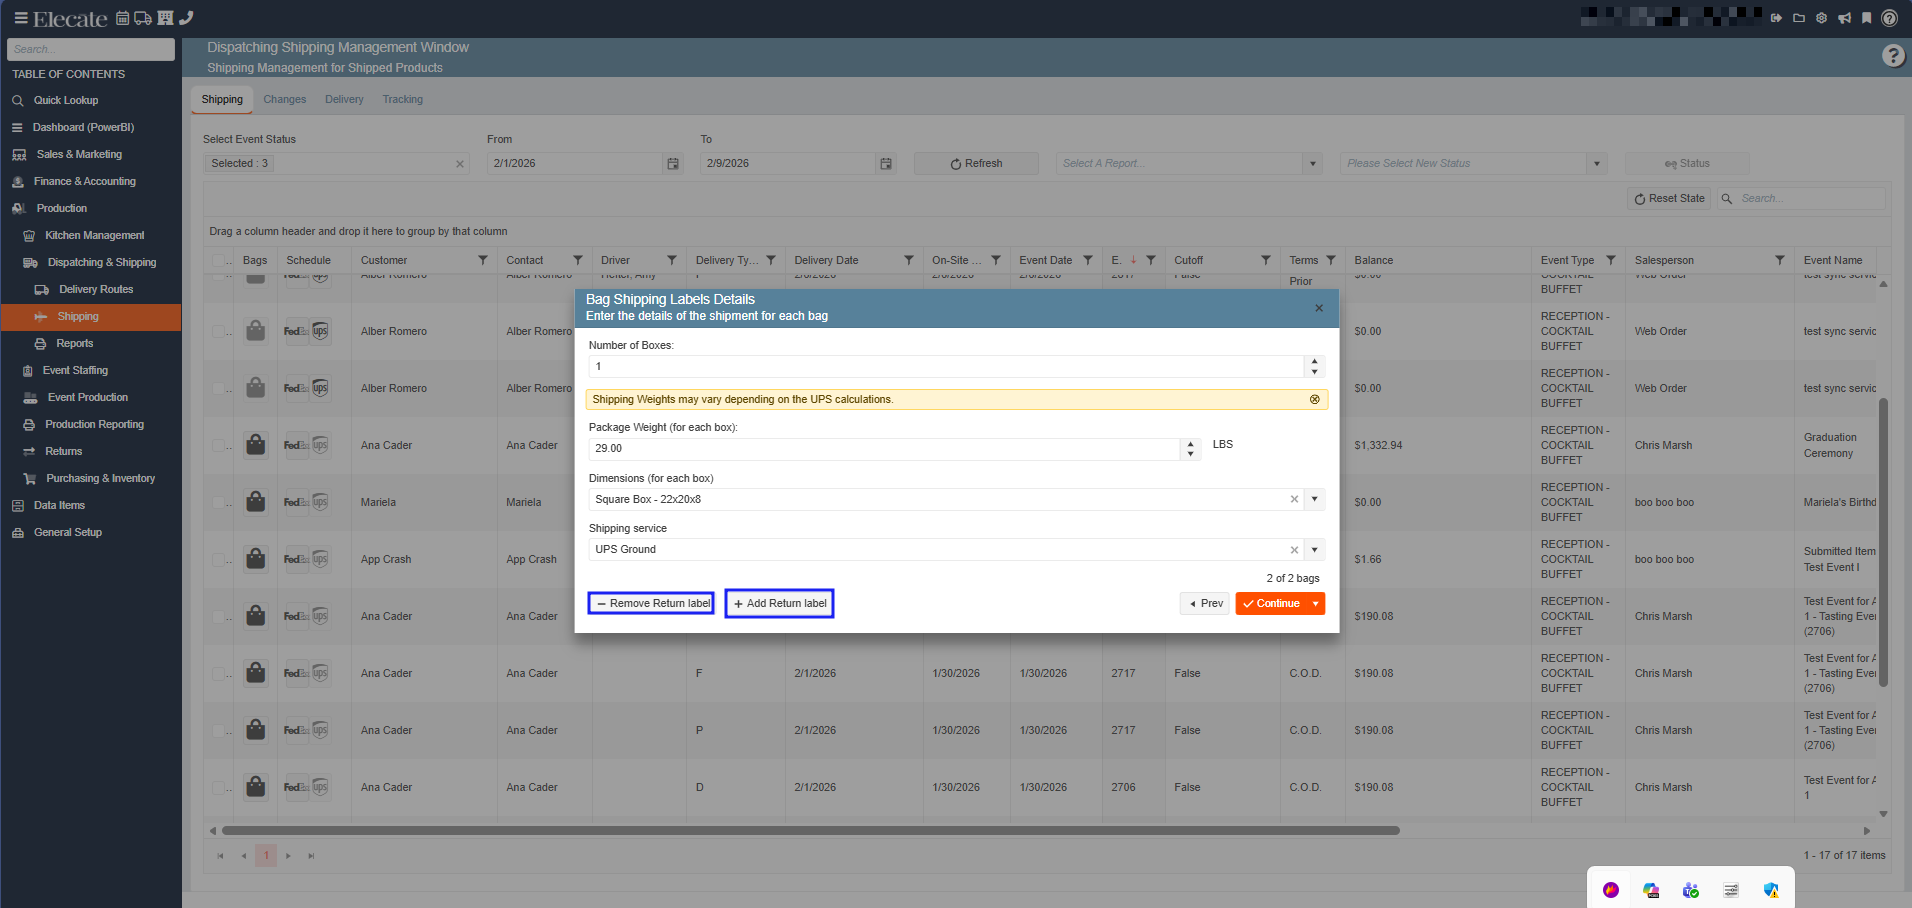
In the Shipping tab, the following enhancements were implemented:
- Buttons: Add Return Label and Add Shipping Label
- Ability to delete existing labels
The pop‑up must refresh whenever a label is added or removed, prior to confirmation.
1. On the left side panel, go to Production
2. Click on Dispatching & Shipping
3. Choose Shipping
4. Fill out the required information, pick an event, enter the number of bags, click on Save & Close, in the following screen you will see new buttons created: