
Best Practices for Managing Recipe Groups:
1. Keep Existing Groups Intact:
Avoid renaming or deleting Recipe Groups that are already linked to data items.Doing so can cause display issues (such as blank fields) in data entry forms.
2. Assign New Recipes Correctly:
When adding recipes:
Always select the appropriate predefined Recipe Group3. Use a Clear Hierarchy:
Organize groups into at least two levels to improve filtering and usability.
Example Structure:
A → Bread (main group)
AA → Sweet Bread
AB → Savory Bread
AC → Other Bread Items
- Do not add recipes to groups marked with an asterisk (*)
- These are parent groups meant only for organization—not for direct use
4. Use Group Codes Correctly (Important):
Recipe Groups are organized using a Group Code field, which determines how items are sorted and displayed.
How Group Codes Work:
- Each group is assigned a code (letters or numbers)
- The system sorts groups based on these codes
- Codes can be up to 3 characters
Recommended Structure:
Use a letter-based hierarchy to keep groups organized:
Beverage:
B1→ Cold Beverage
B2 → Hot Beverage
Important Limitation:
If you use number-based sequences like: A1, A2, A3...
After 9 entries, additional items may not display or sort correctly.
This happens because the system does not continue the sequence reliably beyond 9 in that format.
How to Create or Edit a Recipe Group:
1. On the left side panel, go to Data Items
2. Click on Food Management
3. Select Recipe Group
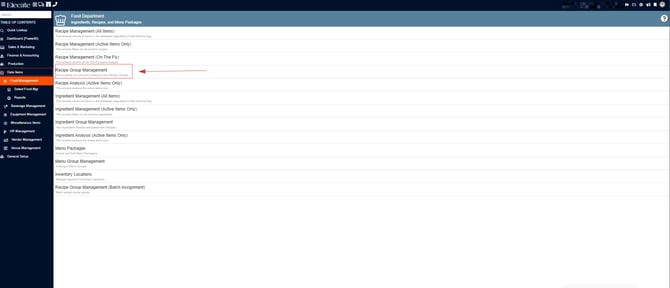
4. You can edit an existing data or create a new record by clicking on New Entry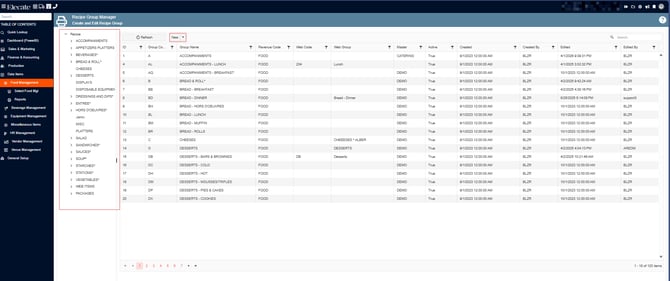
Be Careful When Making Changes:
Modifying existing Recipe Groups can impact system behavior.
- Changes should not be made without guidance
- Always contact Elecate Support before making structural updates
Set Up Revenue Categories First:
Before adjusting Recipe Groups:
- Ensure all Revenue Categories are properly configured