
Authentication Process:
1. At the top of the screen, on the right side click on the Gear Icon
2. Look for Setup Client (Second Page)
3. In the Setup Client window, go to the last option Application Integration Set up
4. Click on Reset Credentials, you will have to enter the Business Username, Password and Instance Name, you can find this information in the URL provided by Jamix, example: https://usa.jami.cloud/apps/instancename/app/, you just need to copy the information from the URL.
Important: Please use only the Jamix provided credentials for the login information. Work with Elecate and Jamix to secure those credentials.

Before starting to use Jamix, make sure to review and set the following AppSettings to ‘Yes’ if required:
- EnableJamixSync
- JamixDefaultRecipeGroup- This app setting allows you to complete the import from Jamix, once you have created the Group, then you need to place the name of the recipe in the App Setting
- RecipeAltDescriptionToMaxLength
To enable or review the Jamix Appsettings:
1. At the top of the screen, on the right side click on the Gear Icon
2. Select App Settings

3. In the search bar type in: Jamix, the following Appsettings will show up:

How to create Recipe Groups for Jamix:
1. On the left side panel, go to Data Items
2. Click on Food Management
3. Select Recipe Group Management

4. Click on New Entry to create the new group, next go to the app setting JamixDefaultRecipeGroup and enter the Group name that you just created

How to check the measurements in Elecate’s catalog:
1. On the left side panel, go to General Setup:
2. Select Recipe
3.Choose Create and Edit Measurement Units 
4. In the following window, you can create a new measure by clicking on New Entry, look for a measure in the search bar and edit the existing records by clicking on the pen Icon

How to check or Update the Jamix´s Measurements in Elecate?
Before creating a new Jamix measure, ensure that the same measure exists in the Elecate catalog. If it doesn’t, you won’t be able to complete the import.
1. At the top of the screen on the left side panel, click on the Gear Icon
2. Click on Application Codes

3. In the search bar type Jamix, the following information will show up


How to import Locations from Jamix?
1. At the top of the screen, on the right side click on the Gear Icon
2. Select Business Units

3. Choose Create and Edit Cost Centers

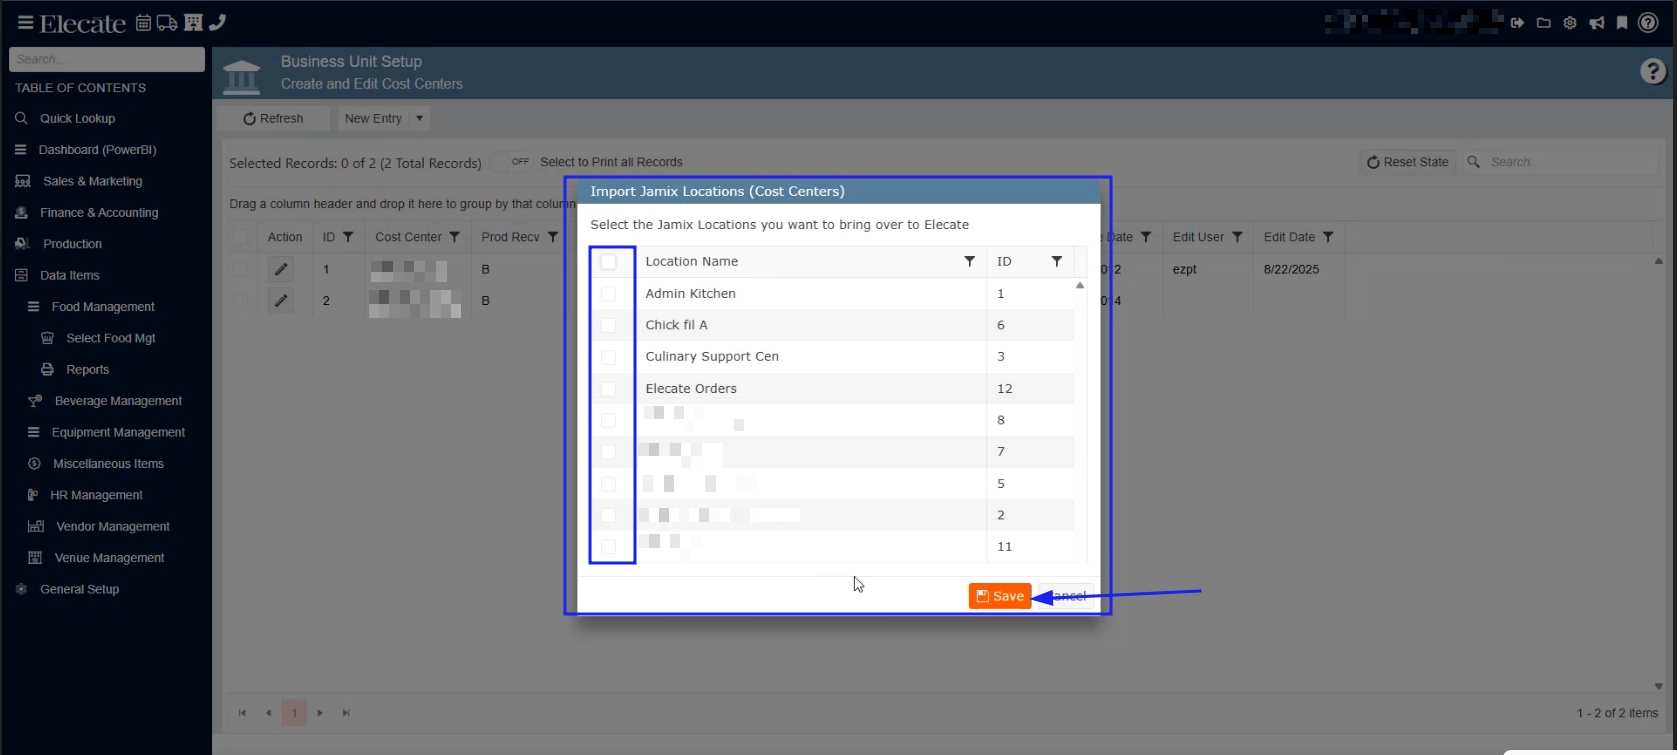
4. From the New Entry drop-down menu, click on Import Locations (Jamix):

5. Click Import Locations. A window will appear where you can select the locations you want to import, then click Saves (Note: If a location name exceeds the maximum length, only the first 20 characters will be imported)
How to Import Jamix Stock Card to Elecate?
1. On the left side panel, go to Data Items
2. Click on Food Management

3. Select Recipe Management (Active Items Only)

4. Click on the New Entry drop-down menu, select Import Food Items (Jamix):

5. From the Calendar icon, select the date (Please remember to select a pass date; the system will then synchronize the information up to the current day)
6. Once the synchronization is completed, you will see the following message, the warning message will let you know if recipes were found or not
If you receive an error message during the process, as shown below, please verify that the units of measure in Jamix match the units of measure configured in Elecate. Any discrepancies between the two systems may cause the import process to fail.
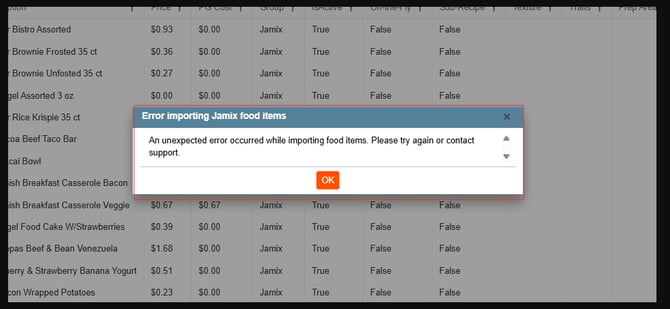
To resolve this issue, update the units of measure in Elecate by following these steps:
- Click the Gear icon.
- Select Application Codes.
- Review the available units of measure and ensure they match the units configured in Jamix.
- Add or update any missing units as needed.
- Save your changes and rerun the import process.
7. You can identify the Jamix import by the Group Name ‘Jamix,’ as shown in the image below:


How to create an event and add Jamix items?
1. On the left side panel, go to Sales & Marketing
2. Click on Event & Order Management

3. Select Event Management- All Status Types Included
4. Click on New Entry: 
5. Fill in the required information:

6. Go to the Financial Tab, in the Cost Centers section choose the Receiving and Home fields, the Jamix´s Locations:


7. In the Order Details tab, you need to select the Jamix´s group, in order to add the items to the event, once you have added the items, then you can close and save the event:
How to submit a Purchase:
1. On the left side panel, go to Production
2. Click on Purchasing & Inventory

3. Select Purchasing
4. Choose PO Management by Event Dates

5. You need to select the Event Start and End Date, The Cost Center, the Delivery Date and from the Flash PO drop down, click on Jamix PO, the following pop-up will show up letting you know if the purchase was completed or not:
