A customer can be created before an event can be scheduled, as all event details are tied to the customer record.
Customer records store important information such as contact details, billing information, and addresses. Once a customer is selected during event creation, this information is automatically populated, saving time, reducing manual entry, and ensuring data accuracy and consistency across the system.
How to Create a Customer:
1. On the left side panel, go to Sales & Marketing
2. Select Customer (CRM)
3. Click on Customer Marketing
4. Choose Customer Sales and Marketing Management

5. You´ll have the option to create a new customer by selecting New Entry or edit an existing record by clicking on the Pen Icon 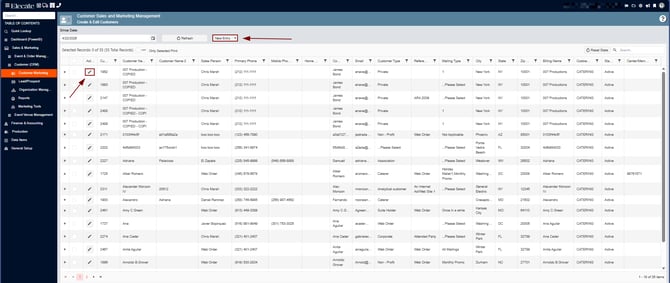
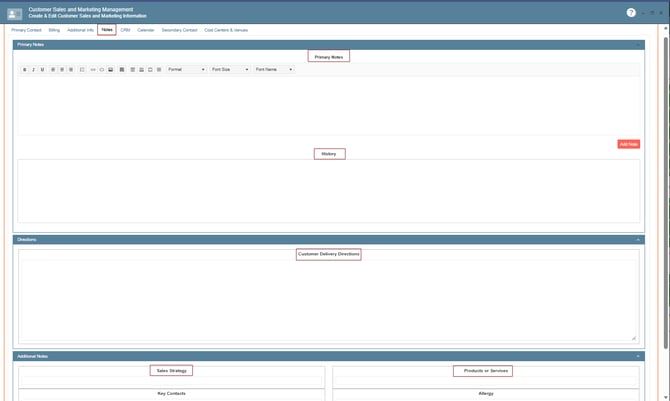
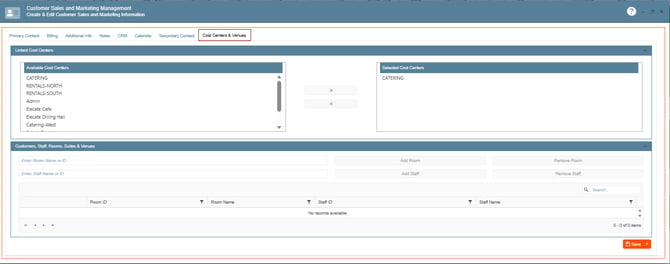
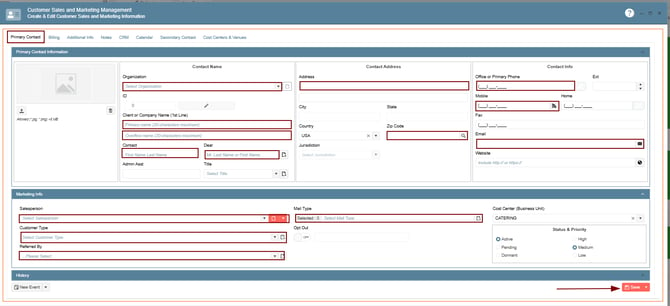
The Primary Contact tab is also divided into two sections:
- Primary Contact Information
- Enter the customer’s main details, such as:
- Name or Business Name
- Phone Number
- Address
- Enter the customer’s main details, such as:
- Additional Details
- Complete the following fields:
- Salesperson Name
- Customer Type
- Referred By
- Mail Type
- Complete the following fields:
Once all required information has been entered, be sure to click Save or Save & Close to keep your changes:
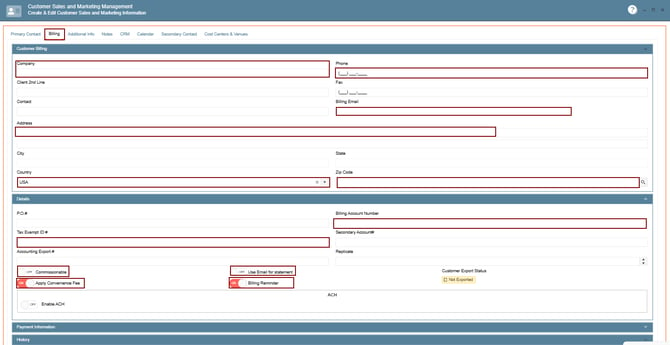
The Billing tab is divided into three main sections:
- Customer Billing
- Enter company-related information such as:
- Company Name
- Phone Number
- Billing Email
- Enter company-related information such as:
- Company Details
- Provide additional financial and administrative details, including:
- Tax Exempt ID
- Billing Account Number
- Options for Convenience Fees or ACH payments
- Provide additional financial and administrative details, including:
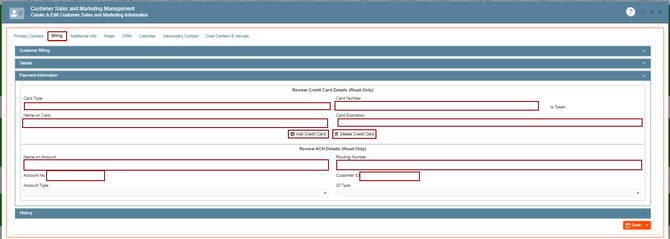
- Payment Information
- Enter and manage payment details such as:
- Credit Card information
- ACH (bank) details
- Enter and manage payment details such as:
This ensures accurate billing and smooth payment processing:
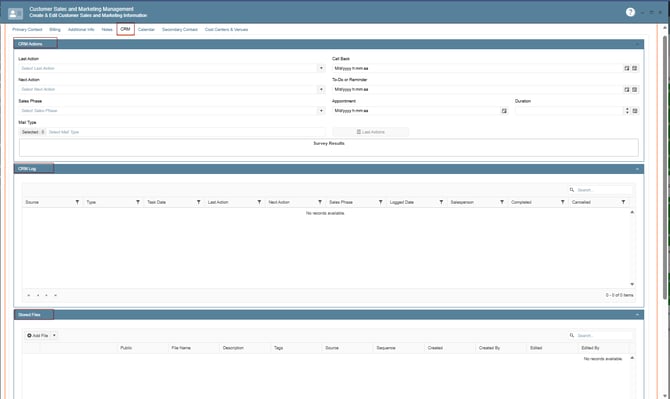
In the Additional Info tab, you can enter and manage a variety of supporting details related to the customer, including: Prospect Profile (e.g., Wedding, Location, Company Size, etc.), Financial Budget information, Mobile App access settings, Delivery and Pickup details
Email History for tracking previous communicationsThis section helps provide a more complete view of the customer and supports better planning and communication.