Enhancements:
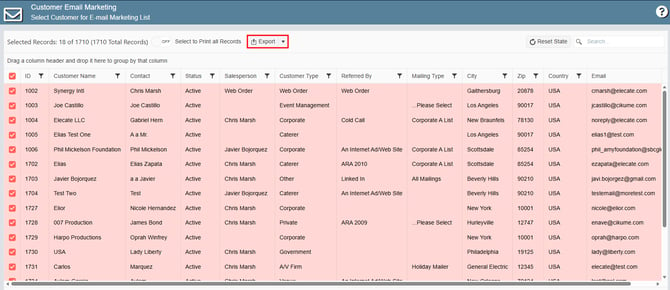
1. Wanting an export button on the Customer/Prospect Email Marketing Window (XLXS):
The Customer Email Marketing window has been enhanced to include Excel (.XLSX) export functionality, matching the capabilities previously available in WPF. Users can now export records directly from the window when Print All Records is selected, making it easier to analyze, share, and work with Customer Email Marketing data outside the application.
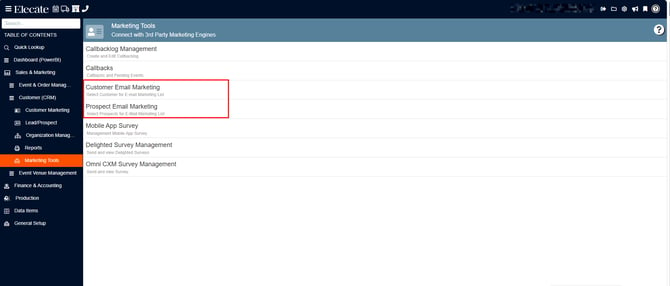
1. On the left side panel, go to Sales & Marketing
2. Select Customer (CRM)
3. Choose Marketing Tools
4. You can either select Customer Email Marketing or Prospect Email Marketing
2. Missing Cost Center Assignment with Default Value, User Notification, and UI Refresh:
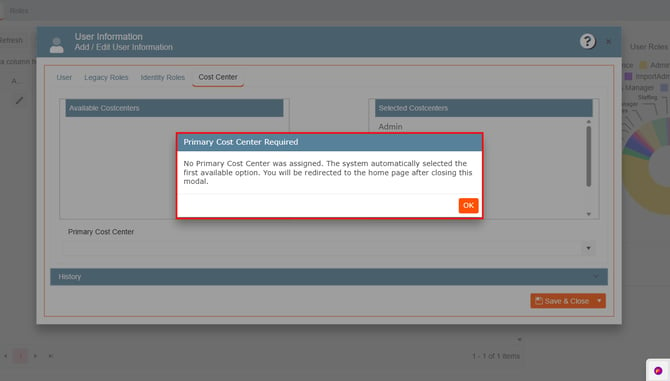
When a user does not have a Cost Center assigned, the system now automatically assigns the first available Cost Center and displays a notification to the user. Additionally, the Primary Cost Center is now required, and the system provides improved error handling and automatic updates to reflect changes immediately.
1. At the top of the screen, on the right side click on the Gear Icon
2. Navigate to the second page, select User Managements
3. Create a new user or select an existing record, go to the Cost Center tab
3. Having the ability to extend the size of the "Description" field when a data item:
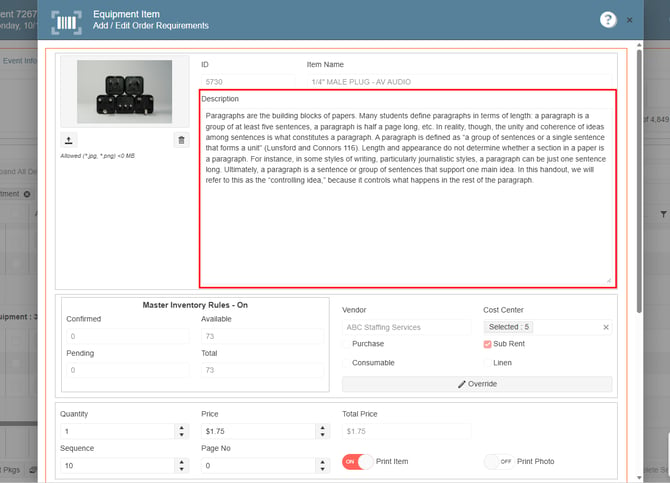
The Description field for equipment items can now be resized when adding or editing equipment on an event. Users can drag the field to expand its size, making it easier to view and edit lengthy descriptions without being limited by the default field dimensions. This enhancement improves usability while maintaining the existing functionality of the Description field.
1. On the left side panel, go to Sales & Marketing
2. Click on Event & Order Management
3. Select Event Management - All Status Types Included
4. Open an existing event, go to Order Details
5. Add an Equipment Item, the description field can be resized
4. Adding Misc On-The-Fly items with $0.00 revenue:
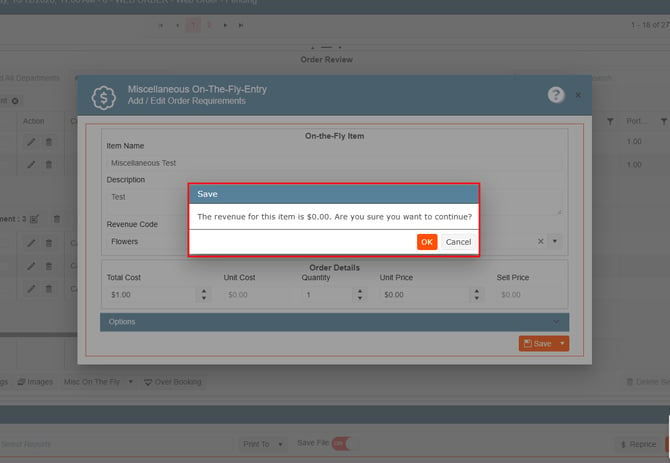
Users can now create Misc On-The-Fly items with a revenue value of $0.00. To help prevent accidental entries, the system displays a confirmation message before saving an item with zero revenue, allowing users to verify the amount before proceeding.
1. On the left side panel, go to Sales & Marketing
2. Click on Event & Order Management
3. Select Event Management - All Status Types Included
4. Open an existing event, go to Order Details
5. At the bottom of Order Review, you will find the Misc On the Fly option,
Bug Fix:
1. Deactivated users retain Mobile App access after being disabled in the User MGMT window:
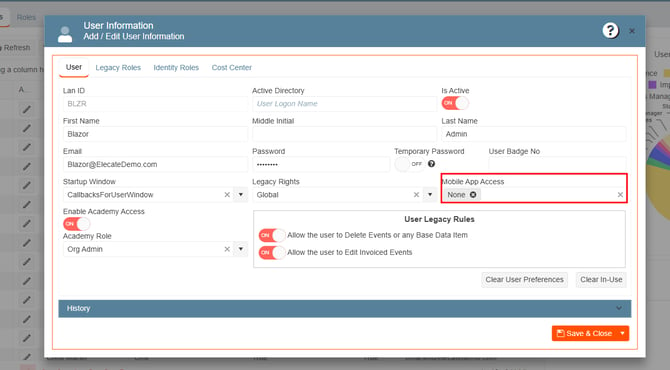
An issue allowing deactivated users to access the Mobile App has been resolved. Users marked as inactive in Core User Management will no longer be able to log in, ensuring mobile access permissions are correctly enforced.
1. At the top of the screen, on the right side click on the Gear Icon
2. Navigate to the second page, select User Managements
3. Open an existing user, in the User Tab go to the Mobile App Access drop-down
2. Deactivated Staff users retain Mobile App access after being disabled from the Staff MGMT Window:
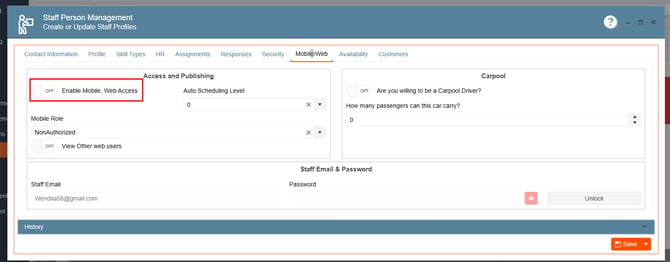
Staff members who are disabled in the system can no longer log in to the Staffing Mobile App. This enhancement ensures that user access is automatically revoked when a staff member is marked as inactive, keeping mobile access aligned with their current employment status.
1. On the left side panel, go to Data Items
2. Click on HR Management
3. Select HR Management (All Staff)
4. Open an existing record and go to the Mobile Web Tab
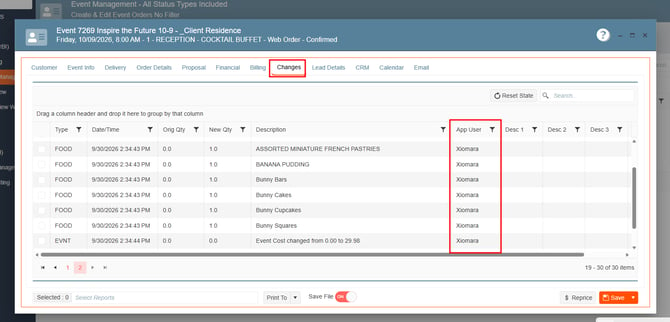
3. The "Changes" tab is showing the App User column as "Unknown" value:
The Changes tab now displays the username of the user who performed an action whenever that information is available, replacing "Unknown" entries and providing more accurate audit tracking of event changes.
1. On the left side panel, go to Sales & Marketing
2. Click on Event & Order Management
3. Select Event Management - All Status Types Included
4. Open an existing event, go to the Changes Tab
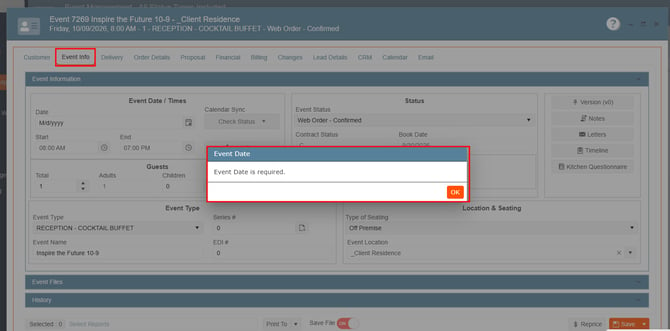
4. Error Pop-up window appears when Event Date is deleted:
The system now provides a clear and user-friendly validation message when a required Date field is left blank. Users are notified before or during the save process, helping prevent incomplete records and ensuring required information is entered before the record is saved.
1. On the left side panel, go to Sales & Marketing
2. Click on Event & Order Management
3. Select Event Management - All Status Types Included
4. Open an existing event, go to the Event Info Tab