1. Creating new prompt message for some specific acts with the salesperson:
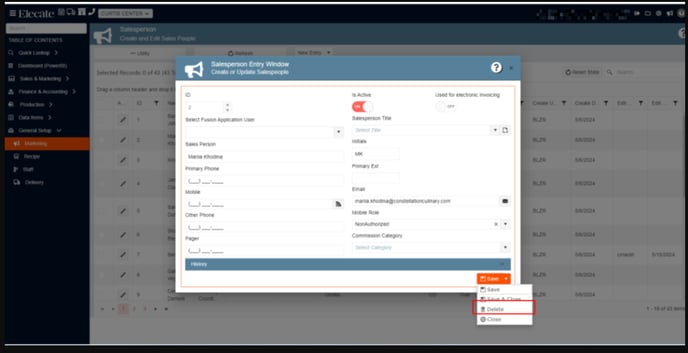
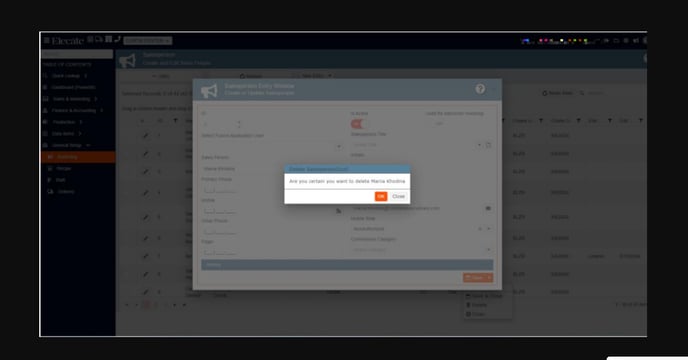
The user won´t be able to delete a Salesperson from the UI if the Salesperson has events assigned to them, the prompt has this warning on it: "You are unable to delete this "Salesperson name", as the user is currently active in other events".
1. On the left side panel, go to General Setup
2. Select Marketing
3. Click on Create and Edit Sales People
4. Choose a Salesperson on that Window and try to delete it
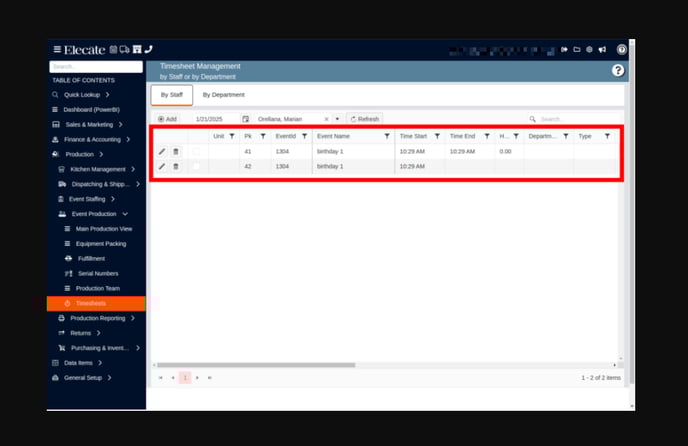
2. Getting the Selected Records and Total Records in view withing the Grid updated based on filters applied:
The label "Selected Records: [SelectedRows] of [DisplayedRows]..." updates based on filters applied to the grid, including column filters and search box text. The "Printing All Records" toggle reflects the count of displayed records and selected rows.

3. Creating a new Proposal Tab Screen within the EventModal:
The Grid persistence is enabled on the proposal tab, a totals box shows Subtotal, Taxes, Discounts, and Grand Total, the "Add to Order" button is removed, the Department column now shows the proposal name, the current Department column is renamed to Revenue Group, a new Department column contains Def Pkg information, subtotal lines are added by department.
The dollar value of data items added to an order under a specific revenue code should be reflected in the proposal page's total for that revenue code. The total price by revenue code must be equal to or greater than the actual total price of the data items entered. If it is not, a pop-up notification should appear.
Grid persistence exists on the proposal tab.
1. On the left side panel, go to Sales & Marketing
2. Click on Event Order Management
3. Select Main Sales View
4. Click the pencil to open any event
5. Navigate to the Proposal tab

A totals box exists with the following information: Subtotal, taxes, discounts, grand total

The Add to Order button has been removed 
The Department column shows the proposal name instead of the short name and contains the Def Pkg information from the revenue set up table
The current Department column is renamed Revenue Group 
Subtotal lines are added by department.
The dollar value of the data items added to the order in a given revenue code should flow
through to the proposal page to the total for that revenue code

The total price by revenue code must be equal to or greater than the actual total price of the data items entered - if it is not, a pop-up notification must appear
4. Needing my Recipe Preparations and Recipe Preparation Allergens to be copied with my previously copied recipe:
It was copied all the recipe preps and recipe prep allergens from the recipe previously copied.
Opening a recipe Item that has allergens
Also has Prep Items

5. Synchronizing some functions and change ID´s located in the staff Setup:
It was synchronized the staff schedule availability and delete action intime sheets, it was updated the synchronization for event attachments, changed IDs value in Staff Skills, verified/changed staff assignment ID when a staff is added to the event, tested entities synchronization with the Mobile DEV team.
Synchronization in staff schedule availability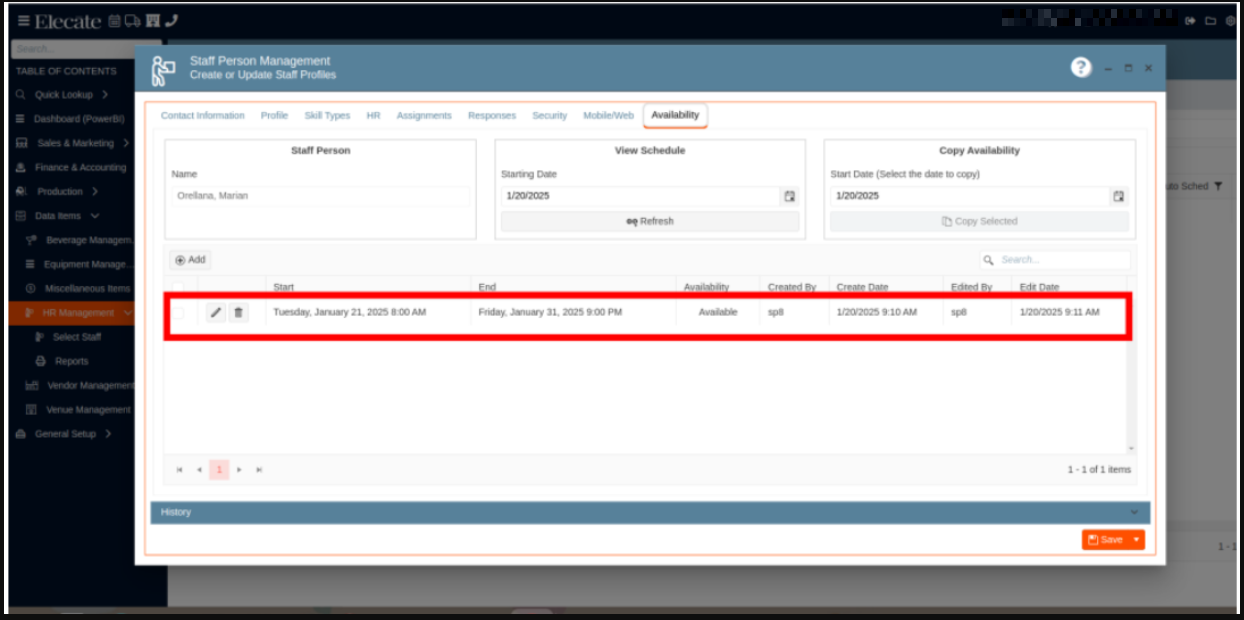

Verify/change staff assignment id when a staff is added to the event

Add update synchronization for event attachments:

Synchronize delete action in time sheets

Change IDs value in Staff Skills


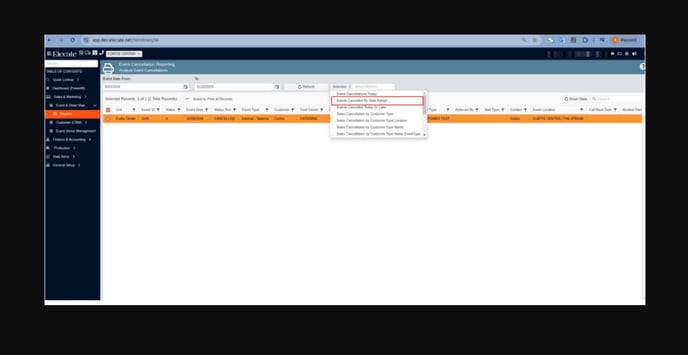
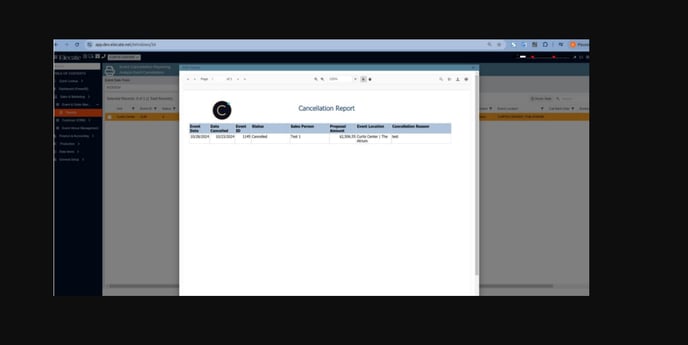
6. Applying a new Cancellation report that comes from merged of the events discount with the Notes report:
A report detailing the cancellation reason was created, the columns included were the following: Event Date, Date cancelled (date the status was changed to any cancelled 'X' status), Event ID, Salesperson, Proposal Amount, Event Location, Cancellation Reason (which is populated by the user by typing in the box below when changing the status to cancelled).
1. On the left side of the panel, go to Sales & Marketing
2. Click on Event & Order Management
3. Go to reports
4. Choose Event Cancellation Reporting
7. Needing to synch and validate if some specific fields from the customer information are activated in the Shopping cart after any change is made:
Synchronize the customer information fields so that any changes made are also reflected in the shopping car, additionally it was validated the changes made for the following fields: PO#, Billing Account Number, Tax Exempt ID#, Apply Convenience Fee toggle.
1. On the left side panel, go to Sales & Marketing
2. Click on Customer (CRM)
3. Select Customer Sales and Marketing Management
4. Choose a customer and go to the Billing Tab


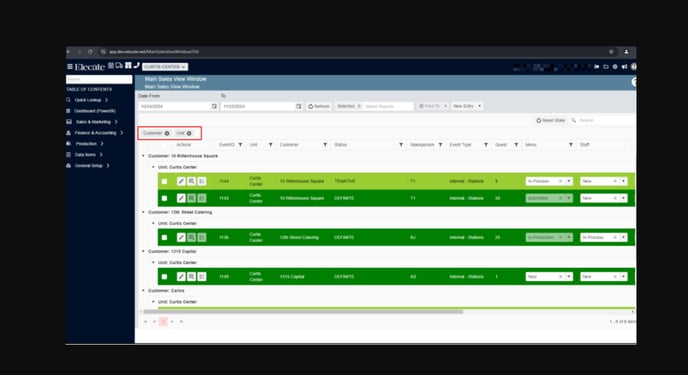
8. Triggering the unchanged functionality to all windows that have the Grid Persistence function:
It was removed the "EventDate" as a default grouping in the windows using grid persistence, it was implemented the group functionality to trigger as soon as the user access to the window with the grid persistence, the changes were applied to the following windows:
- ✅Main Sales View: MainSalesViewWindow/564
- ✅ Main Staffing View Window: MainStaffingViewWindow/575
- ✅Main Kitchen View: MainKitchenViewWindow/555
- ✅Main Production View: MainProductionViewWindow/576
1. On the left side panel, go to Sales & Marketing
2. Click on Event & Order Management
3. Choose the Main Sales View Window

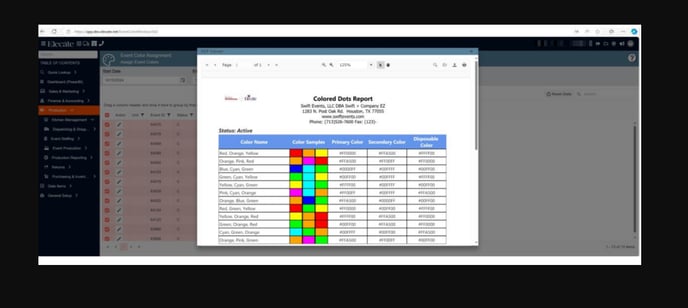
9. Adding the Color Dots Report to Empower:
A new report with colored dots for a given time period is now available.
1. On the left side panel, go to Production
2. Click on Kitchen Management
3. Choose Reports
4. Select Event Color Assignment

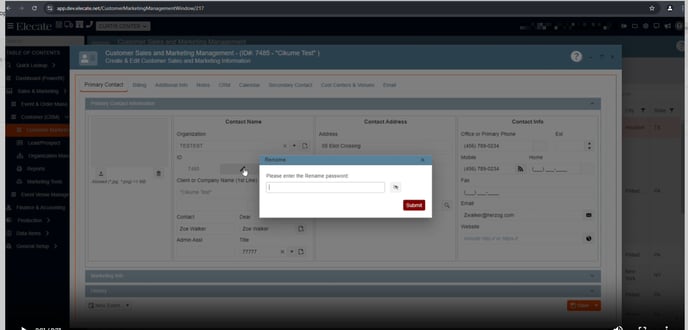
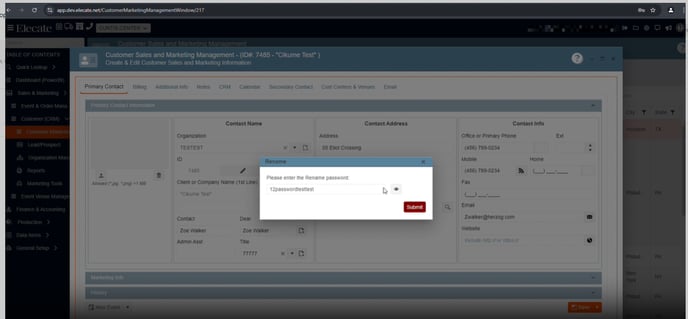
10. Masking the password input textboxes in all the components needed:
It was implemented a password in any workflow that requires one, the textbox has been masked with the standard password, the modal will allow users to submit the password with the enter keypress along with the Submit button.
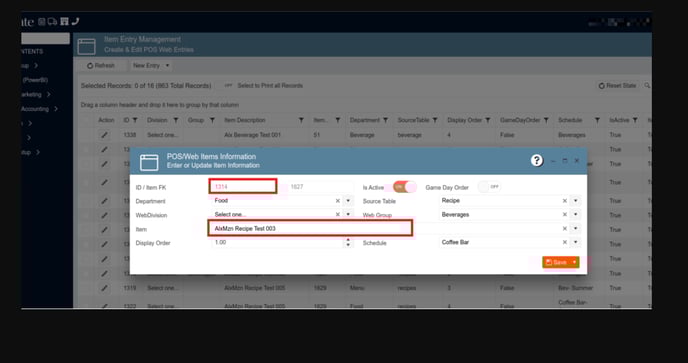
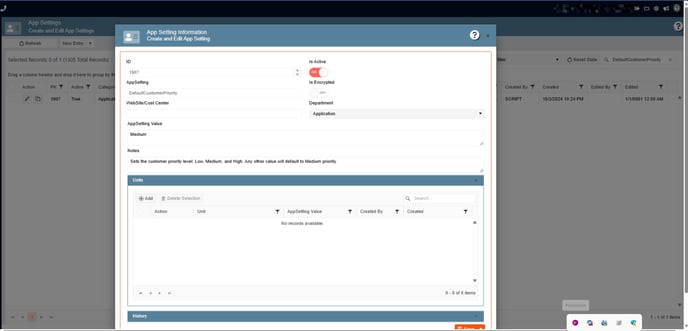
11. Handling the Priority through a new app setting when creating a customer:
The user will be able to set the customer priority by the app setting call: DefaultCustomerPriority, into the categories we have High, Medium, Low.
1. At the top of the screen, on the right side look for the Gear Icon
2. Click on it
3. Look for App Settings
4. In the search bar type in DefaultCustomerPriority
5. Next you need to choose the customer priority (High, Medium, Low)
Then
6. Go to Sales & Marketing
7. Select Customer (CRM)
8. Choose Customer Marketing
9. Click on Create New Customer, in the Primary Contact Tab, go to the Marketing Info section, in here the user will be able to see the customer´s priority.
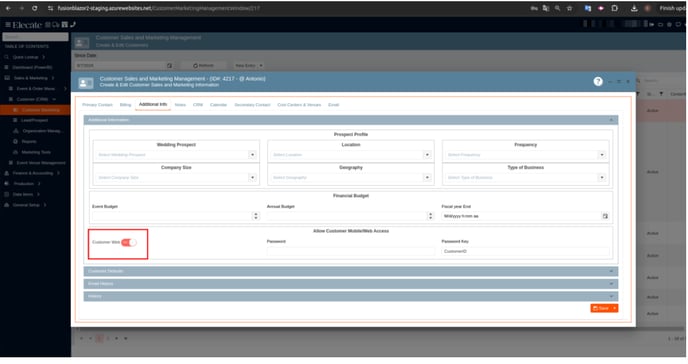
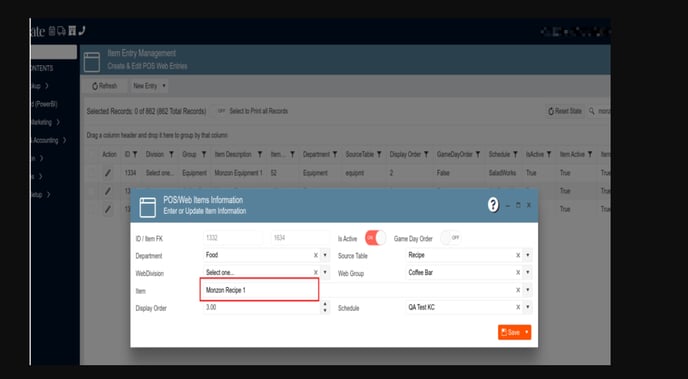
12. Having an App setting to enable the Customer Web credential by default when creating a customer:
In the client administration window, under the Additional Information tab, you can enable or disable the client's Web switch based on the application configuration. If the Web switch is enabled and no password is entered during user creation, a pop-up will prompt the user to set a custom password upon saving the registration. The CustID will be used as the password, and the email from the main contact tab will be recorded for the legacy shopping cart.
1. At the top of the screen, on the right side look for the Gear Icon
2. Click on it
3. Look for App Settings
4. In the search bar type in CustomerWebDefaultPasswordKey
Then
6. Go to Sales & Marketing
7. Select Customer (CRM)
8. Choose Customer Marketing
9. Open a Customer, go to the Additional Info tab, in the Allow Customer Mobile/Web Access section, you will find the Customer Web Toggle.

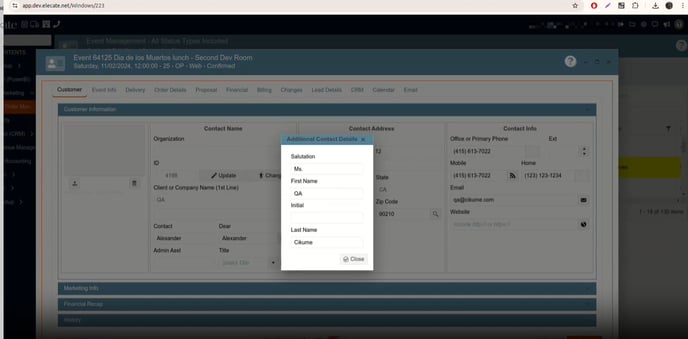
13. Refining the conditions to show the Additional Contact Details pop-up message in the Customer Management Window:
The conditions for displaying the pop-up need refinement to prevent it from appearing if a Contact Name (First Name) and Dear (Last Name) already exist in the event. Additionally, enhancements are required to ensure the Model Data is validated correctly under these conditions.
1. On the left side panel, go to Sales & Marketing
2. Click on Event & Order Management
3. Select Event Management - All Status Types Included
4. Open an event by clicking on the pen Icon
5. In the Customer Tab, look for the Contact Section
 14. Needing to guarantee the Startup Window is loaded based on what the user has configured on User Information:
For every single user, we need to guarantee that on login the user gets redirected to the window that is configured in the Startup Window within the User Information, in the settings.
1. At the top of the screen, on the right side look for the Gear Icon
2. Click on it
3. Look for Users Management (Second page)
Staff account:
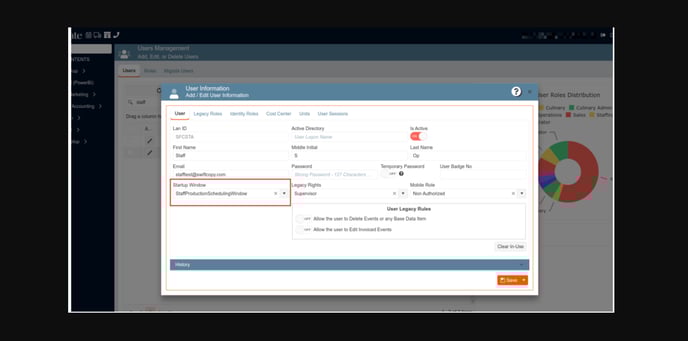
Startup Window: 15. Adding a Validation Message to add the Cost Center when creating a customer:
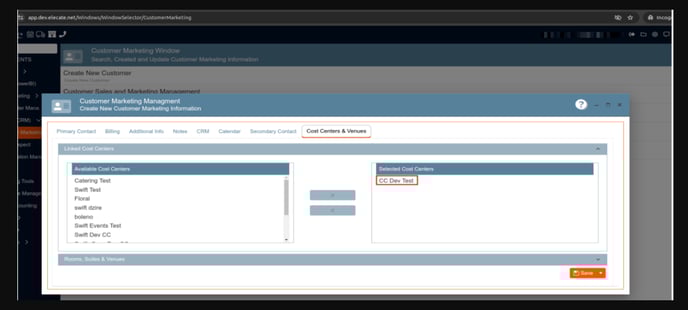
When creating a new Customer, the Cost Centers tab initially has no selections from the available cost centers, which could lead to issues like inventory count discrepancies. To address this, a new validation was added to notify the user that this configuration is pending. This warning message should be skippable, as setting up cost centers is not mandatory for creating the Customer.
1. On the left side panel, go to Sales & Marketing
2. Click on Customer (CRM)
3. Select Customer Marketing
4. Go to Customer Sales and Marketing Management
5. Go to Cost Centers & Venues

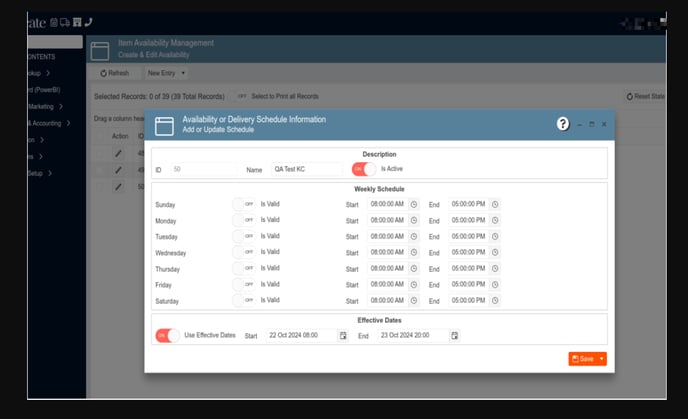
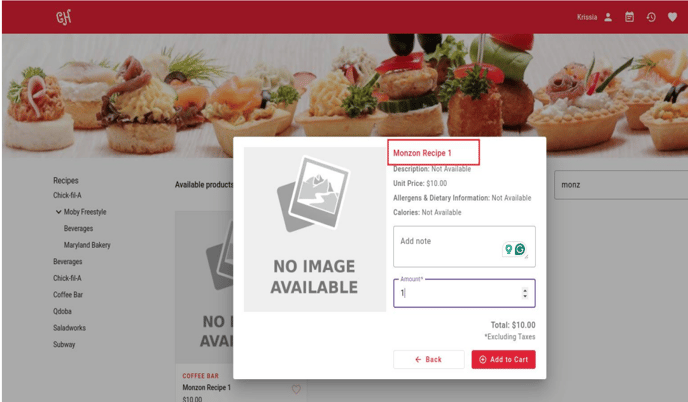
16. Working in the Sync between Empower and the Shopping cart related to soft closes function:
Synchronization between the Empower App and the Shopping Cart, whenever a
new schedule is created or modified. The synchronization in the recipe schedule is working as intended.
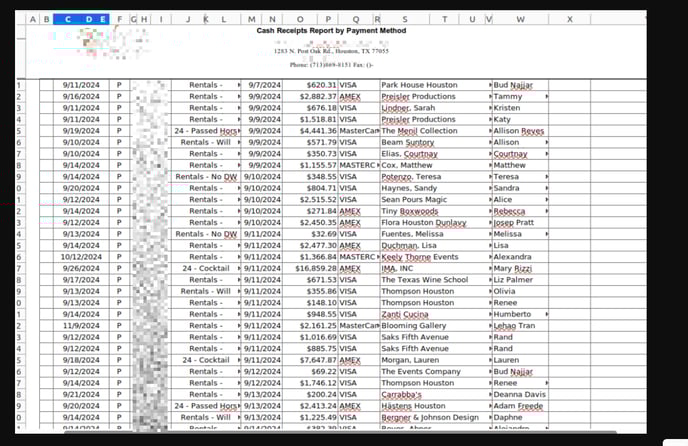
17. Changing the received hours in the "Cash Receipts by Payment Method" report to a day instead in order to see the data for the full day:
The “Cash Receipts by Payment Method” was having a data issue didn´t
show the data o September 18th, the report reflects the date range correctly.
18. Setting as default a cost center for all the new customers:
When we create a new cost center, the client wants a default cost center to be assigned as default to all the new customers. We can use a setup table that already exists for all the events.
1. On the left side panel, go to Sales & Marketing
2. Click on Customer (CRM)
3. Select Customer Marketing
4. Go to Customer Sales and Marketing Management
5. Go to Cost Centers & Venues

20. Working in the Sync between Empower and the Shopping cart related to soft closes function (Second Part):
From Empower when a User sets the schedule to an item, the schedule must be set in PostgreSQL. From Empower when a User updates the schedule of an item, the schedule must be updated in PostgreSQL.