1. Updating the stored procedures to prevent deliveries or pickups that are not in “Confirmed” status:
- usp_eventsPickupDeliveryViewsByDispatchDateRange
- usp_eventsPickupDeliveryViewsByDeliveryDateRange
- usp_eventsPickupDeliveryViewsByPickupDateRange
1. On the left side panel, go to Production
2. Click on Dispatching and Shipping
3. Select Reports
4. Choose Equipment Delivery Reporting
OR
5. You can choose Dispatching Reporting


2. Adding a refresh functionality in the financial tab:
It was added a refresh functionality into the ¨Financial¨ tabs that will trigger once the user adds a new item to the events.
1. On the left side panel, go to Sales & Marketing
2. Click on Event & Order Management
3. Select Event Management - All Status Types Included
4. Open an event by clicking on the pen Icon
5. Go to the Order Details Tab, then go to the Financial Tab


3. Modifying the Kitchen Labor Budget Report from DB 1 to DB 5:
- DB 1 and DB 2: Kitchen Labor Allowance is 10% of food revenue.
- DB 4: Kitchen Labor Allowance is 29% of food revenue.
- DB 5: Kitchen Labor Allowance is 25% of food revenue.
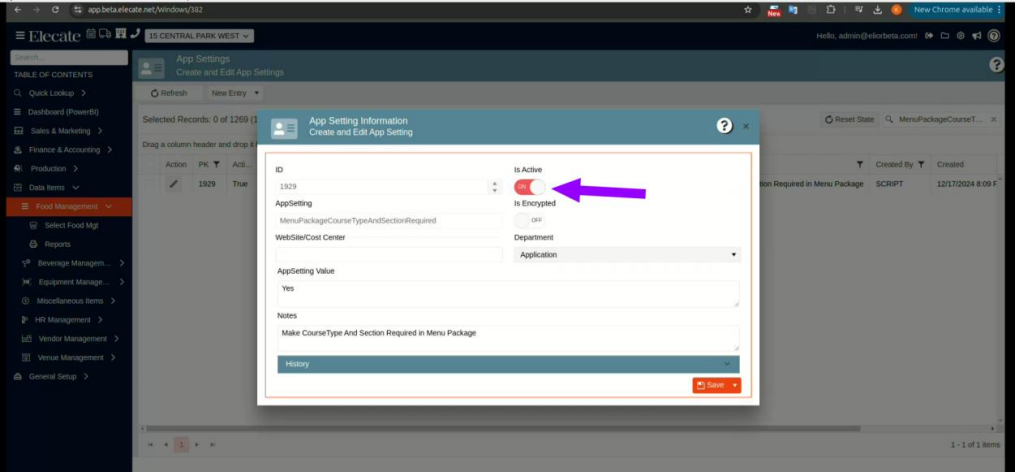
1. At the top of the screen, on the right side you will see the Gear Icon
2. Click on the Gear Icon
3. Look for App Settings
4. In the search bar, tap in: KitchenLaborAllowancePercentage
THEN
5. Go to Production
6. Click on Kitchen Management
7. Select Reports
8. Choose Food Production and Scheduling Reporting

DB1:
DB4:
DB5:
4. Applying new Spread of hours calculation report:
A Spread of Hours calculation report has been created, this report will help to custom staff reports that can be run for a given event that calculates the ¨spread of hours¨.

5. Renaming the Delighted Average Score field to "Survey Results" located in the CRM Tab:
The CRM tab at the event and customer level no longer says Delighted Average Score- instead the labels and watermarks read "Survey Results", it was deleted the Delighted Average score from the Survey Result Box.
1. On the left side panel, go to Sales & Marketing
2. Click Event & Order Management
3. Select Main Sales View Window
4. Click the pencil to open any event
5. Go to the CRM tab
6. Rename Delighted Average Score in the watermark and label to "Survey Results"
Before:
After:
6. Standardizing the Enter Keypress to submit the data for a new entry in an active modal:
When opening the modal, any press of Enter will execute the save method, allowing a faster experience for the user.
1. On the left side panel, go to Quick Lookup
2. Click on the Customer ID Search

7. Adding the Pace Report to the corresponding windows:
The Pace report was added to these report screens in Empower.-
- Financial Revenue Report
- Customer and Event Marketing Report
- Finance & Accounting -> Financial Reports -> Financial Revenue Reports
- Sales & Marketing -> Reports -> Customer & Event Sales & Marketing Reports
8. Creating a report that contains the information form the cost center Revenue Code Screen:
A new report has been created and saved in the Financial Revenue Reporting window.
1. Add the report to Finance & Accounting
2. Financial Reports
3. Financial Revenue Reporting

9. Identifying all the change request that comes from the Shopping Cart:
It was created a system flag to identify and track change requests from the shopping cart. This flag will distinguish these requests from other types, ensuring they receive the appropriate priority and workflow.
1. On the left side panel, go to Production
2. Click on Kitchen Management
3. Select Main Kitchen View
4. A pop up will show up, on that window you can see the Change Requests
When the flag is active the “Add/Edit Item” and “Reject with comments” buttons are
disabled

10. Applying some enhancements to the lock status flow:
The statuses in the accounting status column of the Main Sales View window are being updated to:
- N/A
- New
- Ready for Invoicing
- Invoiced
- Invoiced - Exported
When the Accounting Status column is set to "Ready for Invoicing," the event status also changes to "Ready for Invoicing" as these fields are linked. Additionally, a new app setting ensures that all other columns (menu, beverage, equipment, and staff) also change to "Ready for Invoicing" when the accounting column is updated.
1. On the left side panel, go to Sales & Marketing
2. Click on Event & Order Management
3. Select Main Sales View


11. Having two new fields to set credit limits and monthly financial rates:
The following fields were added to Financial Rules: Credit Limit, Mo Fin Rate, Account Hold on/off toggle, it was Renamed the "Financial Rules" section in the Customer window to "Credit Limit & Terms".
- Credit Limit: Limits the payment amount a customer can have pending.
- Lock on/off toggle: Prevents customers with an outstanding balance from placing new orders.
- Mo Fin Rate: Enter the rate applied as a finance charge for open balances.
Account Hold on/off toggle: Locks a customer from placing new events
- On the left side panel, go to Finance & Accounting
- Click on Customer Financial
- Select Customer Financials

12. Creating a new Per Diem Report for Elior Pro Dining:
A Per Diem report with the above columns has been created and is available on the shopping cart. The location of this report will come later, as it is specific to just two professional dining Elior accounts.

13. Implementing the Payroll Entry Previous/Next Buttons:
On the Add/Edit Payroll Screen, there is now a next button that opens the next skill type for processing, without having to save, close and open the next line item.
1. On the left side panel, go to Finance & Accounting
2. Click on Payroll Processing
3. Select Payroll Entry
4. Click the pencil on an event
5. Click the pencil on a skill type line item to open up the Add/Edit Payroll screen

14. Having an option to delete and unassing all the skill types from an event in the scheduling window:
Users can delete all skill types at once on the staff production scheduling by event screen. A new confirmation window appears before the deletion action. Users can unassign all skill types at once on the staff production scheduling by event screen. A new confirmation window appears before the unassignment action.
1. On the left side panel, go to Production
2. Click on Event Staffing
3. Select Scheduling
4. Click on Staff Production Scheduling
5. Click on a calendar day with events with staff requests
Double click the event on the far right of the calendar - this will open Staff Production Scheduling by Event screen. This is where the bulk delete and bulk unassigns buttons should be.
Action Drop-Down button shows the following options:
❖ New
❖ Add Note for Event
❖ Copy Staff Schedule
❖ Delete Skill Type
❖ Publish Event
❖ Send Custom Text
❖ Unassing Scheduled Staff
❖ View Event Changes

“Request” Drop-down button shows the following options:
❖ View Sales Request
❖ View Staff Responses

The staff production scheduling by event screen now has a button for users to delete skill
types all at once:
15. Adding a new on/off toggle for the scaling function in the Prep Elements:
There is now a toggle that allows users to indicate if they want to set recipe prep items to scale or not. The Prep Item Unit is updated to the new scale. Ex: Ounces to Cups or Cups to Ounces.
1. On the left side panel, go to Data Items
2. Click on Food Management
3. Choose Recipe Management
4. Click on the Pencil icon of any recipe
5. Select Recipe Prep tab
6. Click on the pencil icon
7. Choose Recipe Prep Information screen

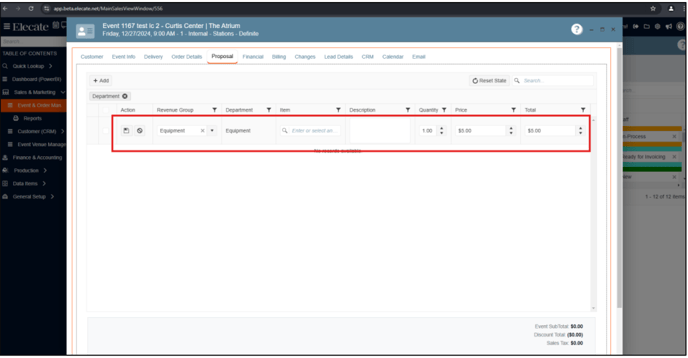
16. Having validations pop up after saving the whole set of changes instead of an individual change in the Proposal Tab:
Displays a list of revenue codes where the total is less than the order details price. The pop-up appears only when saving the order on the bottom right, not at the line-item level.
1. On the left side panel, go to Sales & Marketing
2. Click on Event & Order Management
3. Select Event Management - All Status Types Included
4. Open an event by clicking on the pen Icon
5. Go to the Order Details Tab


17. Having the Printing all record control in the Accounting Statements and invoice processing Windows:
Ensure proper usage as implemented throughout the existing software. Users can enable a switch to print all records, regardless of the page. The switch defaults to Off and must be enabled by the user. Checkboxes were removed. Defaults to PDF, Word, etc., based on the configuration in the Report Manager.
1. On the left side panel, go to Finance & Accounting
2. Click on Accounting Tools
3. Select Accounting Finance Charges Window

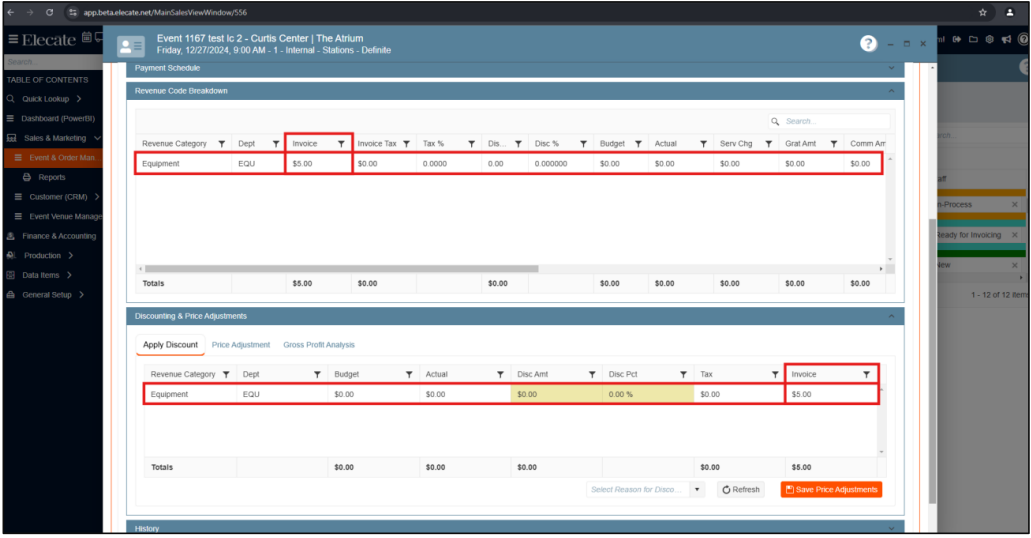
18. Wanting the Order Detail Total to turn red only if it's greater than the Totals section in proposal tab:
The Order Details total is highlighted in red when the amount is greater than the total in the Totals section. The Order Details total will be grey if it is equal to or less than the Total section.
1. On the left side panel, go to Sales & Marketing
2. Click on Event & Order Management
3. Select Event Management - All Status Types Included
4. Open an event by clicking on the pen Icon
5. Go to the Proposal Tab

19. Adding a 500 Millisecond Delay to Event ID Search Window:
A 500 millisecond delay has been added to the Event ID Search.}
1. On the left side panel, go to the Quick Lookup option
2. Click on Event ID Search


20. Adjusting the API to Support Account JAM Cater:
When you log in to your jamcater account, you can easily navigate through the
different tabs and tables.

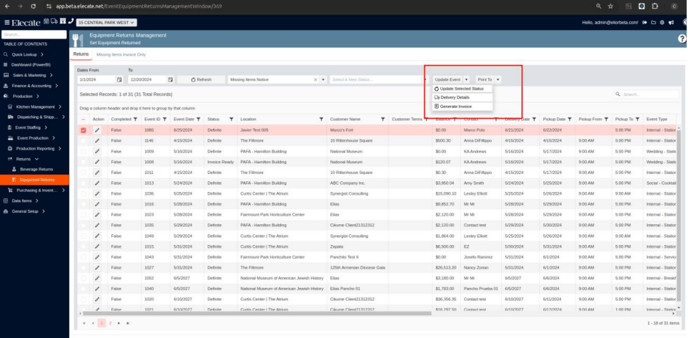
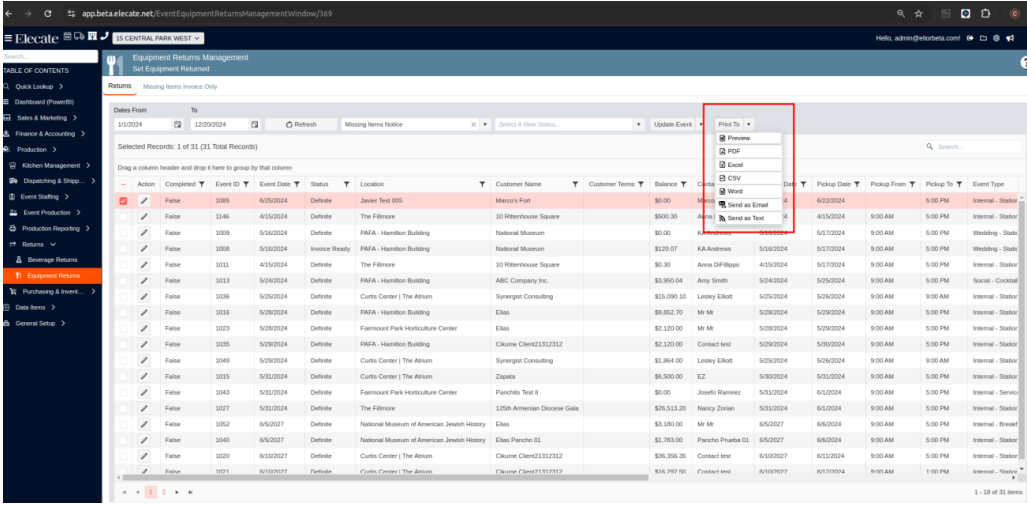
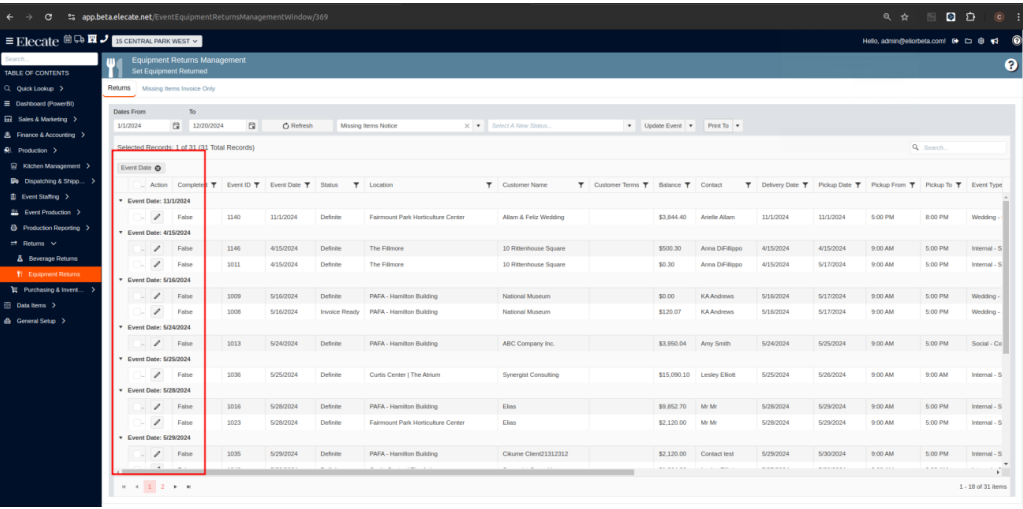
21. Changing the distribution of the Buttons on the Equipment Returns Management Windows:
- Grid Persistence has been added
- The button "Return Items" has been removed
- The buttons have all been moved onto one row, with similar formatting to the Accounting Invoice Processing Window, including the Delivery Details and Generate Invoice coming off of one "Update Event" button
- Grid Persistence has been added