1. Implementing front end validations for the required fields in the Equipment editor:
The information was validated on the frontend before sending the information to the backend, a banner will show on the top of the modal with the validation message. For instance, instead of “The rec_tsel field is required”, it should say “The Selling Price field is required”.
1. On the left side panel, go to Data items
2. Click on Equipment Management
3. Choose select Equipment

2. Being able to select multiple Staff Members in the Security Clearance field:
On the Staff Person Management Profile Tab, the Security Clearance Field is now multi-select, so employees can be assigned more than one security clearance.
1. On the left side panel, go to Data Items
2. Select HR Management
3. Click on HR Management (All Staff)
4. Open any staff member using the pencil
5. Click on the Profile tab

3. Filtering the department columns by name instead of ID:
When a user opens a Filter Listbox in a column with dropdown options a list of the values names will be displayed instead of the IDs. With the Grid Persistence Grouping header for the columns with dropdown options (if the column allows to group by), the value name shall be displayed instead of the value ID. This should apply to all four main views- sales, production, staffing and kitchen.
1. On the left side panel, go to Sales & Marketing
2. Click on Event & Order Management
3. Select Main Sales View

4. Implementing a prompt for Terms and Conditions required for all users except Elior:
The first time an organization's admin user logs into Empower, they will be required to see the attached terms and click through to sign. The time stamp, IP address, etc. of the user will be logged.
5. Working on the Functionality of Edit and Copy Buttons in the Menu Prep Window:
The Edit and Copy button have been moved to the right-hand side of the screen, the Edit Button and the Copy Button on the Menu Prep Window, are clicked by the user to either update or create (respectively) the same changes made on the right-hand side of the screen at the data item level. There is a confirmation pop-up before updating the Recipe master data. When creating a new recipe, it includes all Recipe preps from the right-hand panel.
1. On the left side panel, go to Production
2. Click on Kitchen Management
3. Select Main Kitchen View
4. Open an event by clicking on the pen icon

6. Hiding some windows from the Accounting Tools window for Elior DBs:
The following windows were hide: Accounting Finance Charges Window, Invoice Entry Window and Batch Invoice Processing Window.

7. Renaming the Change Request header Pop Up on Main Production View:
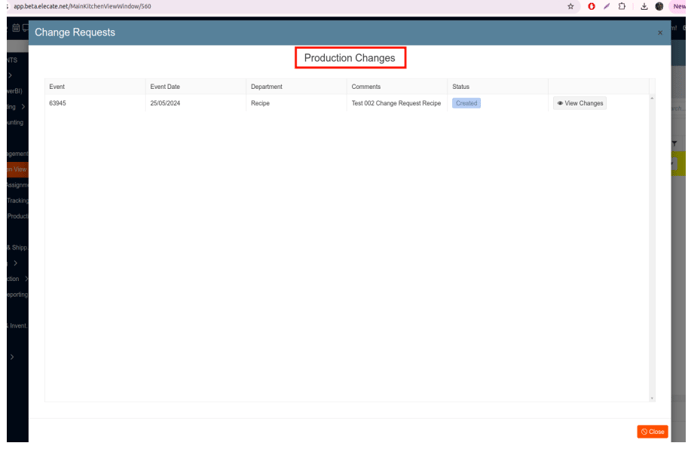
1. On the left side panel, go to Sales & Marketing

12. Disabling the copy feature in an event if the 'Total Due' exceeds the 'Credit Limit' on the client's account or if the account is on 'Hold':
The user can not copy an event if the new Total Due exceeds the Credit Limit or if the 'Account Hold' toggle is 'On'.


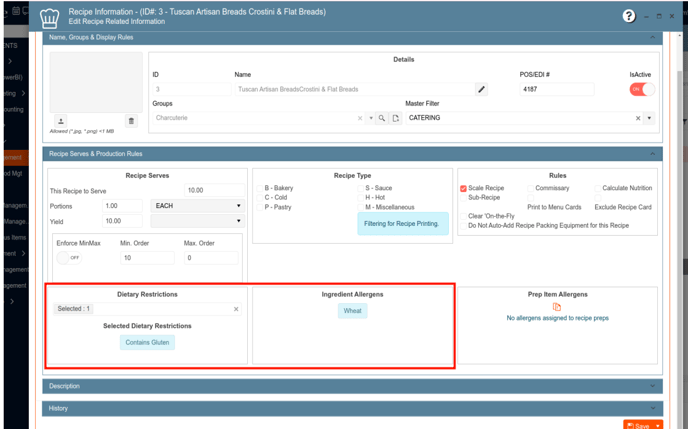
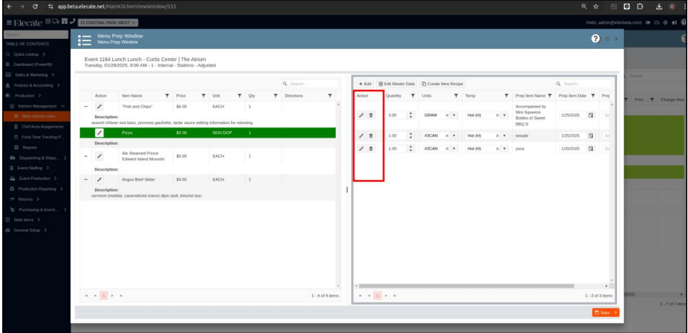
13. Working on Save and Display Prep Item Allergens in Recipes:
Prep item allergens were saved to the data item and appear when being used in another recipe.
1. On the left side panel, go to Production
2. Click on Kitchen Management
3. Select Main Kitchen View
4. Open an event with recipes
5. Click the pencil on a recipe
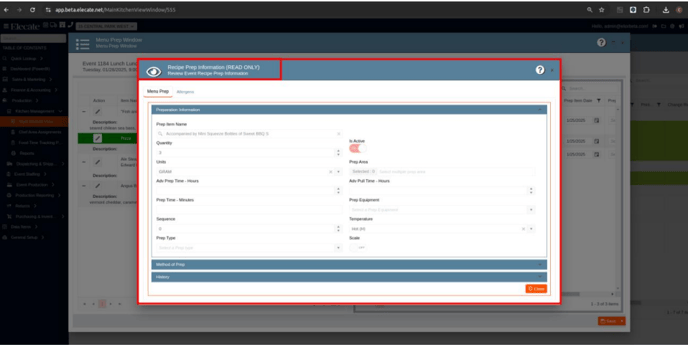
6. Click Add to open the Recipe Prep Information window
Search in the Prep Item Name- if inserting an existing prep item, the corresponding allergens should also appear


14. Being able to login with my Google and Microsoft account, so that I can have a faster log in:
The user will have the option to log in using their Microsoft or Google account, this log in option will be available in: Empower Web App, Shopping Cart and Staffing Mobile App.


15. Working on the System Fails to Block Event Scheduling Beyond Capacity Limit:
The system should check the capacity limit for Shipping/Pickup/WillCall for each date. Once the capacity limit is reached for a specific date, the system should block any new events from being added to that date. The implementation should ensure that the WPF version remains stable and does not crash. Performance testing should be conducted to verify that the system can handle capacity checks without significant performance degradation.
- Go to Production> Dispatching & Shipping > Delivery Routes
- Select Delivery and Shipping Capacity Information
- Set Delivery/Pickup/WillCall limit on a shipping date
- Schedule more deliveries than the set limit for that date
- Go to the Delivery Calendar to confirm the overbooking.


16. Seeing the web status name instead of the ID in the Staff Response Reports grid:
It was set up that the column shows the staff response in letters, instead of numbers.
1. Click on Production Option in the left side Menu.
2. Select Event Staffing
3. Open the Reports option
4. Select Staff Response Reports By Event Date.
5. Will see the Web Status with Numbers in the columns

17. Having the ability to multi-select and send a Custom Text message to all selected users:
The Contact & Company field and the System Text were removed, it was standardized the buttons option in the Pop-up message, it was added a body limit of 1,500 characters, the user will have the multi select option and send in a batch the ¨Custom text¨ message to all the selected users.
18. Estimating Item Name label to be renamed to Proposal Item Name, along with other UI improvements:
The “Budget Item Name” label has been changed to “Proposal Item Name”, along with other user interface improvements for a more intuitive experience.
- Proposal Item
- Create and Edit Proposal Item

19. Having the standard split button control in the Recipe Prep Allergens Modal Window:
The Allergens Modal located in the Recipe Prep is now with the same design as the Allergen Modal that appears in the Ingredient Management Window.
1. On the left side panel, go to Data Items
2. Click on Food Management
3. Select Recipe Management Active Items Only
4. Open an item, then go to the Recipe Prep tab
5. Choose New, then go to the Allergens tab


20. Handling user creation with default unit and multiple unit assignation:
- Create New Users: Add new users to the system.
- Assign Units and Primary Unit: Allocate units to the users and designate a primary unit.
- Set Default Unit: If only the default unit exists, set it as both the user's unit and primary unit.
- Save and Close: Save the user information and close the process.
1. At the top of the screen, on the right side you will see the Gear Icon
2. Click on the Gear Icon
3. Look for Users Management (Second Page)
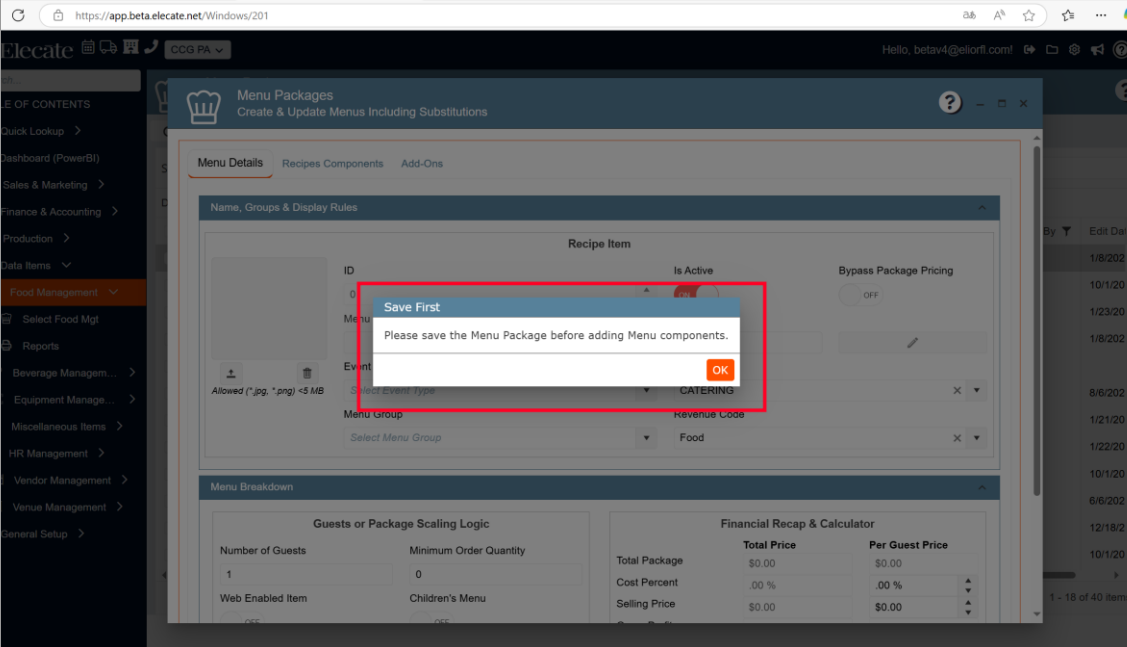
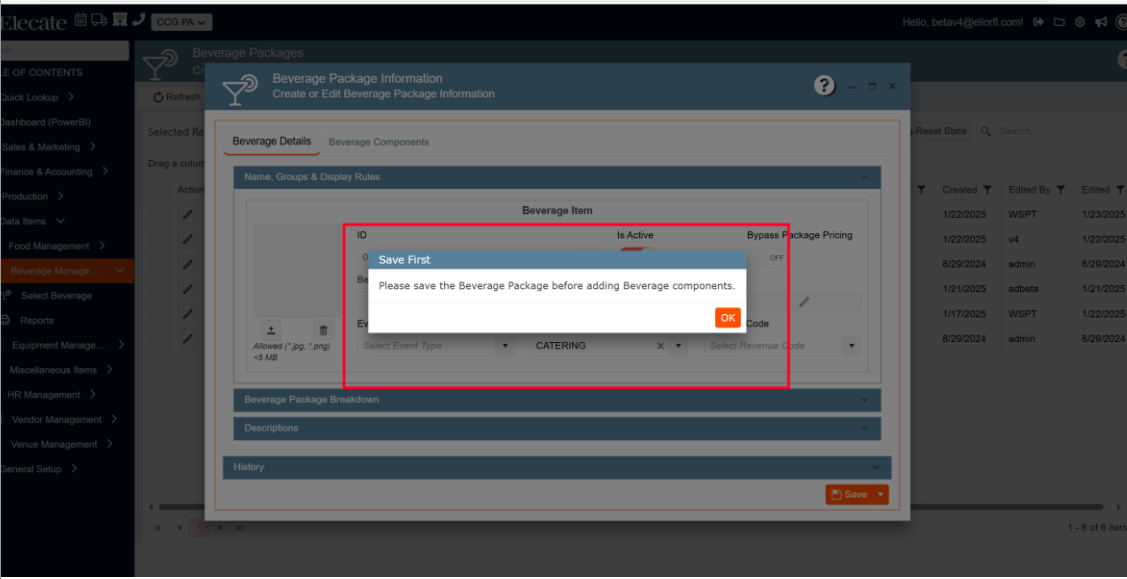
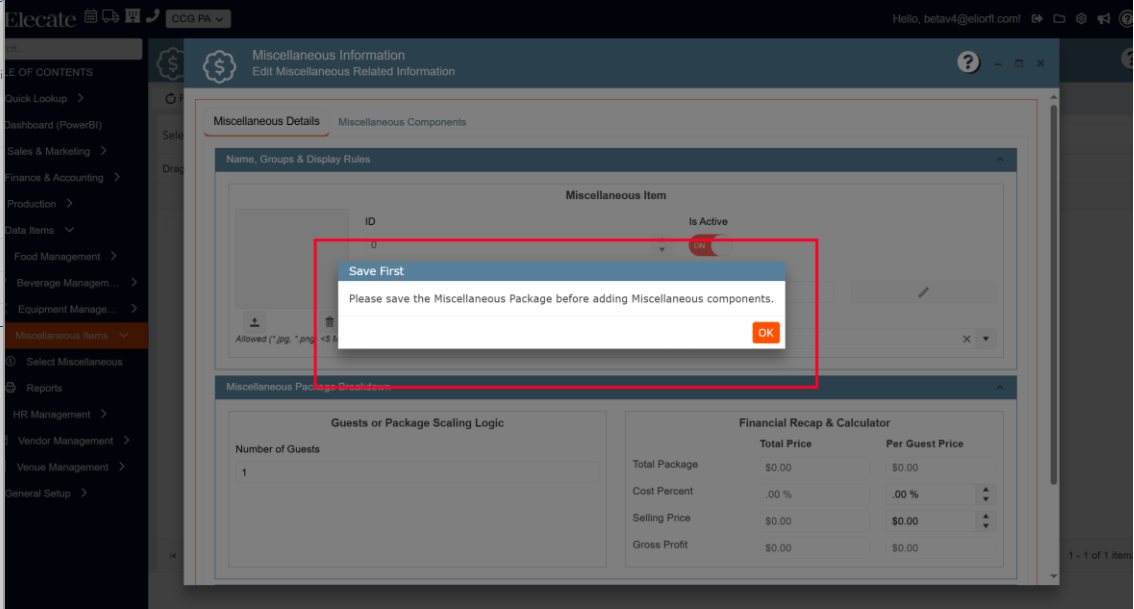
21. Adding a prompt message to prevent the user in the Package Editor: