
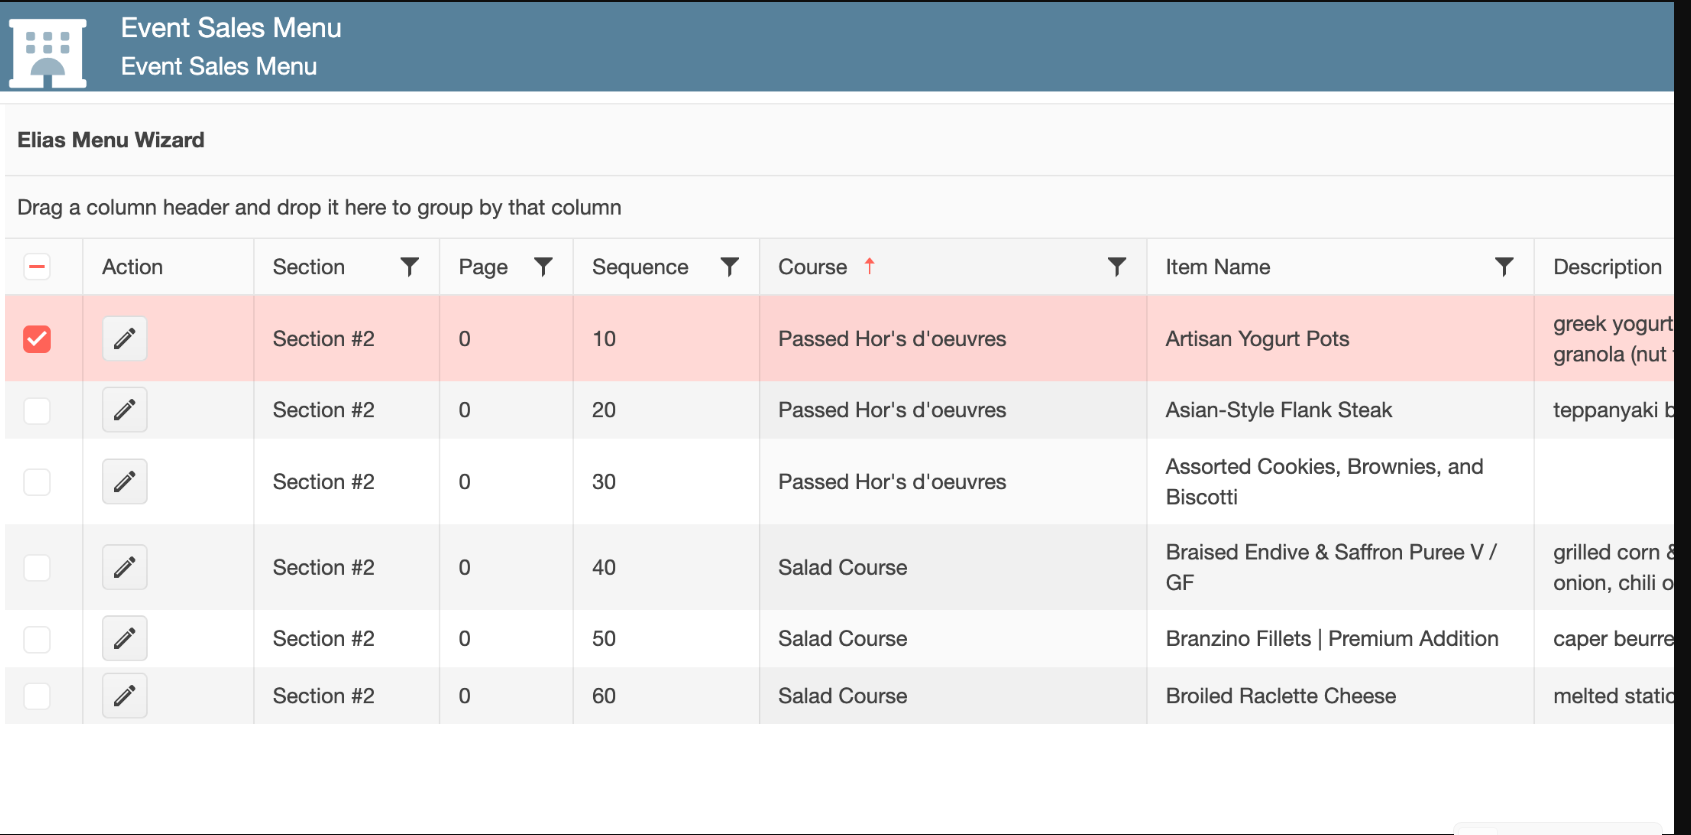
1. Implementation of a grid functionality in the Events Sales Menu Window, move the course, the sequence in the page number and add the drag-drop function.
It was implemented the grid and Drag- Drop functionality in the ¨Event Sales Menu¨, this window can be found in the icons within the Main Sales View Window, the Course option was move next to Menu, additionally the page number and the sequence have to be the same in the OrderDetails pop up window.
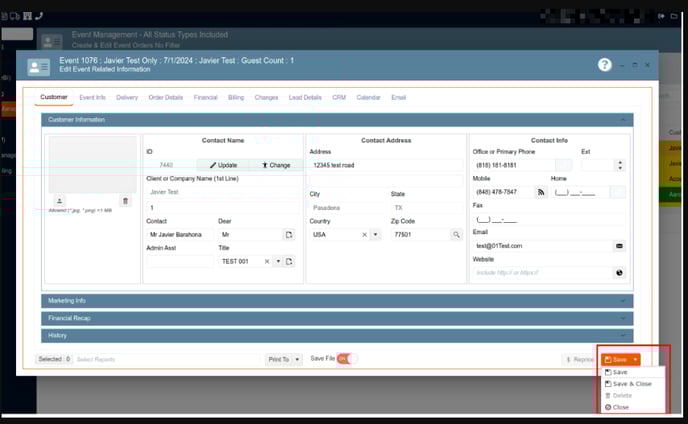
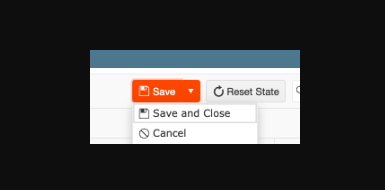
2. Adding a drop-down with specific options:
In the ¨Save¨ button, we need to have a dropdown with the following options:
Save, Save & Close, Delete and Close.
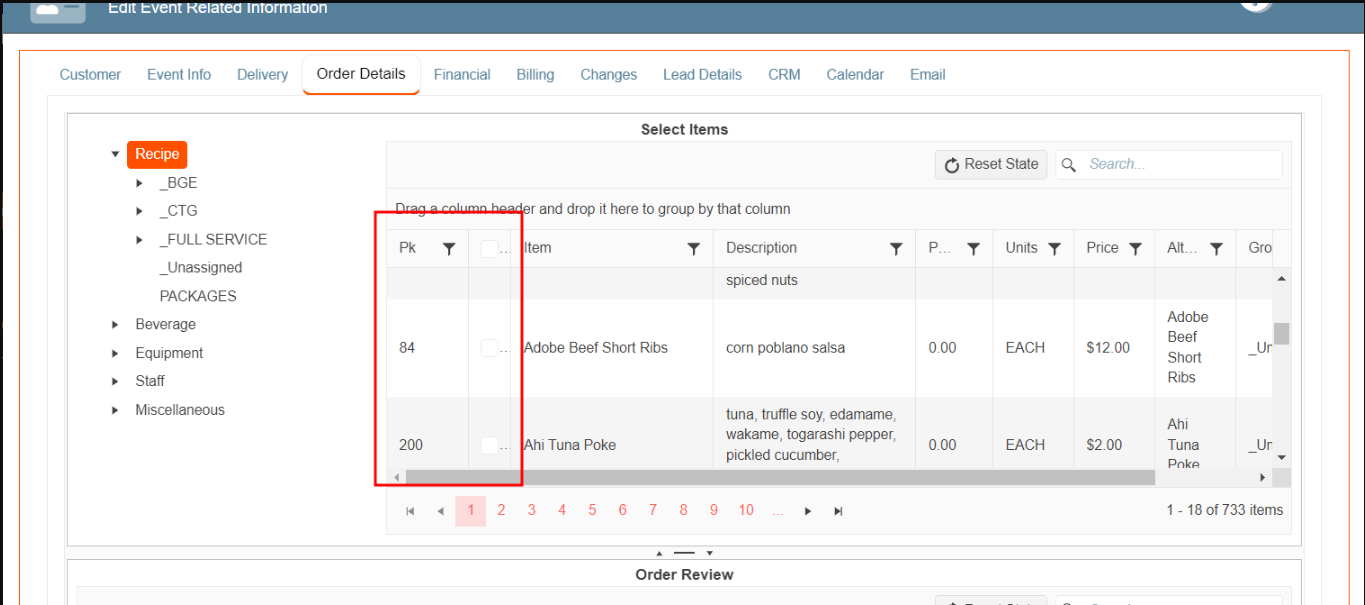
3. Adding new columns in frozen state in the Event Crud Editor Window:
We need to have the following columns, in a frozen state: PK and Checkbox column.
1. On the left side panel, go to Sales & Marketing
2. Click on Event & Order Management
3. Select Event Management - All Status Types Included
4. Choose an event by clicking on the pen icon
5. Go to Order Details
6. In the Select Items box, you will find these 2 columns.
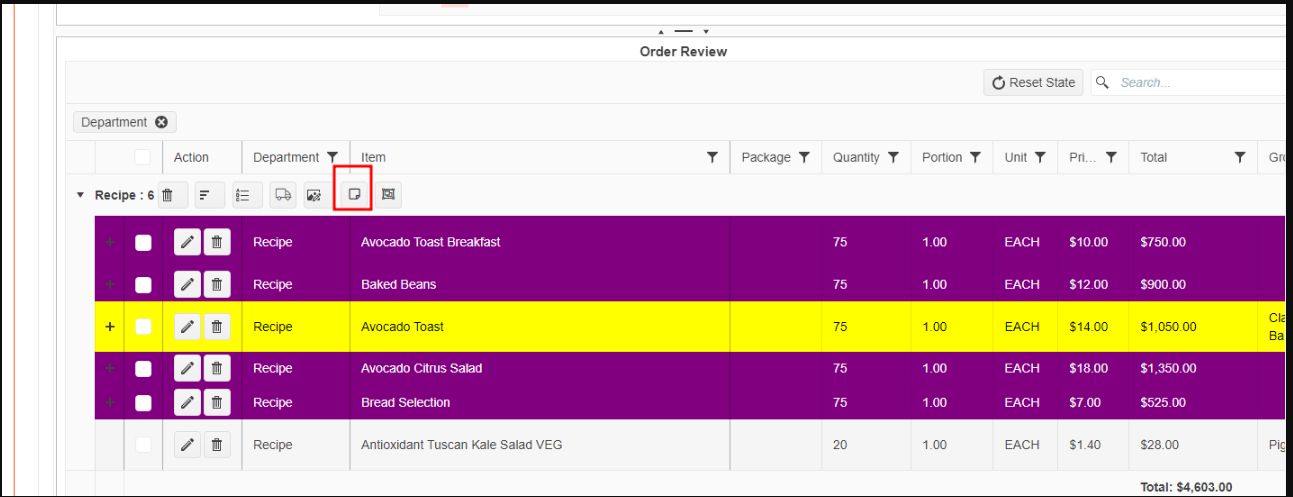
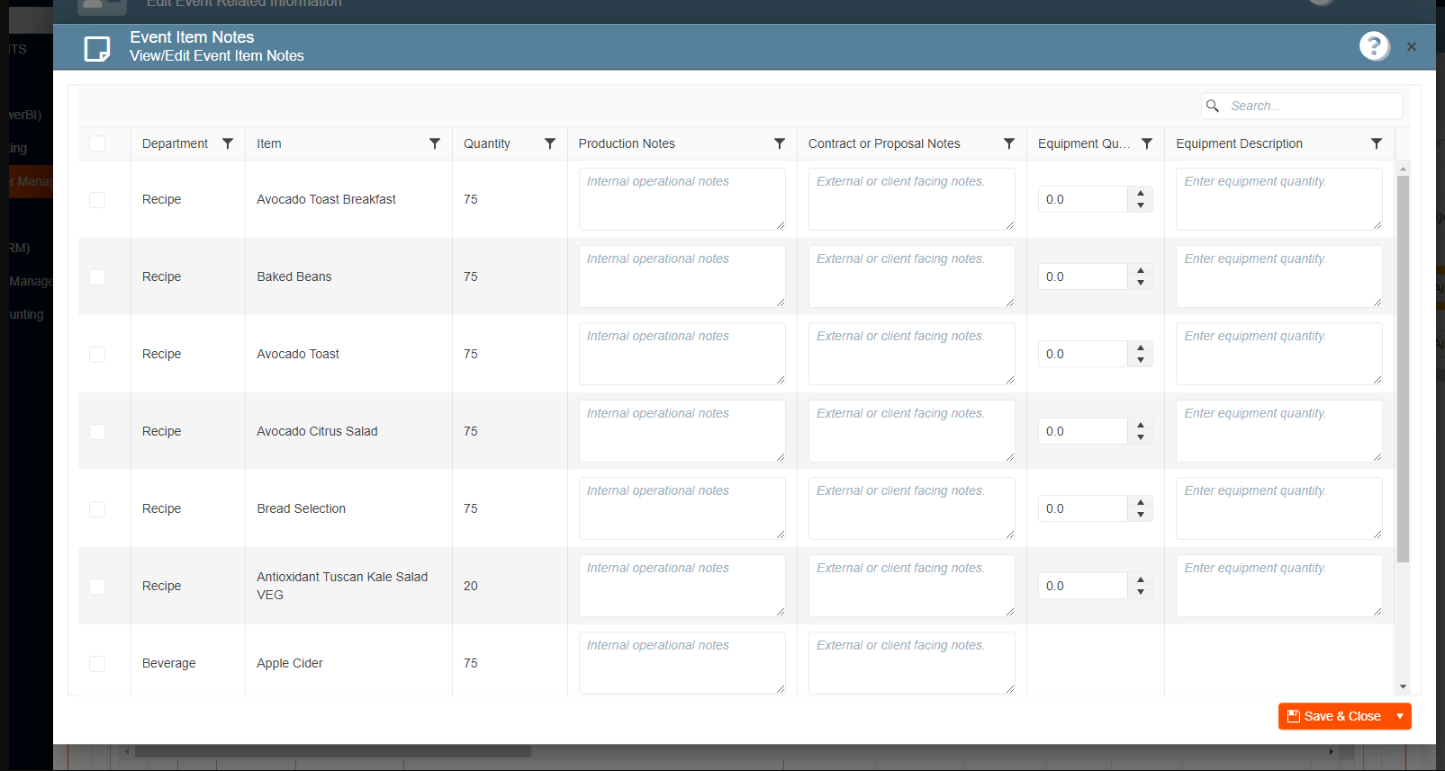
4. Creating a batch update button in the Event Item Notes:
Inside the event crud editor, after adding your data items, you'll find a button labeled "Event Item Notes." This section includes three text fields: "Production Notes," "Contract or Proposal Notes," "Equipment Description," and "Equipment Quantity."
Each column can be edited individually. However, we need a "Batch Update" button that allows users to update all three text fields simultaneously. The values entered in these fields will be applied to all selected items when the "Batch Update" button is clicked.
1. On the left side panel, go to Sales & Marketing
2. Click on Event & Order Management
3. Select Event Management - All Status Types Included
4. Choose an event by clicking on the pen icon
5. Go to Order Details
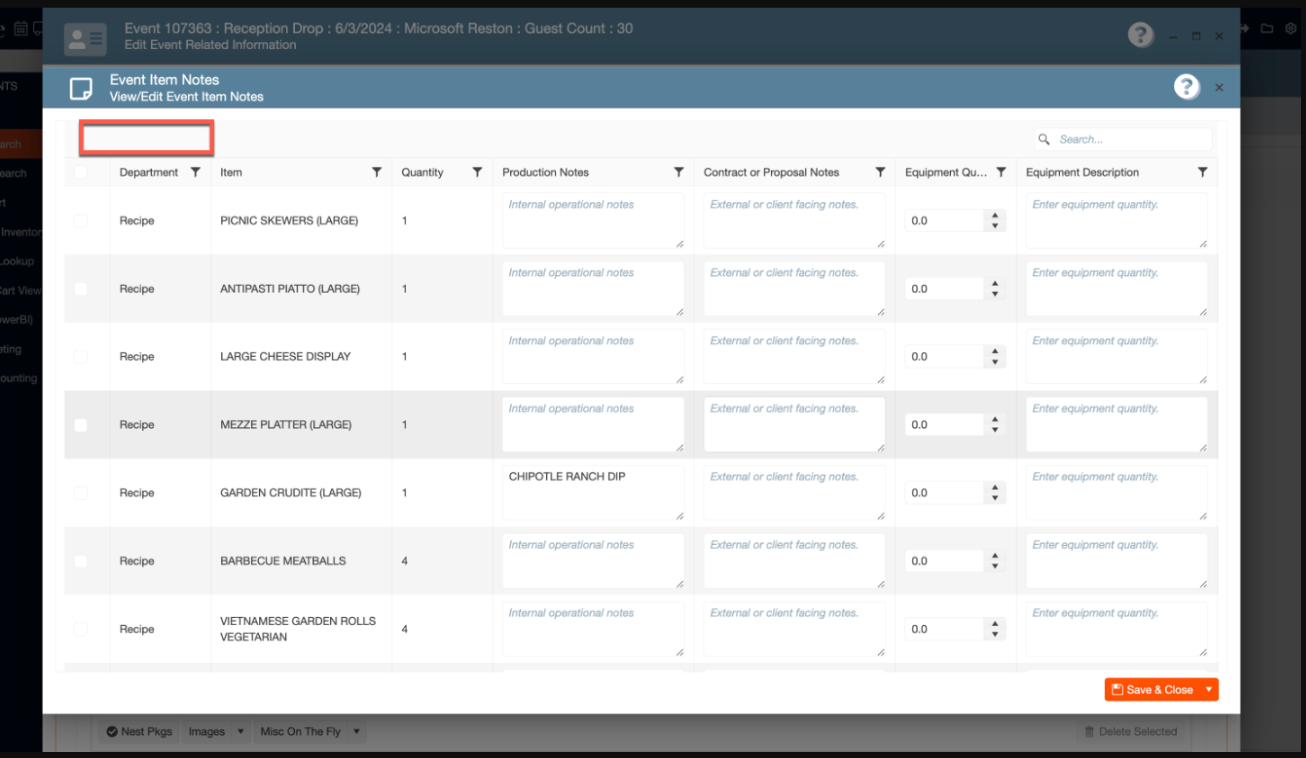
6. In the order review box, next to the item´s category, you will see 8 different options
7. Select the one that says: Edit Item Notes
8. You need to put a check mark on one of the items, to enable the Batch Update button

5. Creating an easy way to Enable/ Disable Identity Users in the User Management Window:
Users will be able to visualize how many Enable/Disable Identity Users, they have in the organization, additionally a flow was created in the Management Window/ User Crud Editor.
1. At the top of the screen, on the right side, you will see the Gear icon
2. Click on the Gear icon
3. Go to the second page on that window
4. Look for Users Management and click on it

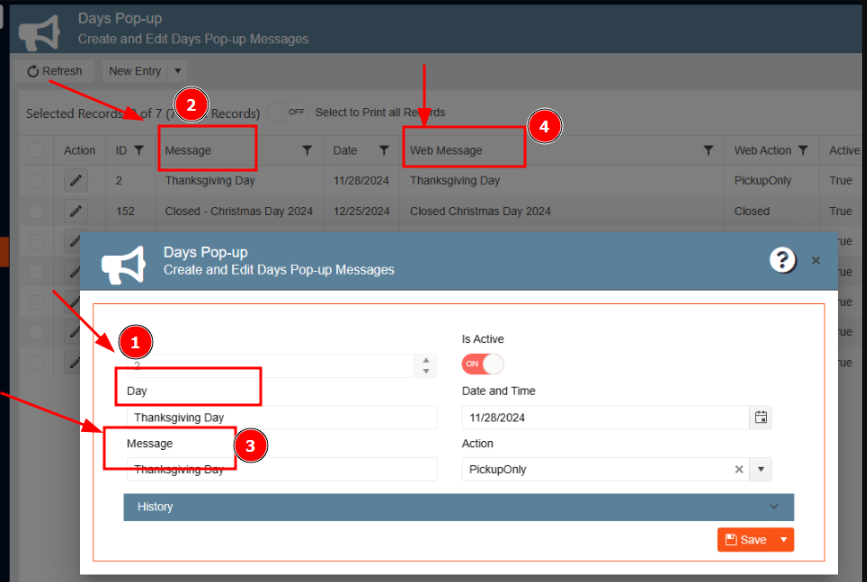
6. Renaming Fields in the "Days Pop-Up" Window for Better Alignment:
In the "Days Pop-Up" window located in General Setup under Marketing, we need to make the following changes:
Within the modal window for creating or editing an entry, there are two fields labeled "Day" and "Message." These fields do not align with the columns in the Days Pop-Up window. Therefore, we need to rename the "Day" field to "Message" and the "Message" field to "Web Message."
1. On the left side panel, go to General Setup
2. Click on Marketing
3. Choose Create and Edit Days Pop-up Messages

7. Customizing Messages for Locked Event Status in Modal Headers:
In the header of the modal window that appears when an event is locked by status, we need to remove the existing text.
For events locked by the beverage column, display the following message:
Your beverage order has been submitted. For changes, please ask the beverage department to return your order or place a change request.
For events locked by the recipe/menu column, display the following message:
Your menu has been submitted. For changes, please ask the Kitchen to return your order or place a change request.
1. On the left side panel, go to Sales & Marketing
2. Click on Event & Order Management
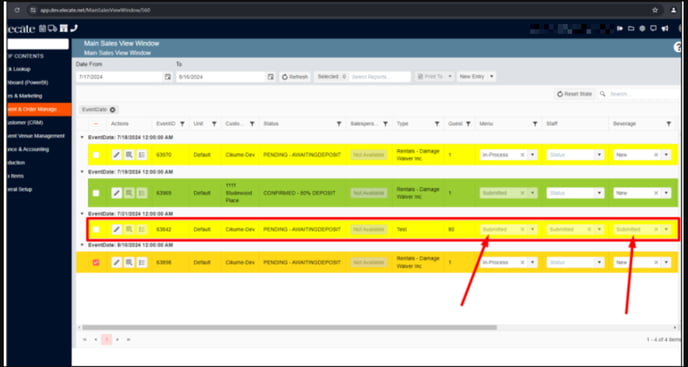
3. Select Main Sales View Window
4. On the right side of the window, the user will see the status of the order, make sure this has been submitted
5. Go back to the order details in the event
6. Try to add more items to the event
7. The user will see the pop up message: Your menu or beverage has been submitted. For changes, please ask the Kitchen to return your order or place a change request.

8. Adding a horizontal splitter in the event crud editor:
A splitter in the event crud editor was created, between the treeview and the right top grid.
1. On the left side panel, go to Sales & Marketing
2. Click on Event & Order Management
3. Select Event Management - All Status Types Included
4. Choose an event by clicking on the pen icon
5. Go to Order Details
6. On this window, you will see the splitter between the event crud editor and the items category.
9. Increasing the width of the columns:
In the event crud editor, at the bottom grid, it was increased the width of the columns to avoid rows wrapping.
1. On the left side panel, go to Sales & Marketing
2. Click on Event & Order Management
3. Select Event Management - All Status Types Included
4. Choose an event by clicking on the pen icon
5. Go to Order Details
6. Into Order Review box, the user can see the department column

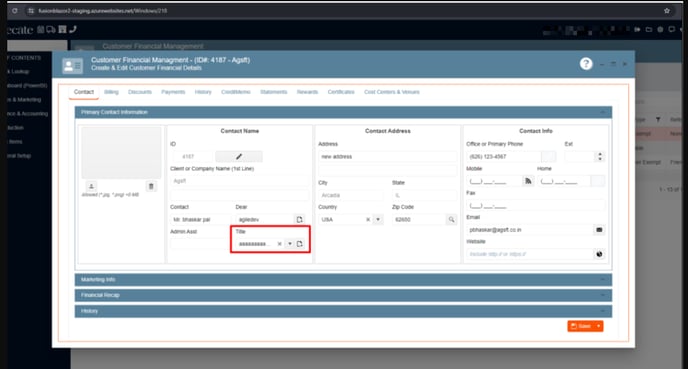
10. Increasing the customer title size to 50 characters:
The customer title was increased to 50 characters.
1. On the left side panel, go to Finance & Accounting
2. Click on Customer Financials
3. Select Customer Financial Management
4. Choose either an existing customer or create a new by clicking on New Entry
11. Increasing the Rec-bib field size to 512:
The Rec-bib field size was increased to 512.
1. On the left side panel, go to Data items
2. Click on Food Management


12. Creating a new Appsetting to allow the ¨Adjust price by total¨:
The "SetDefaultPriceAdjustmentType" Appsetting was created to adjust the price by total.
1. At the top of the screen on the right side, you will see the Gear Icon
2. Click on the Gear Icon
3. Choose Appsettings
4. Look for the Appsetting "SetDefaultPriceAdjustmentType"
5. Make sure the value is set to Yes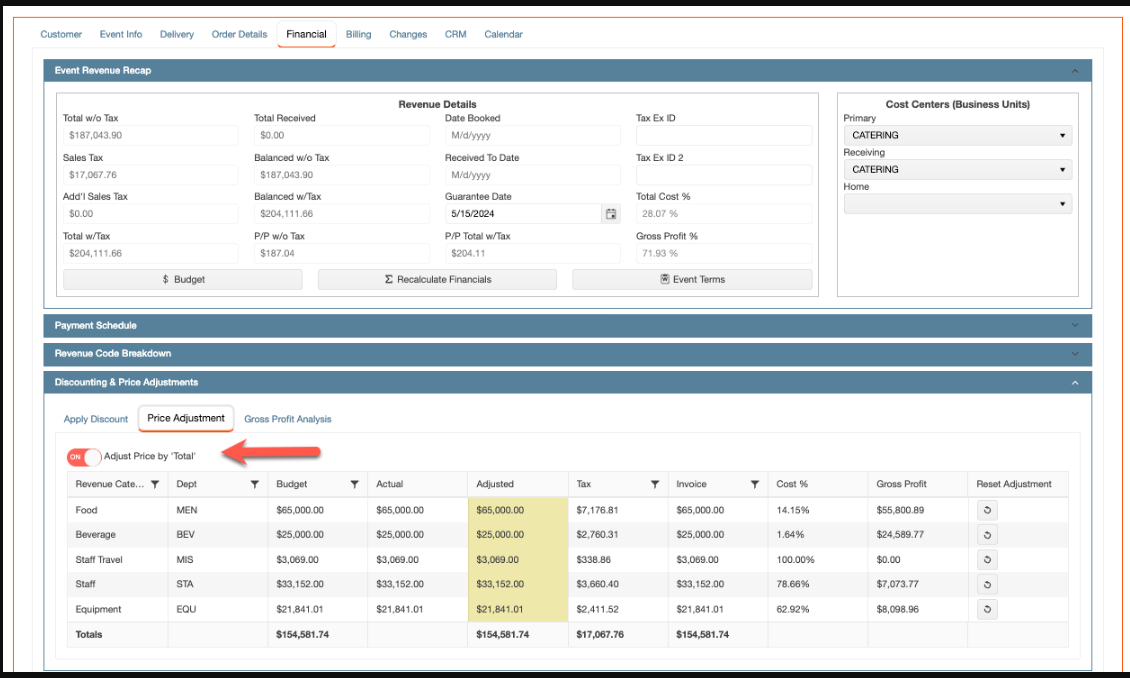

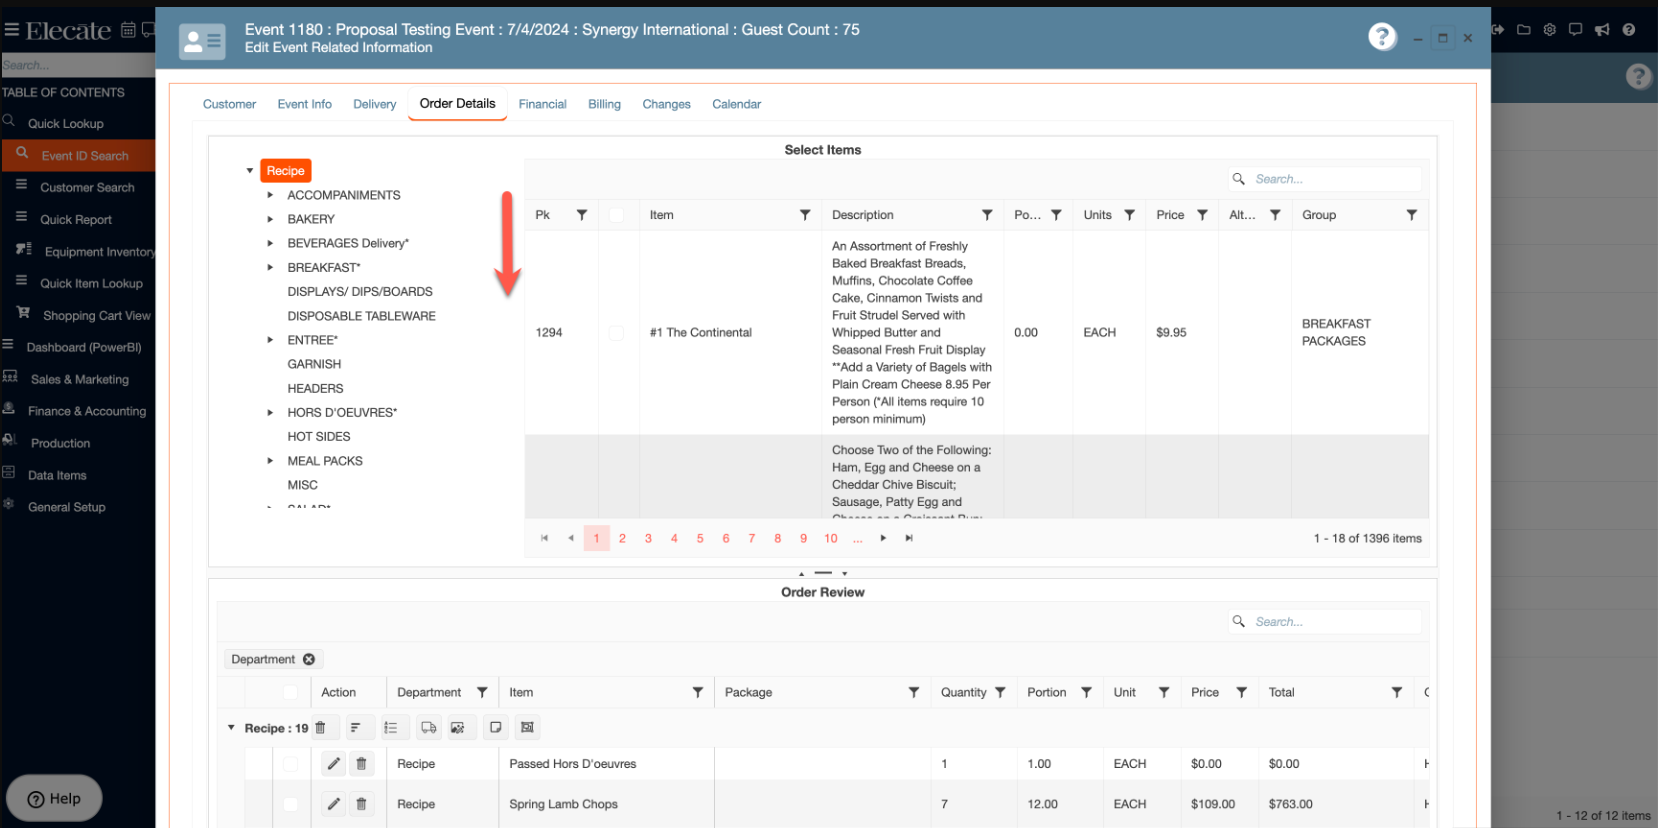
13. Creating 2 new columns called: Unit (Brands) and Group:
2 new columns were created on the order details top grid view, the columns will be visible, while the user click on the main categories (Recipe, Beverage, Equipment, Miscellaneous and Staff) and not in their sub nodes.
1. On the left side panel, go to Sales & Marketing
2. Click on Event Management - All Status Types Included
3. Choose an event by clicking on the pen icon
4. Go to Order Details Tab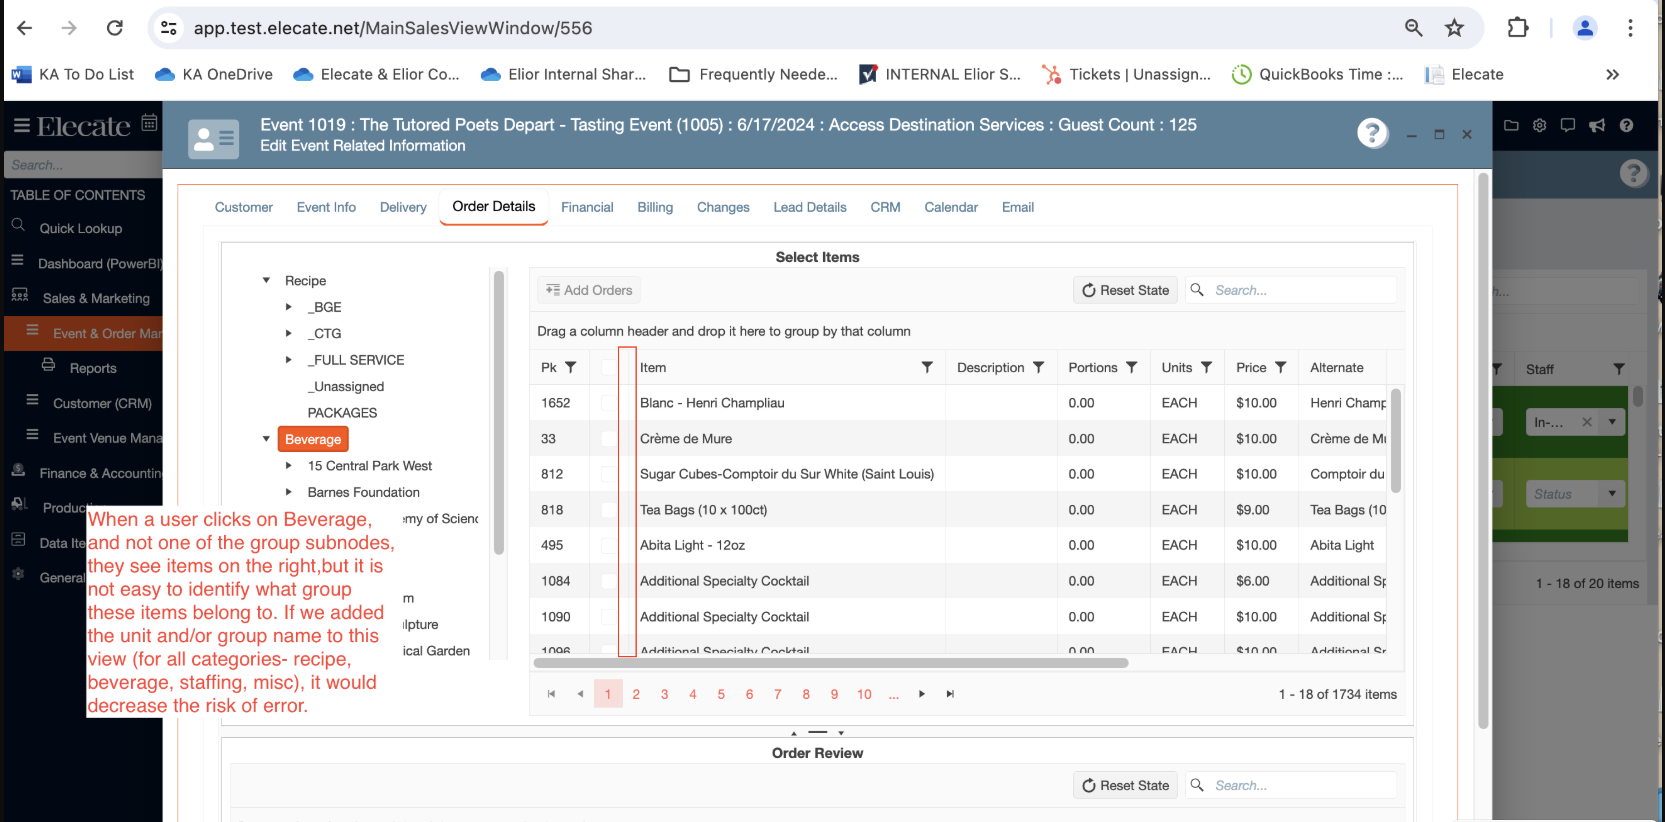


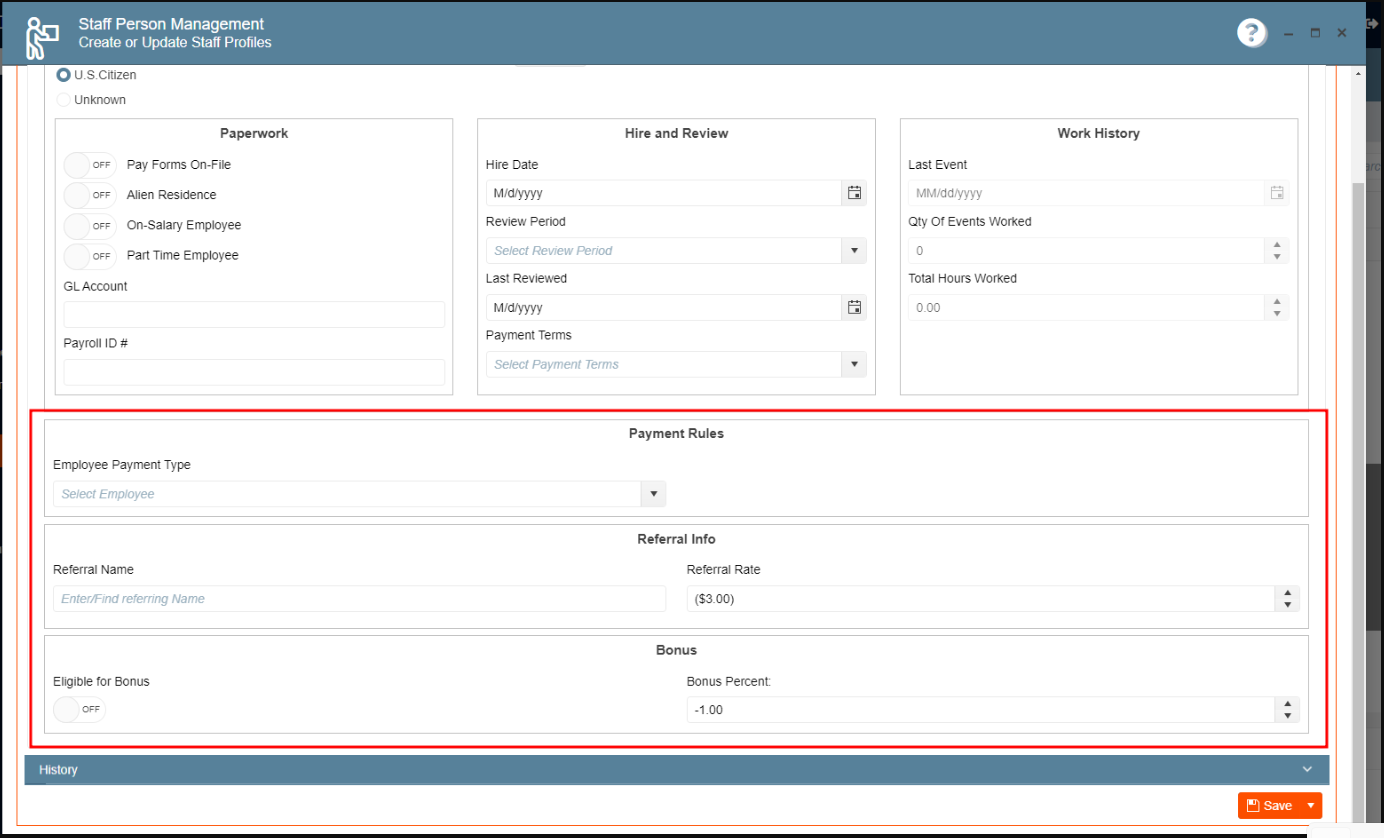
14. Creating a new blue panel bar for collapse or extend some sections:
It was created a Blue Panel Bar within the HR tab, that option can be found inside the Staff Management window and the user will be able to collapse or extend the bar. This panel should contain ¨Payment Rules¨, ¨Referral Info¨ and ¨Bonus¨.
1. On the left side panel, go to Data Items
2. Click on HR Management
3. Choose HR Management (Active Staff Only)
4. Select or create a new staff member
5. Go to HR tab and click on Payment Rules, Referral & Bonus.
15. Wording on the required field in the additional info tab from Recipe Management window needs to be changed:
It was changed the wording about the required field in the additional info tab, so the information is cleared for the user, and they can fill in the missing information on that window.
1. On the left side panel, go to Data Items
2. Click on Food Management
3. Select Recipe Management Active Items Only
4. Choose an active item or create a new one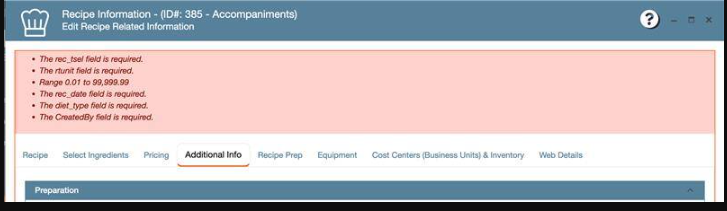
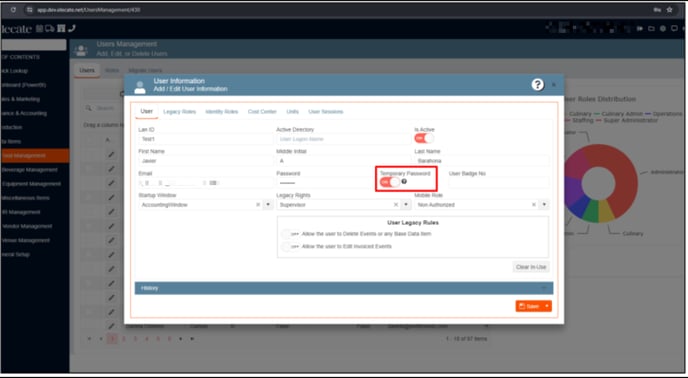
16. Adding the option to create or update user´s temporary passwords:
In User Crud Editor was added an option to specify to the user when the password is temporary so then they need to change it after their first login, in the same window the user can update the password.
1. At the top of the screen, on the right side you will see the Gear Icon
2. Click on the Gear Icon
3. Look for Users Management (second page)
4. Click on Users Management
5. Select the users which you need to update the password
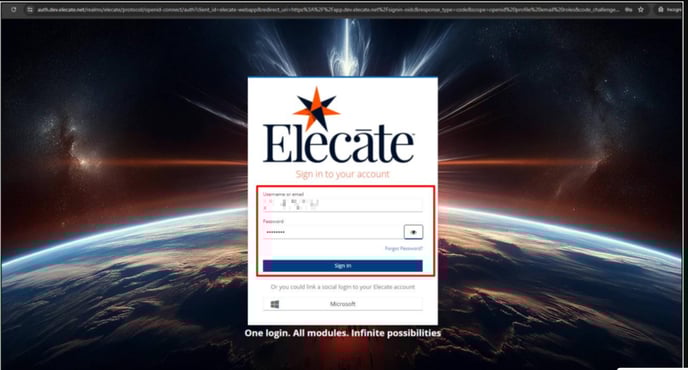
17. Adding an edit fonts functionality to the proposal function:
Users can edit the proposal templates, modify fonts, bold text, indent, bullet and numbers, we are keeping the proposal formats at the moment to save it, additionally the user have the chance of printing proposals in Blazor.
1. On the left side panel, go to Sales & Marketing
2. Click on Event & Order Management
3. Select Event Management - All Status Types Included
4. Choose an event and go to the Event Info tab
5. Click on Notes, this option is on the right side of the window
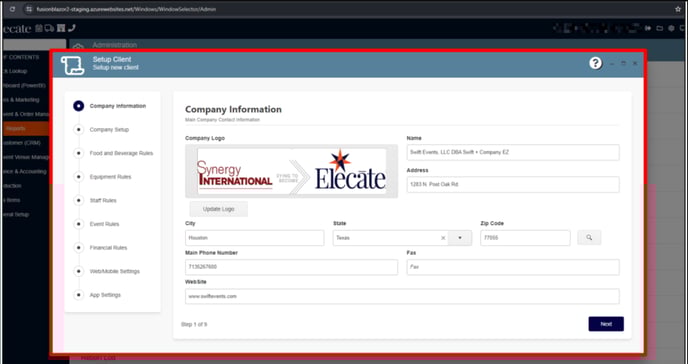
18. Implementation of the Setup Client for all the Databases:
It was implemented the ¨Setup Client¨ window to all the existing DBs in Synergy.
1. At the top of the screen, on the right side you will see the Gear Icon
2. Click on the Gear Icon
3. Look for Setup Client (second page)
4. Choose Company Information
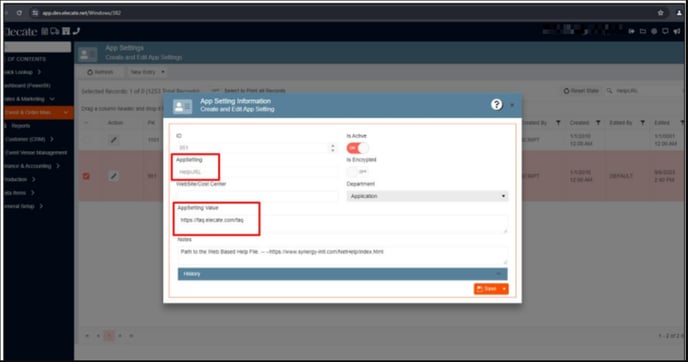
19. Running an Appsetting script for set for the HelpURL:
It was run a script in all tenants and DBs: updated appSettings set appSettingValue = "https://faq.elecate.com/faq" where appSetting = "HelpURL"
20. Changing the ¨None¨ status to ¨N/A¨:
It was included in the drop down menu the ¨N/A¨ option.
1. Navigate to Sales and Marketing
2. Click Event and order management
3. Click on Main Sales View
4. On each of the drop downs in the columns – Menu, Staff, Beverage, Equipment and Accounting, the option called None should be changed to N/A

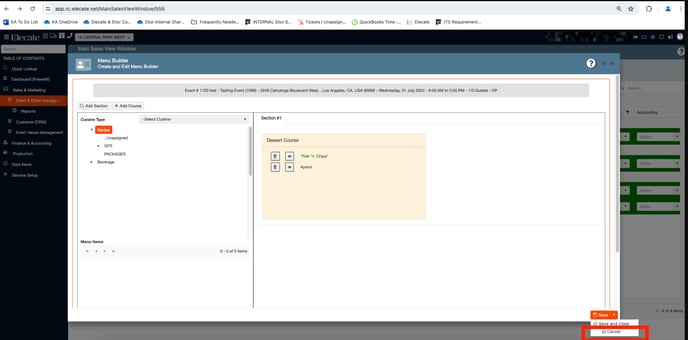
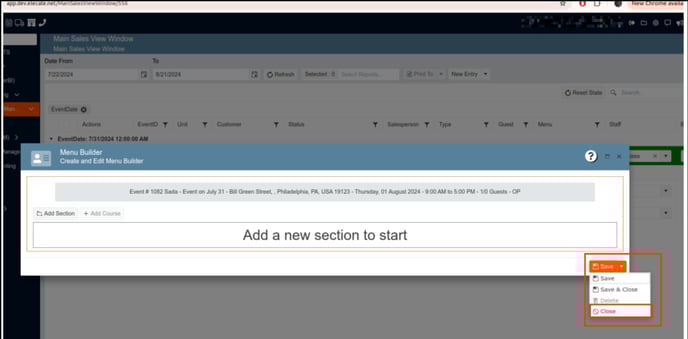
21. Changing the Cancel button icon in the Menu Builder Tool:
It was replaced the Cancel button in Menu Builder to Close (a circle with a slash through it).
1. Click on Sales & Marketing on the left-hand side
2. Click Event & Order Management
3. Click Main Sales View
4. On any given event, click on the Menu Builder
5. Navigate to the save button in the bottom right had corner
22. Renaming the Package column to ¨Not Applicable¨ if the item is not part of the package:
The package column in the event crud editor, bottom grid was renamed to ¨Not Applicable¨ if the item does not belong to the package.
Previously:
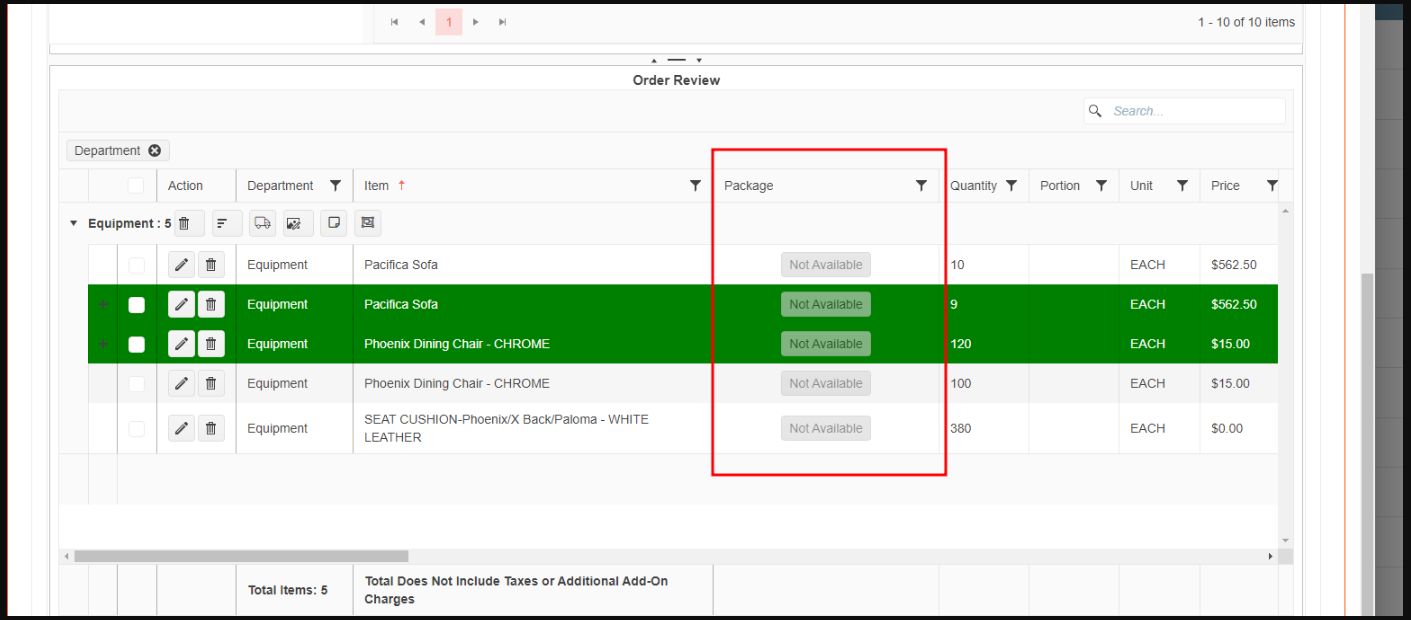
Now:

23. Changing the Icon of the General Setup located in the side menu:
It was changed the Gear Icon (General Setup) to a Toolbox or Tool.
Before:

After:
